Anything Goes with Holly and Creative Creases
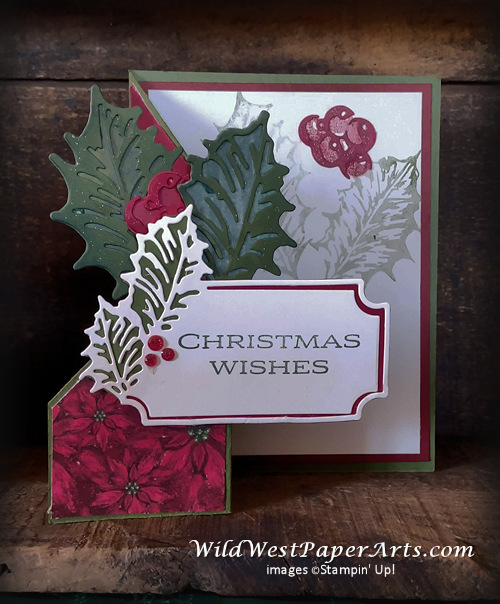
Another week, another challenge from Creative Creases. The fold I chose for Challenge #40 is a Diagonal Z Fold featuring Leaves of Holly Bundle and Boughs of Holly Designer Series Paper.
Reminder…. make sure to go to the end of this post for the link to play along with Challenge #40.
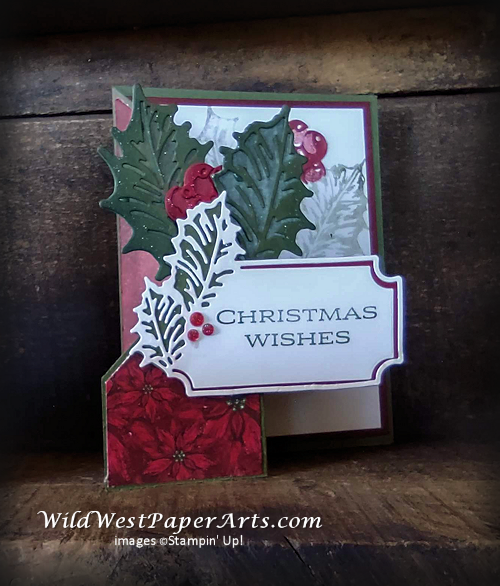
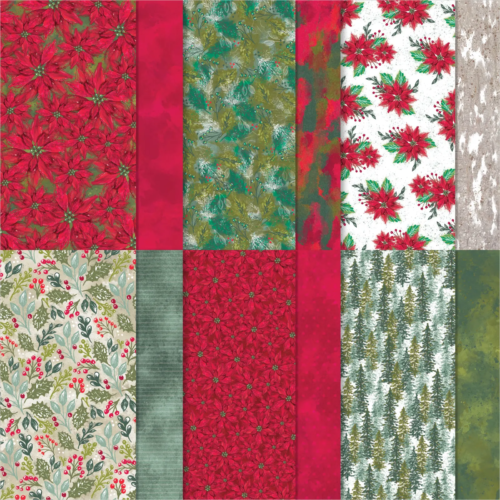
Holly and poinsettias are two of the many iconic elements for winter holidays. And, I’m in love with this suite. Especially the Boughs of Holly Designer Series paper! It works so well with this fold too.
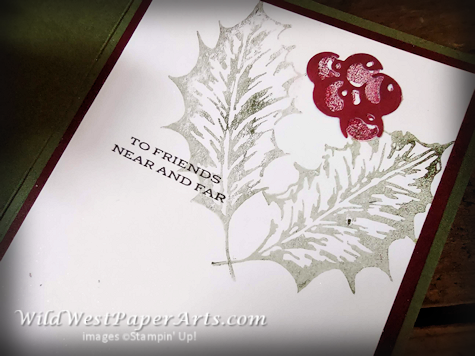
The holly leaf stamps and dies are quite large in this set. Here, they do the perfect job of decorating an area that would otherwise feel unfinsished. Scrapbookers…. they will adorn your holiday pages beautifully.
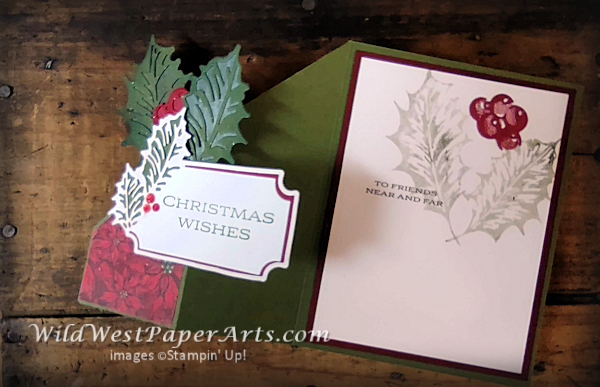
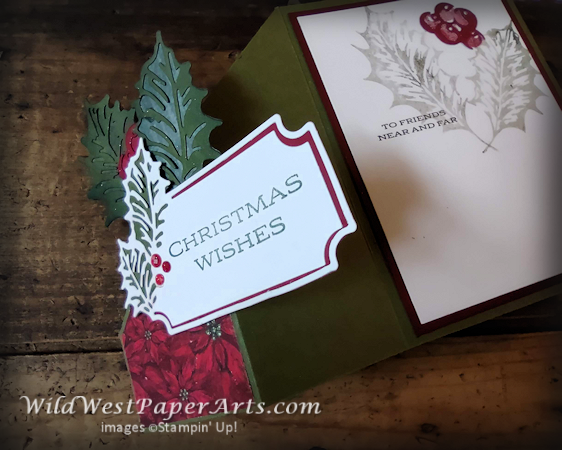
Finishing Touches include faceted gems and Wink of Stella on the leaves and holly berries. I used blending brushes to smudge the leaves with Mossy Meadow classic ink.
The inside: The Cherry Cobbler mat for the inside of the card is smudged with Cherry Cobbler ink as well.
Let’s make it!
Supplies: Unless otherwise noted, I use Stampin’ Up! products.
- Cardstock –
- Mossy Meadow #133676 cut to 5-1/2″ x 8-1/2″. Scored in half at 4-1/4″ and again at 2-1/8″ on the front panel. Additonal pieces for die cuts.
- Cherry Cobbler #119685 cut to 4″ x 5-1/4″ for inside mat piece; plus extra for die cuts.
- Shimmer White #101910 cut to 3-3/4″ x 5″ for inside; plus 3″ x 3-1/4″ pieces for die-cuts. Note: You may use Basic White cardstock here. However, Shimmery White adds something a little special.
- Patterned Paper –
- Boughs of Holly Designer Series Paper #159600. One small poinsettia piece, one other Cherry Cobbler piece and two Mossy Meadow pieces of different patterms for leaf backgrounds.
- Stamps & Dies –
- Leaves of Holly Bundle #159608
- Ink & Color-
- Cherry Cobbler #147083
- Early Espresso #147114
- Mossy Meadow #147111
- Embellishments:
- Red rhinestones , sequins or jewels. I used the retired Faceted Gems from Stampin’ Up! here.
- Wink of Stella Clear Glitter Brush #141897
- Tools –
- Blending Brushes #153611
- Bone Folder #102300
- Take Your Pick Tool #144107 & Brush Attachment #149655
- Soft lead pencil with eraser
- Ruler
- Trimmer #152392
- Score Board #125586 or Score Blade on your trimmer
- Adhesives –
- Multipurpose Liquid Glue #110755
- Stampin’ Dimensionals #104430
- Stampin’ Seal #152813
Instructions:
- Base: Fold and burnish the score lines like a “Z” with the largest piece on the bottom.
- Open the base and lay flat. Use your ruler to measure up from the bottom, 1-3/8″ on the left edge and make a small pencil mark.
- To create the diagonal cut, line-up the pencil mark with the 4-1/4″ score line with groove in the trimmer. Cut. Now when you re-fold the card you will see the diagonal.
- Cut DSP to fit the panels.
- Poinsettia Piece – cut one strip 2″ x 3-1/4″. Make a pencil mark 1-1/4″ from the bottom on the left side. Line this mark up with the top right corner on your cutter as you did in step 3 above. Cut. Adhere to the front-most panel.
- Cherry Cobbler Piece – cut one strip 2″ x 5-1/4″. Make a pencil mark 3-3/8″ from the bottom on the right side. Line this mark up with the top right corner on your cutter as you did in step 3 above. Cut. Adhere to the middle panel.
- Smudge the Inside Mat Piece with Cherry Cobbler ink around the edges. Adhere to inside of card. You’ll prep the Shimmery White piece later.
- Die-Cuts.
- Die cut the front label piece from Shimmery White. Stamp with greeting of your choice in Mellow Moss ink. Die-Cut a piece of Mellow Moss cardstock with the holly background die. Adhere behind holly leaves attached to the label. Manually trace the lable die onto Cherry Cobbler cardstock, then fussy cut and adhere behind the label.
- Die-Cut both Holly Leaf forground pieces from Mellow Moss. Die Cut Holly Leaf outline pieces from Mellow Moss & Evening Evergreen pieces if DSP for background. Smudge forground pieces with Mellow Moss Classic Ink. Adhere over the background pieces. Use the Pick It Tool with brush tip to easily remove lingering pieces.
- Die cut two Holly Berry foreground pieces from Cherry Cobbler. Die Cut one background Holly Berry from the same DSP as used in step 4B. Adhere one of the foregound pieces to the background piece,
- Assembly.
- Attach the large Holly Leaves from step 5B to the front panel, raising the front leaf with Stampin’ Dimensionals.
- Attach the Greeting Label as shown in the picture with Stampin’ Dimensionals,
- Attach Holly Berries from step 5C with liquid glue as shown.
- Adhere red gems as shown.
- Fold the card and lay Shimmer White Cardstock on the inside without adhering. Make a Light pencil mark where you want to stamp the Holly Leaves.
- Ink up the two Holly leaf stamps with Mellow Moss ink. Stamp-off twice on paper before stamping on the Shimmery White piece.
- Ink up the background Holly Berry stamp. Stamp off once on paper before stamping on the Shimmery White piece. Affix the second Holly Berry foreground piece over the stamped image.
- Stamp greeting on the inside (as shown) with Early Espresso ink. Make sure it doesn’t show when the card is closed.
- Finally, brush areas you may want to shimmer with Wink of Stella Clear Glitter Brush.
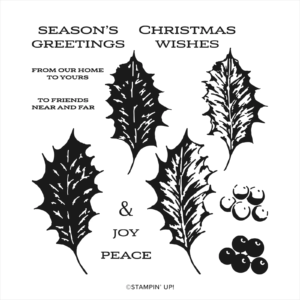
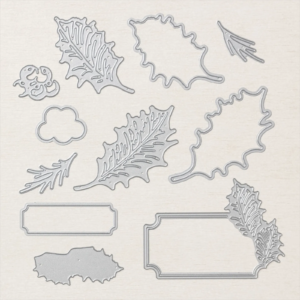
Here’s a peek at the stamp set and dies.
 |
 |
A few more samples courtesy of Stampin’ Up!
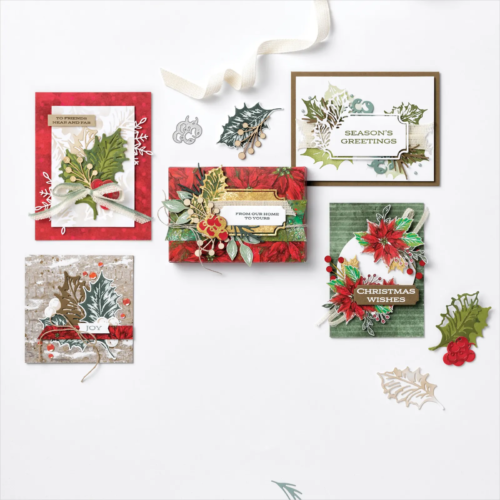
Anything Goes with Holly Product Showcase
Please Note: These are suggested items. If you decide to purchase the Suite, you won’t need the individual pieces included in that Suite.




Amazing christmas card. Thank you for entering our Anything Goes Challenge at Through The Craft Room Door this week. Looking forward to see you again next challenge.
Regards
Danka
TTCRD
Twórcze pasje Danki {My Blog}
Thank you Danka!
Nice!
Thank you Karen. Thinking of you this week.
Wow, Rae, this is a beautiful holiday fun fold card! It’s exactly the type of card I enjoy making. That DSP is incredible – I need to open it up! Have a wonderful weekend.
Thank you Debbie. I fell in love with this paper the second I saw it.
Rae, this is gorgeous. I love the DSP and it’s a great fold.
Thank you Karen.