Fancy Quarter Folds

Welcome to the September edition of the Fun Folds Blog Hop. I’m always excited to see what my fellow Stampin’ Up! Demonstrators come up with. My September entry is a Fall Fancy Quarter Fold. Another easy fold to re-create.
I love to play with unusual product combinations. Shimmer and smudge, rustic and rhinestones, it’s all in the mix.
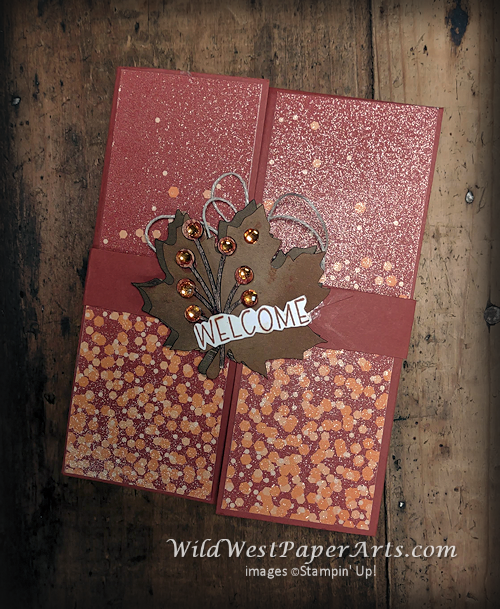
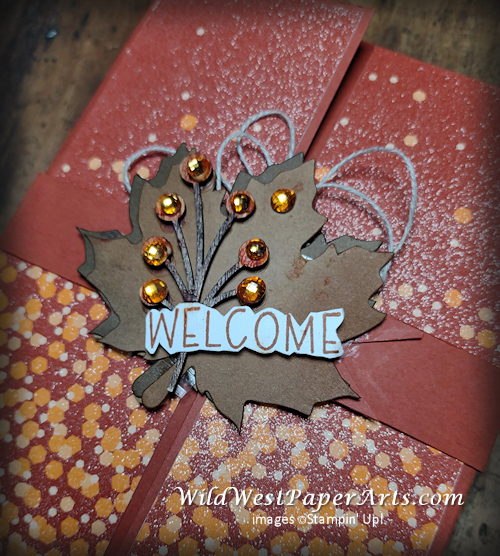
What’s so unusual? The combination of Metallic & Shimmer with Crumb Cake all smudged and earthy. Imagine a maple leaf floating over a pile of fall leaves covered in dew.
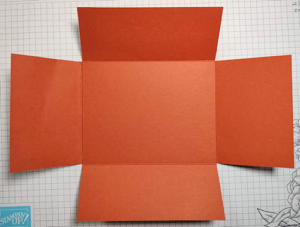
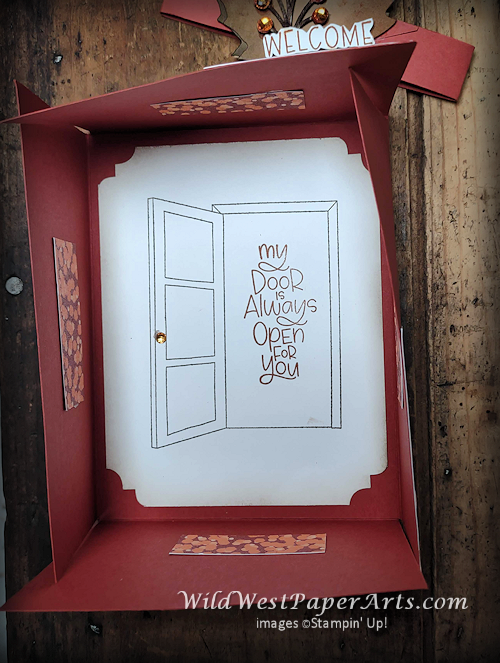
The Quarter Fold has a unique closure, resembling the top of a box. You know, when you don’t have tape and need to secure a cardboard box, tucking the last flap inside. Yep, that’s it! For this reason, we need to make sure everything is secured with strong adhesive. I used Tear & Tape, Stamp-n-Seal+ and Liquid Glue.
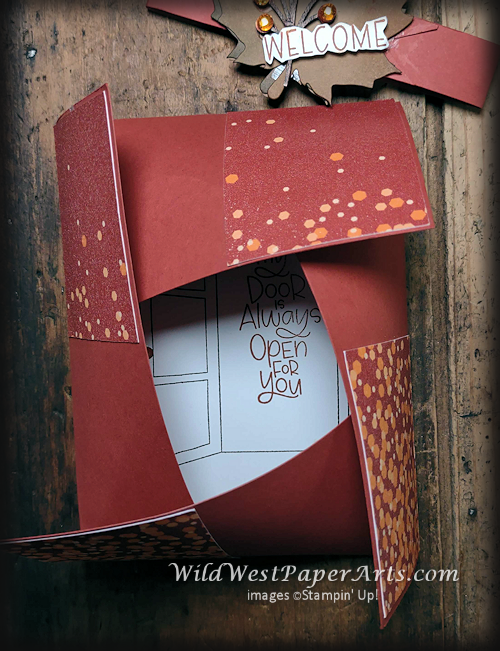
Fancy Quarter Fold Nuts & Bolts:
Paper Cuts & Scores:
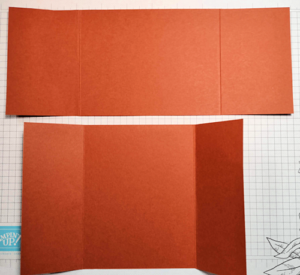
- Card base Cardstock 1: 4-1/4″ x 11″, score at 2-3/4″ & 8-1/4″
- Card base Cardstock 2: 5-1/2″ x 8-1/2″, score at 2-1/8″ from each end
- Belly Band Cardstock: 1″ x 11″; score at 3-1/2″ and 7-3/4″
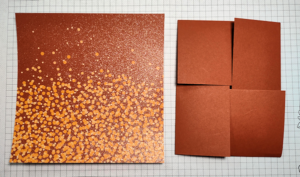
- Designer Series Paper: cut 2 @ 2″ x 2-3/4″
- Designer Series Paper: cut 2 @ 2-1/8″ x 2-5/8″
- Basic White or Very Vanilla Cardstock : 4″ x 5-1/4″
Basic Assembly
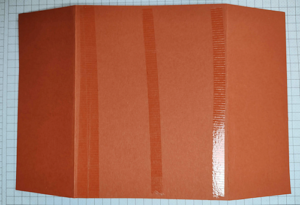
- Line up the score lines and adhere the two cardstock bases to each other as shown using Stampin’ Seal +, Tear & Tape or Liquid Glue. Make sure it’s a firm seal. Tip: After adhering, burnish all score lines to make closing the fold easier. The box-top. See 4th photo below.
- Close the fold before adhering the Designer Series Paper (DSP). You can also number each quarter panel and back of corresponding DSP to make placement easier. Now, unfold the card, turn over and adhere the DSP with firm adhesive.
 |
 |
 |
 |
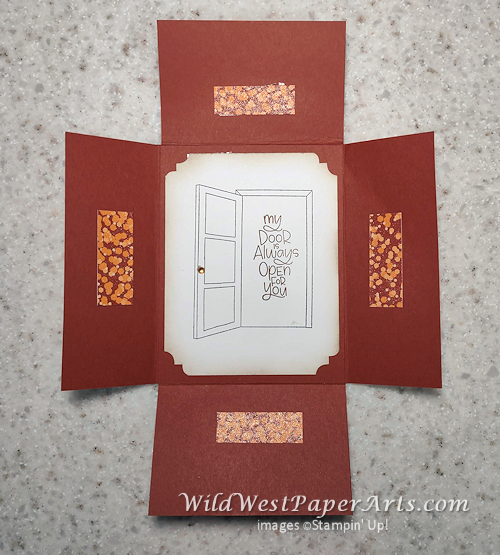
- Stamp, punch corners and adhere the inside piece. Decorate with scraps of DSP.
Belly Band
- Flag one end of the band. Wrap around the closed card and adhere to itself.
- Build the Focal Piece. I used two Leaf Labels to make the piece more sturdy. Smudge the bottom leaf with Early Espresso. Loop and glue Linen Thread to the top of this leaf. Smudge the top leaf with a mixture of Cajun Craze and Soft Suede. Adhere to the bottom piece with liquid glue making sure to offset just a little to show the shading of the bottom leaf.
- Use Stampin’ Write Markers to color a Textural Element with Early Espresso (stem) and Pumpkin Pie (buds). Affix to Maple Leaf with liquid glue. Affix matching rhinestones to this element with also with liquid glue.
- Stamp “Welcome” on a scrap of white. Fussy Cut and affix the the leaf with a combination of liquid glue and a Mini Stampin’ Dimensional.
Finally, close up the card, slip on the finished belly band and you’re done!
 |
 |
Please leave a comment with your thoughts and don’t forget to visit my fellow bloggers.
Blog Hop Line-Up
- Lisa Ann Bernard
- Mary Deatherage
- Karen Finkle
- Beth McCullough
- Jackie Beers
- Melissa Seplowitz
- Sue Jackson
- Rae Burnet
- Debbie Mageed
Have a wildly creative day!


Click to shop 24/7!

Love this fold! This one is new to me and I must try it soon! Gorgeous! Thank you for sharing the card and specific directions. Love!!
Great fun fold Rae! I love the shimmer, smudge, rustic and rhinestone combination!! A total winner that I will have to try. Thank you for the detailed instructions.
I have not seen this fold in many years! What a great one to bring out going into the holidays. It’s like opening a gift! Your version is beautiful and I’m excited to try this again.
Thank you Jackie! My first time with this fold. Great fold to have in my arsenal.
WOW! Oh, Rae, you really made a gorgeous fun fold card! I have never seen this one before and your tutorial will make it so much easier! Love it!! Have a great day and wonderful rest of your week.
Thank you Debbie. This fold is definitely a keeper. Great for gift cards and money gifts too.