Deck the Halls for Creative Creases #71
Welcome to Creative Creases Fun Fold Challenge #71. Thank you to all who entered Challenge #70. We hope to inspire you to enter the current challenge too. You’ll find the link toward the bottom of this post.
Today’s Fun Fold has a few different names. I call it an expanding fold. I don’t have a tutorial for you today. If you post a comment on this post, I’ll find or create one for you.
Thank you to Lisa’s Stamp Studio on YouTube for today’s project inspiration. I have the link for you at the bottom of this post.
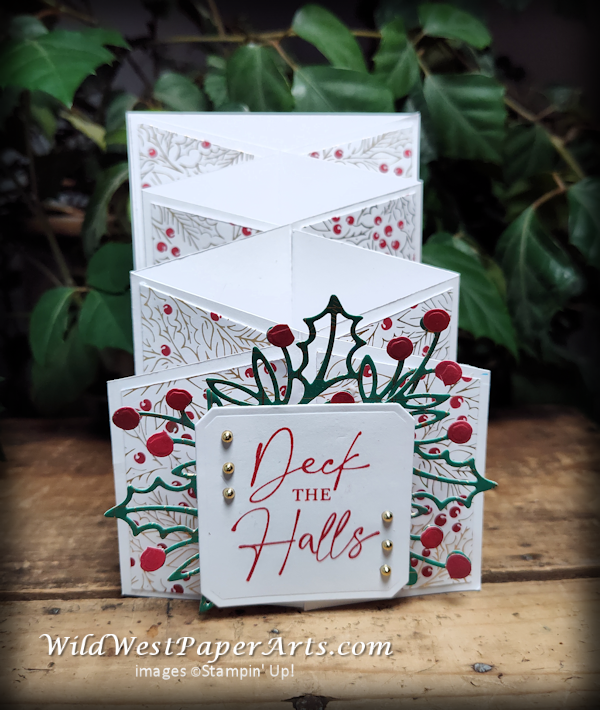
Christmas Classics (used here) is a retiring bundles that I’m glad I got my hands on this year. So many ideas are dancing in my head. The Joyful Specialty Designer Series Paper is also on the retiring list. Get it while you can.
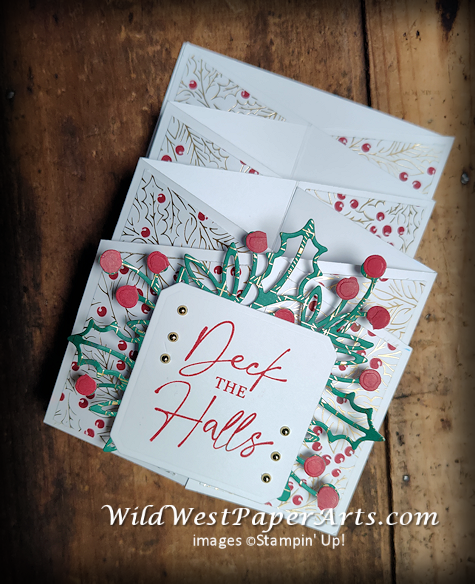
Viewing from the top shows how the card expands for display. Love this!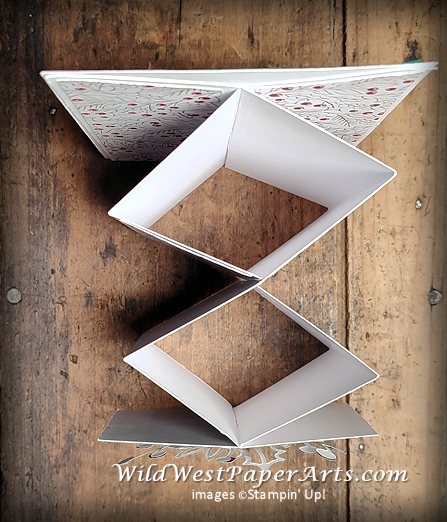
Many fancy folds have little space for writing. Not this one. The back panel is 3-3/4″ x 5″. Similar to a standard A2 inside panel. Some tutorials for this fold have a back panel that folds like the rest of the card. I changed it a bit for two reasons. First, stability for the card. Second, more room to write.
Nuts & Bolts
Paper Cuts:
- Card Base: Basic White Heavy Cardstock – 8″ x 12″; score at 2”, 4”, 8”, 10”, mark at 6”
- Panels: Designer Series Paper-2 at 1 3/4″ x 5 1/4″; 2 at 1 3/4″ x 4 1/2″; 2 at 1 3/4″ x 3 1/4′; 2 at 1 3/4″ x 2 3/4″
- Back: Shaded Spruce Cardstock mat – 4″ x 5-1/4″; Writing Panel – White 3-3/4″ x 5″ (This is where my changes to the video from Lisa’s Stamp Studio are)
- Hinges: Basic White Heavy Cardstock – 2 @ 1/2″ 1 “, score at 1/2″
Hinges are used to mount the front image to the card without interfering with the fold.
Assembly Tricks:
These instructions are in addition to the video I share at the bottom of this post. They pertain to my card specifically. My methods are a little different (and easier for me) than Lisa’s. However, videos are not in my arsenal yet. Thankfully, there are paper-crafters that have harnessed video tutorials.
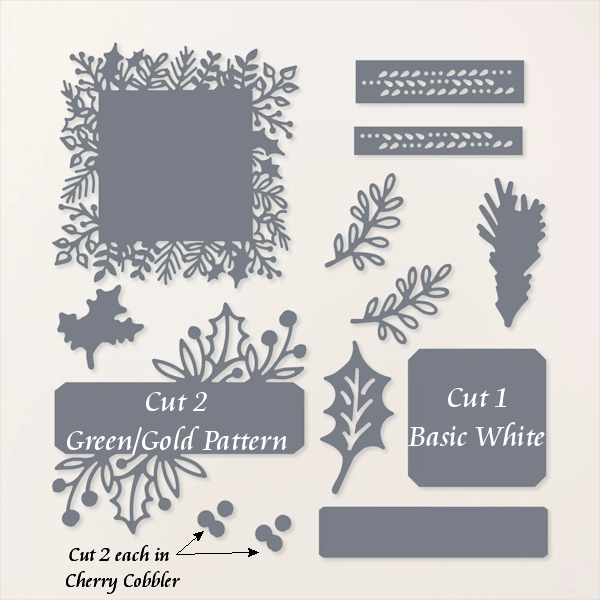
- After die-cutting the holly adorned labels, trim off the holly pieces and arrange behind the white label. Then cut the Cherry Cobbler holly berries apart and glue them in place.
- Make sure to stamp before assembling the front and back panels. Also, red inks tend to dry a bit slower. Make sure the ink is dry before assembly to prevent smearing.
- Cutting the angled DSP: Instead of tracing the angle from the card base as she shows, I opted to make a mark 3/8″ down from the top, inside edge of each piece. Then, cut from this mark to the outside corner, much like she shows you for the card base angles. You can draw a pencil line if you’re more comfortable.
I did find a video tutorial from Lisa’s Stamping Studio. However, as I mentioned above, I changed a few methods.
To Join us for Creative Creases Challenge #71. click on the link button below. What will you create for the challenge? No blog necessary.
Thank you for visiting.…
Have a Wildly Creative Day!

Don’t forget to leave a comment. I love to read and respond to them.
Click to Leave a Comment
Deck the Halls Product Showcase & Video Link:
My video link skips the introduction. Instructions go through 25:05 minutes with some promotions during that time. Be aware that she has affiliate links as well.


Wow! This card is just stunning, Rae! I love the way you cut the holly from the 2 tags and then used that behind the sentiment panel! Genius idea! Such pretty DSP, too!
Thank you Carrie.
What a beautiful card, Rae! I made one of these years ago, so I need to do it again. I love the Christmas Classics bundle and will be keeping it in my stash! Hope you had a wonderful Thanksgiving!
Debbie, thank you. This bundle is definitely a keeper!