Secret Pocket Fold meets Creative Creases 76
 First things, first. Welcome and a big “thanks” to those of you that entered Creative Creases Challenge #75. Another thank you to everyone that took time to view entries and use them for inspiration.
A celebration is in order! It’s Creative Creases Challenge’s 3-year anniversary! Congratulations to our founder, Debbie Mageed and to everyone that has made this a wonderful place to play and share.
We’re also partnering with the Double Trouble challenge! Double the fun, double the chance to win! You’ll find the Double Trouble logo and link to both challenges toward the end of my post.
My project is a Paper Pumpkin Kit alternate. I’m using the January 2024 kit…. Lovely Lavender. It truly is a lovely kit. Sometimes I use only what is included in the kit. This Secret Pocket Fold.
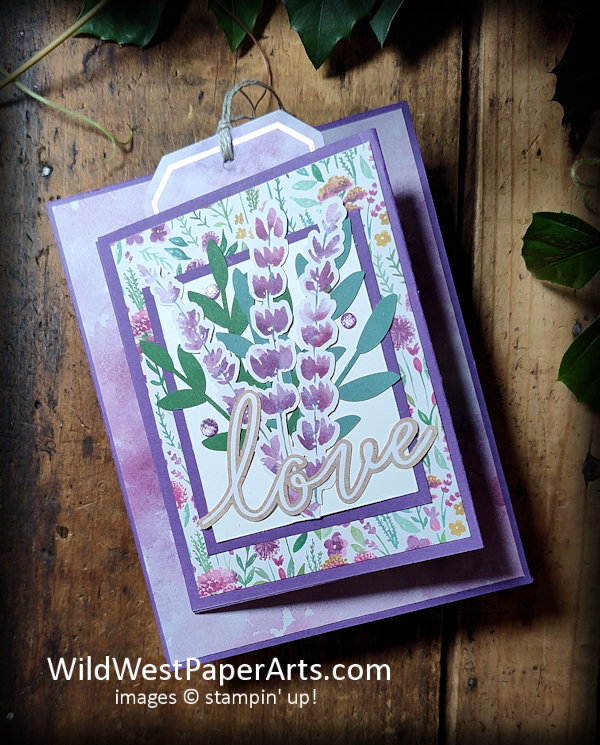
Paper Pumpkin kits keep getting better and better. This is one of the best so far. They’ve come a long way. 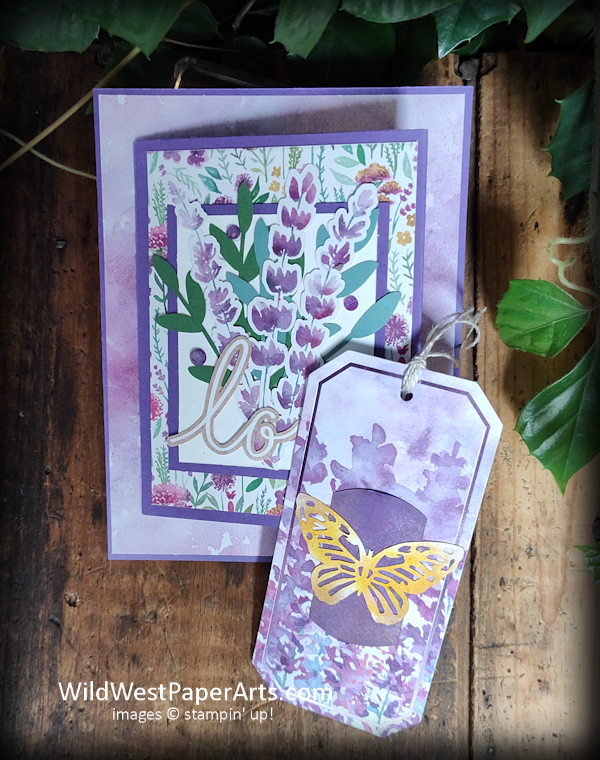
The card portion is mounted on top of an A2-size cardstock that doesn’t open.
So, where’s the pocket?
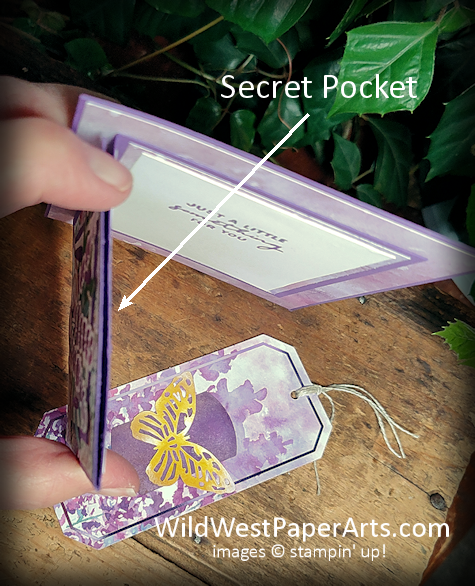
Complicated? Not at all!
Nuts & Bolts
Paper Cuts
- Gorgeous Grape Cardstock:
- Card Base 4-1/4″ x 5-1/2″ (1 piece)
- Card Pocket 4-1/4″ x 9-3/4″; score at 3-1/4″ & 6-1/2″ on long edge (1 piece)
- Mat piece: 2-1/2″ x 3″
- Basic White Cardstock:
- Focal Piece background 2-1/4″ x 2-3/4″
- Inside Greeting piece 2-3/4″ x 3-3/4″
- Paper Pumpkin Pieces:
- Two Lavender Floral Card Bases cut in half then cut down as follows:
- Lavender 4″ x 5-1/4″ (1 piece) and 3″ x 4″ (1 piece)
- Floral 3″ x 4″ (2 pieces)
- Two Lavender Floral Card Bases cut in half then cut down as follows:
Tip: If you don’t have leftover lavender cards from the kit, deconstruct one of the envelopes!
Construction
- Adhere largest lavender piece to largest Gorgeous Grape piece
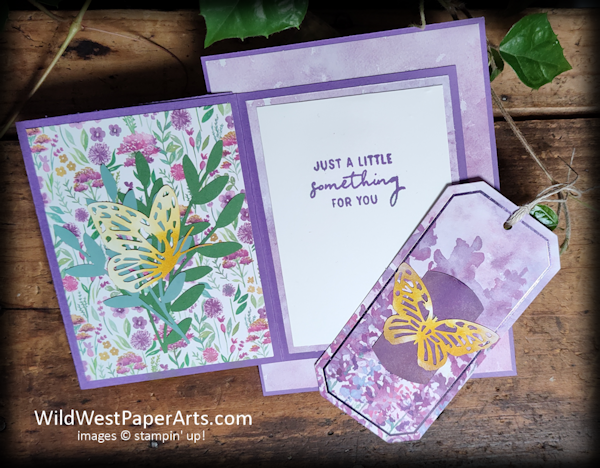
- Create the pocket by applying Stampin’ Seal to center panel of the 4-1/4″ x 9-3/4″ piece. (see image below) Close and press firmly to create the pocket.
- Adhere one of the 3″ x 4″ floral pieces to the outside of the pocket. Open the pocket piece to adhere the second floral piece to the inside (left side).
- Adhere the 3″ x 4″ lavender piece to the inside of the pocket piece, right side.
- Stamp a greeting on the 2-3/4″ x 3-3/4″ basic white piece with Gorgeous Grape ink included in kit. Adhere this piece to the top of the lavender piece in step 4.
- Choose floral and leaf pieces from the kit. Adhere them to the inside left flap with liquid glue. Apply a little Crushed Curry Ink to one of the butterfly elements with a blending brush or sponge dauber. Adhere over the floral arrangement.
- Remove one of the “bookmark” pieces and one of the small white labels from the kit. Apply Gorgeous Grape ink to the white label with the blending brush. Apply Crushed Curry Ink to the second butterfly with the blending brush. Adhere the label to the bookmark and the butterfly over the label with liquid glue. Set aside to dry.
- Create the focal piece. First, adhere the 2-1/2″ x 3″ Gorgeous Grape piece to the top center of the pocket piece. Adhere the 2-1/4″ x 2-3/4″ Basic White Piece to the Gorgeous Grape piece. Build the floral arrangement from elements of the kit. Adhere gems.
- Finish the tag: Thread linen thread (included in kit) through the hole in the tag. If the glue is dry from step 7, slip the tag int the “Secret Pocket” so the very top of the tag is showing.
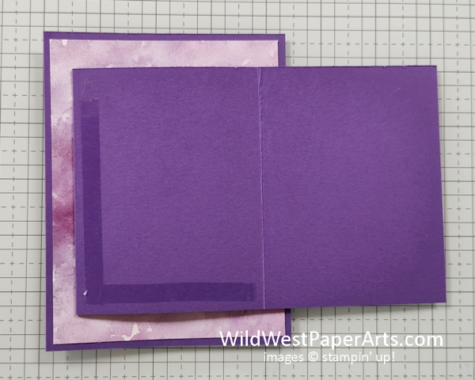
Apply Stampin’ Seal as shown to create pocket.
Click to Leave a Comment
Thank you for visiting.…

Have a Wildly Creative Day!
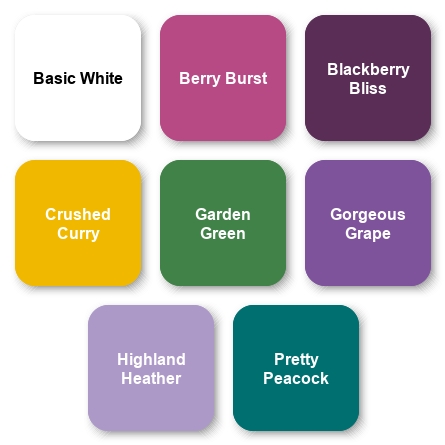
Lovely Lavender Product Showcase:


This is so awesome and so creative!! I love the secret pocket! Thanks for playing along with us at Double Trouble and can’t wait to see you next time!
Thank you Kellianne!
Beautiful design and colors! I am eager to create a card like this. Thank you for playing along with us at Double Trouble. – Melanie R.
Thank you so much Melanie!
This is such a pretty card and I love the fun fold you created with the PP Kit. This kit is one of my faves.
Thank you Mary.
Rae, this card is just gorgeous with those beautiful shades of purple! And I love the secret pocket! So much fun!
Thank you Carrie!
Wow, beautiful patterned paper and what a great idea for a hidden pocket for a tag or gift card. Beautiful card. Thanks for sharing your DT card with us at Double Trouble.
Thank you Suzanne. Here’s another secret…. the pocket was not originally planned. When I realized I could make the tag a bookmark (and a gift), it just happened. So many secrets, so little time!
Can’t wait to try this. Thank you for posting this beautiful project.
Great! Thank you Judy. If you have any trouble with my instructions, please reach out.
Just beautiful!!! I have paper pumpkin paper left over I am going to try this!!
Paula,
If you don’t have enough of the lavender/purple background, deconstruct one of the envelopes. That works just as well.
Thank you for your comment!
Rae