Lattes, Magnolias and Creative Creases #79
Welcome to Creative Creases #79 where “Anything Goes with a Fun Fold”. We hope your last two weeks have been filled with lots of crafting inspiration. Did you enter Challenge #78? Whether or not you did, we have a fresh new challenge opportunity starting now.
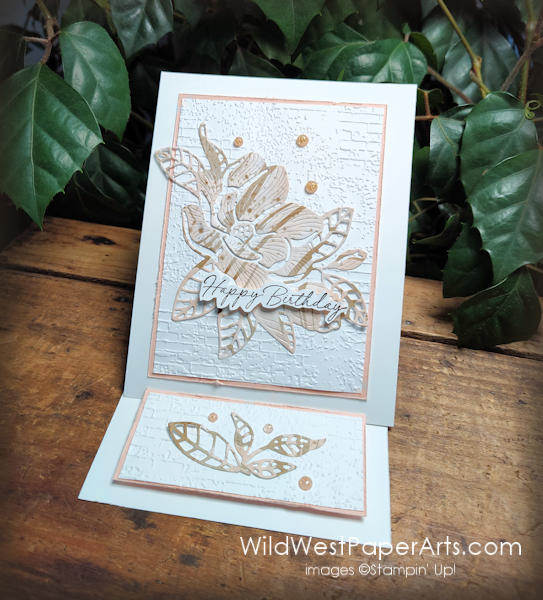
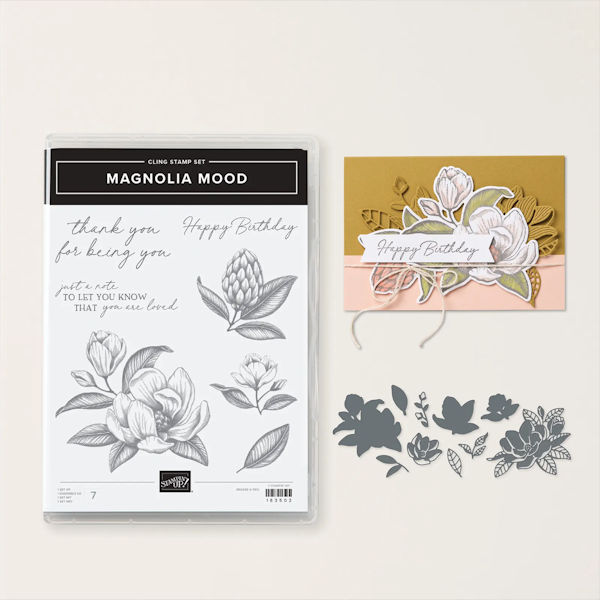
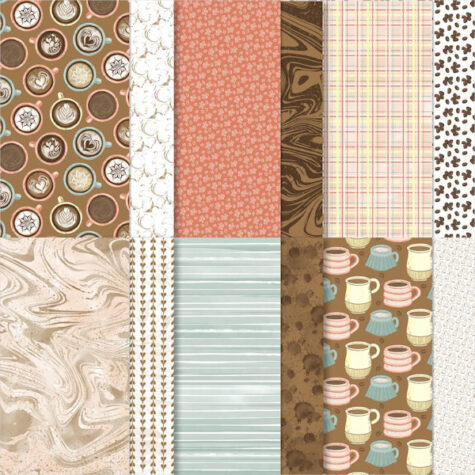
The Easel Fold Card is great for both beginners and experienced makers. They can be simple and fun or complicated and challenging. You decide. The elegance of the Magnolia Mood Bundle and casual feel of A Little Latte DSP atop the distressed background of Exposed Brick 3D Embossing lands this project somewhere in the middle. Don’t be afraid to mix it up.
Get out your trimmers, paper and ink…. it’s time to create!
Nuts & Bolts
Finished Size & Orientation
- A2 (4-1/4″ x 5-1/2″
- Portrait orientation
Gather supplies: (The complete list, with product numbers, appear at the end of this post)
- Cardstock
- Thick Basic White
- Petal Pink
- Designer Series Paper (DSP)
- A Little Latte DSP
- Embellishments
- Petal Pink & Pretty Peacock Foiled Gems
- Adhesives
- Liquid Glue
- Stampin’ Dimensionals (both regular and mini)
- Stampin’ Seal
- Tools
- See list at the end of this post
Paper Cuts
- Basic White Thick Cardstock –
- Card Base 4-1/4″ x 11″ Scored at 5-1/2″ and 8-1/4″
- Top Panel – 4-1/4″ x 5-1/2″
- Embossed Panels – 3-3/8″ x 4-5/8″ and 1-3/8″ x 3-3/8″
- Scrap for the greeting
- Petal Pink Cardstock –
- Large Layer 1-3-1/2″ x 4-3/4″
- Small Layer – 1-1/2″ x 3-1/2″
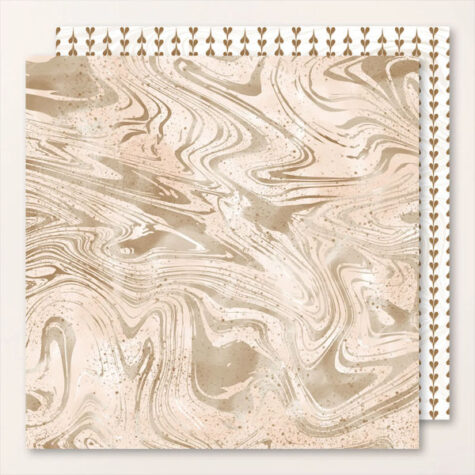
- A Little Latte DSP
- Light Marbled piece – enough for die-cuts
 |
|
 |
 |
Construction
- Fold and burnish the card base on score lines. See photo below.
- Build the top piece.
- Use snips or your fingernail to rough up the edges of both Petal Pink cardstock pieces. Adhere the large piece to the Basic White cardstock panel
- Dry emboss the both the 3-3/8″ x 4-5/8″ and 1-3/8″ x 3-3’/8″ Basic White Pieces with Exposed Brick embossing folder. Adhere to the Petal Pink pieces
- Die-cut the large magnolia and a few small leaves from the sheet of A Little Latte DSP shown above.
- Attach die-cuts with liquid glue.
- Stamp a greeting with Early Espresso on a scrap of Basic White. Fussy Cut. Adhere over one of the die-cuts with Mini-Stampin’ Dimensionals.
- Embellish with Petal Pink Foiled Gems.
- Attach pieces assembled in step B to Card Base using the finished photo as a guide. The small piece will be attached with Stampin’ Dimensionals to be used as a “stopper” for the easel.
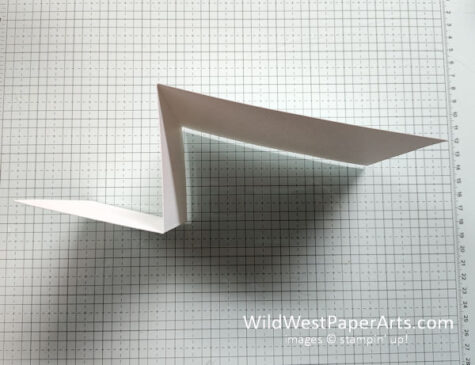 Card base folding |
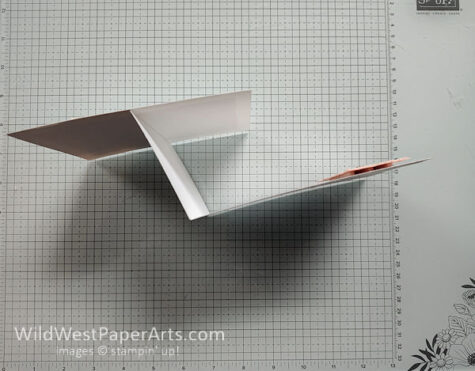 Card base with front and bottom panels attached. |
Did I mention that this fold lies completely flat for mailing?
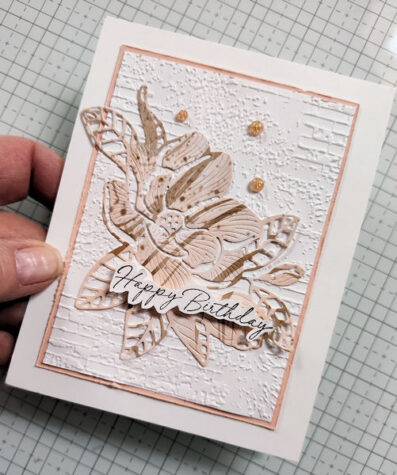
Time to give it a try. Can’t wait to see your beautiful creations in the challenge.
Click to Leave a Comment
Don’t forget to enter our current challenge!
Click to enter Creative Creases #79
Thank you for stopping by.
Have a wildly creative day!
Lattes, Magnolias Product Showcase:


Pretty card, Rae. Love that brick background!
Thank you Lady! See you at the crop!
Beautiful easel card, Rae! Love the new bundle!! The textured background is lovely as is the designer paper that you have shown me I need to get! Have a wonderful weekend.
Thank you for letting me inspire you Debbie. Hope your weather is great for a picnic this spring weekend.
I love easel cards and this one is beautiful
Thank you Mary. I love them too. They have an instant “WOW” factor.
Your card is definitely elegant! I don’t know about the “easy” part because you put a lot of great details into embellishing it, from those lovely flowers to the popped up sentiment to the foiled gems! It turned out beautifully, and I love how you used that Exposed Brick embossed background for the front and the stopper! Have a blessed Easter!
Thank you Carrie. It really IS easy.
Easter Blessings to you too.