Beautiful Wings Flip Corner Fold for Creative Creases #81
What’s better than a fun fold? Creative Creases Anything Goes with a Fun Fold, of course. I can’t believe it’s time for another challenge. The last two weeks have flown by. Hope you had a chance to take part in the last challenge. If not we hope you were inspired by the crafters that were able to enter. Some beautiful folds are waiting to inspire you in the challenge gallery.
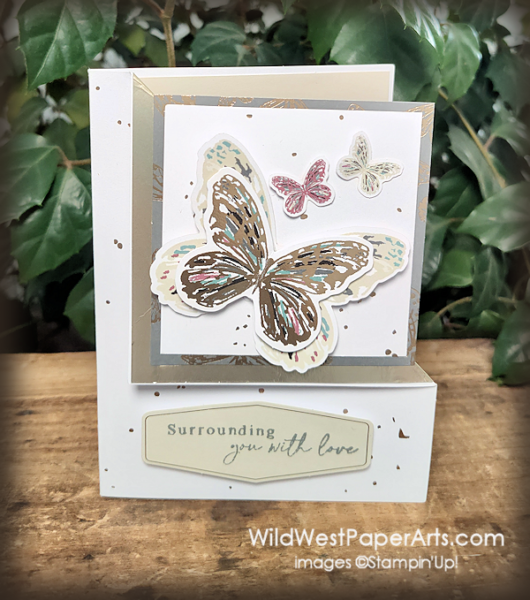
My fold today is called a Corner Flip card. I now realize there are more than one fold with this name and they are completely different. Mine is the easier of the two I found.
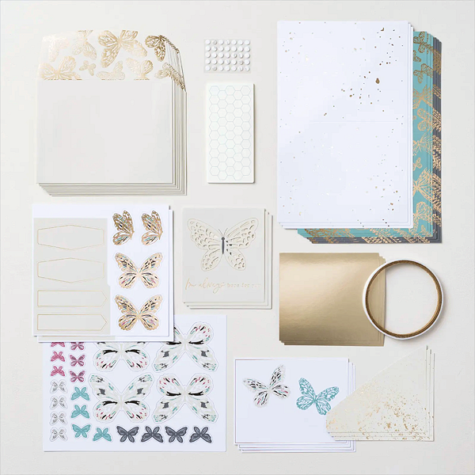
All of the elements used on this project are from the April, 2024 Paper Pumpkin kit “Delicate Wings”.
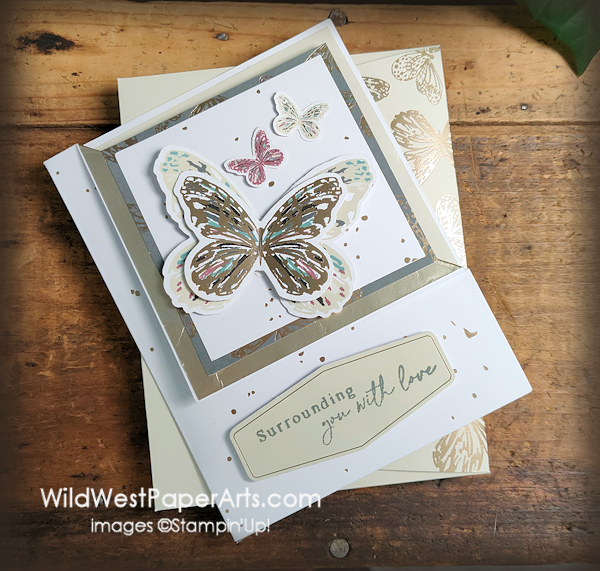
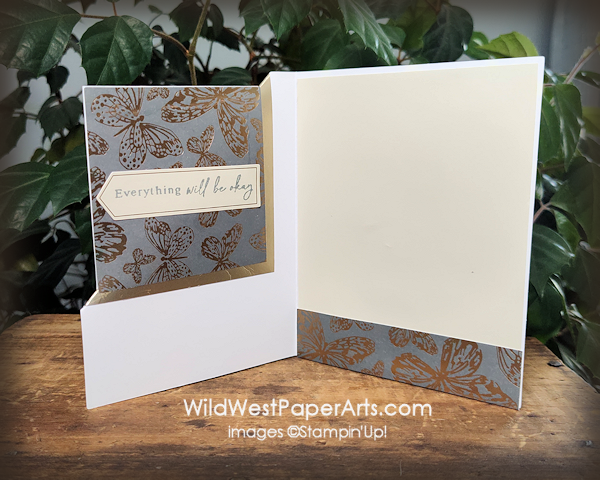
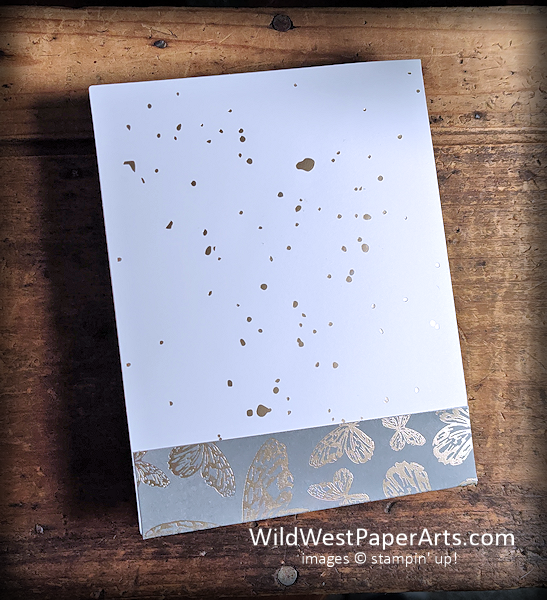
Thanks to this fold, you can make the inside just as pretty as the outside. Even the back is decorated!
And the back…
Back of Card
Nuts & Bolts
Color Pallet
Plus the new Basic Beige
Paper Cuts & Kit Supplies used
Supplies used from the Paper Pumpkin Kit “Delicate Wings” kit (shown below) are:
- White & Foil flecked card bases (2)
- One for the actual card base
- Cut a 3″ x 3″ square from the second card base
- Basic Grey & Foiled Butterfly card base –
- Cut two pieces 3-1/4″ x 3-1/4″
- Optional: Cut a piece from the card (around the scored fold) measuring 2″ x 4-1/8″. Make sure that the score line is in the middle. You’ll use this piece in step 9 below.
- Gold Foil piece – Trim to 3-5/8″ x 3-5/8″
- Envelope – Trim to 4-1/8″ x 5-3/8″
- Butterflies –
- Small (2)
- Medium Foiled (1)
- Large (1)
- Labels – one of each shape
- Adhesives –
- Dimensionals
- Dots
- Tear & Tape
Construction:
- Fold and burnish the Gold Flecked card base where pre-scored.
- On the front of the card, at the top edge, measure 1/2″ in from the fold. Make a light mark.
- On the font of the card, at the bottom edge, measure up 1-1/2″. Make a light mark.
- Score a line between these two marks. Fold the top right corner down, at the score line and burnish.
- Adhere the gold foiled piece to the flap. Fold over so the second half of the piece shows on the inside of the card. Burnish and adhere with Tear & Tape.
- Create the front focal piece base by adhering the 3″x3″ foil flecked square to one of the Basic Grey Butterfly squares. Line up and adhere over the foil piece with. Use Tear & Tape in this step.
- Open the card and adhere the second Basic Grey Butterfly square over the foil piece with Tear & Tape. Use the image above as a guide for placement.
- Adhere the Basic Beige piece to the right side of the card with Tear & Tape.
- Optional: Adhere the optional piece from the list above to the bottom, inside right panel of the card. Make sure the score line is at the very bottom edge. If you’ve done it correctly, you’ll have a border on the inside and outside back of the card.
- Stamp desired greetings on the banners, adhere the inside banner with Glue Dots and the outside banner with Dimensionals.
- Decorate the outside with butterflies. Use Glue Dots for the small butterflies and bodies of the larger butterflies. Use Dimensionals to pop the wings.
Tip: I did NOT glue down the outside flap. Leaving it loose gives the card more dimension.
Time to give it a try. Can’t wait to see your beautiful creations in the challenge.
Click to Leave a Comment
Don’t forget to enter our current challenge!
Click to enter Creative Creases #81



I love this card and it is well done.
Thank you Ruth.
Such a beautiful creation, love that butterfly too
Thank you Emma.
I love this kit and your alternative card. I’m working on those this morning. Thanks for the inspiration.
Thank you and you’re welcome Hilda. I love creating with kits. So much that can be done. Have fun!
Rae, this is great! My kit is arriving tomorrow. I didn’t order it when I should have but my upline just happened to have an extra kit. I think I will be CASEing! TFS.
Thank you Karen. I can’t wait to see what you create!
Stunning card! Thanks for sharing Rae
Thank you Barbara. Glad you like it. Have a great weekend!
Thank you Carrie. This one is easier than it looks.
What a great fun fold card, Rae! I think I get it now but it took me a minute to figure it out. I just got this PP kit and am working on alternatives this weekend. Isn’t it beautiful?! I love it. Have a wonderful weekend, my friend!
Thank you Debbie. Maybe I need process pictures for this one. It does use a fair amount of the kit. It’s definitely not one to extend the kit. Have a great weekend!
Rae, those butterflies are so beautiful! And what a great card design with such pretty papers both inside and out! Thanks for sharing the details! I’ll have to give this one a try!