Life is Sweet with Creative Creases #86
It’s time for new Fun Fold inspiration from the gang at Creative Creases, welcome. We’re here to inspire you to create and share with us.
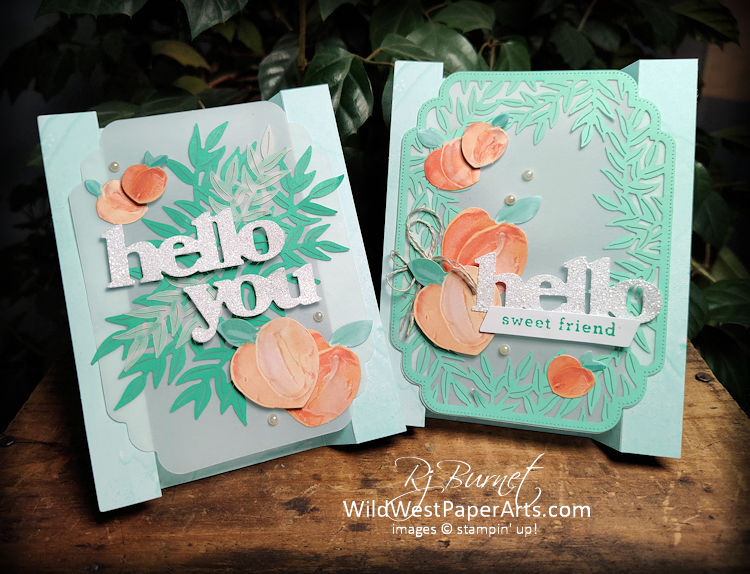
I’m sharing a fun fold that also serves as an alternate for the June 2024 Paper Pumpkin Kit, “Life is Sweet”. When you scroll down you’ll see a second version as well.
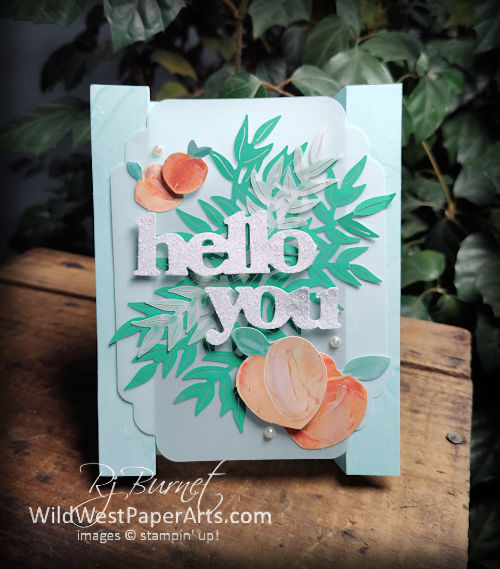
The June 2024 Paper Pumpkin kit is full of fruit and beautiful color. It’s been so much fun to work with. Let’s see more about this fold.
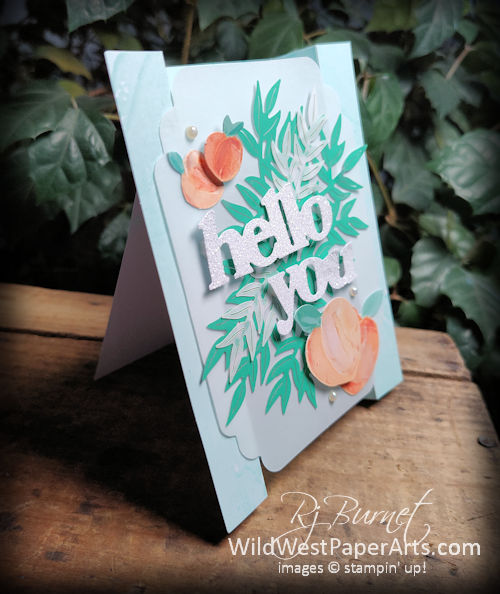
First to give credit where credit is due. I saw this fold in a YouTube video from Gina K. I don’t think she gave it a name. I did modify it a bit to make sure we ONLY used Paper Pumpkin kit supplies provided in the June 2024 kit “Life is Sweet.” I have a link to the video at the end of this post. Here card is beautiful and she has some great tips.
Creating the Fold
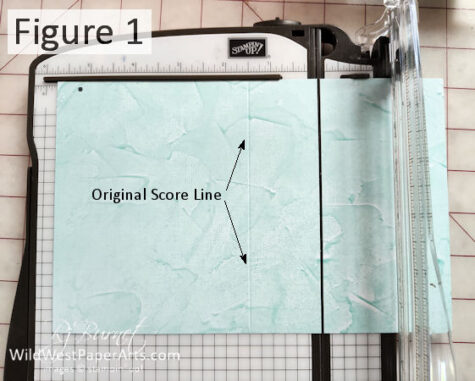
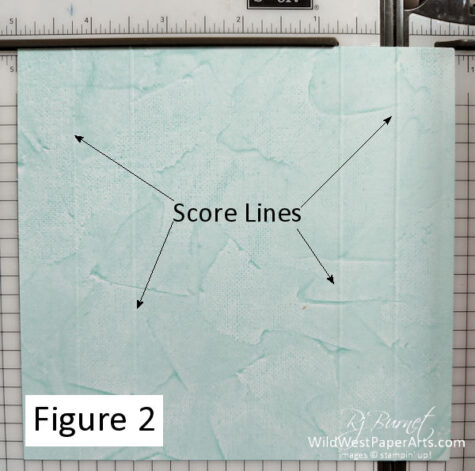
- Step 1. Base: 5-1/2″ x 5-3/4″; score at 5″ and 4-1/4″ on long edge. Save the piece you cut off for the “easel” part of your card. When you make your cut, you’ll see that the original score line on the card base is exactly at 4-1/4″. Sweet! Turn 180 degrees and repeat the scores from the other side.
- TIP: Since we’re doing an accordion type fold, flip the card over and lightly score over the same lines. This will ensure that both folds (mountain and valley) will not crack. I hate when that happens!
 |
 |
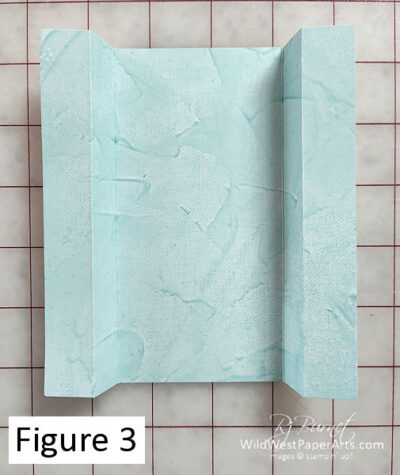
- Step 2. Make an accordion fold on each end.
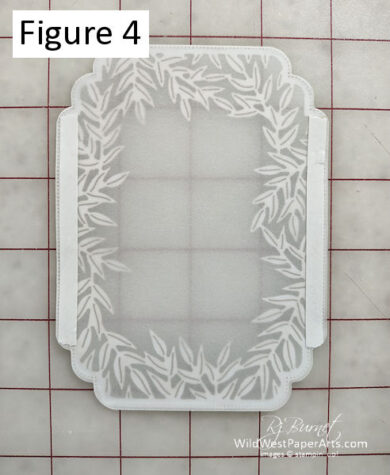
- Step 3. Create a base for the focal piece and adhere to the card front, leaving a 1/4″ margin on both sides.
- Attachment Tip: Flatten the base by pushing it to one side before attaching the focal piece. This will ensure your card will fit into an A2 envelope. Sounds confusing but trust me it works like magic!
 |
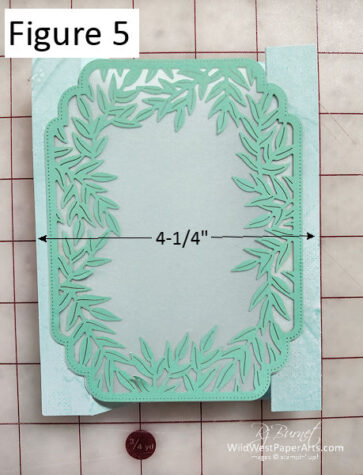 |
- Step 4. Stamp and decorate the piece above.
- Step 5. Create the Easel Card Base from the piece cut off in Step 1 and score at about 1-1/2″. OR Cut a piece of white cardstock at 2-3/4″ x 5-1/5″. Score at 4″ Fold and burnish. Stamp a greeting on the the “easel” piece. Adhere to the back of the card to create an easel. Refer to Figure 7.
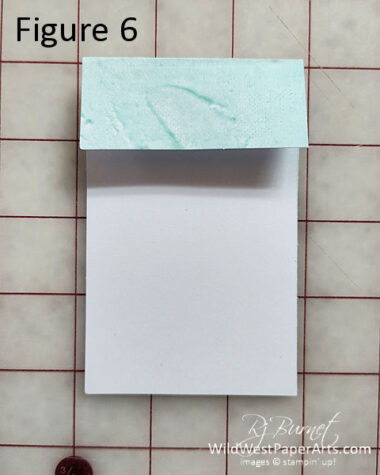 |
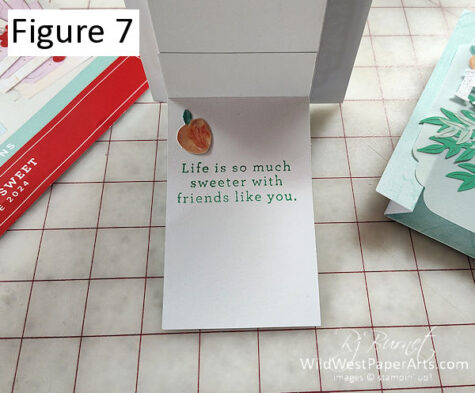 |
- Step 7. Decorate the front of the card as desired.
Gina K. Fun Fold Video
Click here to leave a comment or just to say “Hi”
Ready to enter the challenge?
Keep checking back to see the projects being posted.
This challenge closes July 19th.
Clicking here takes you to Creative Creases #86 Challenge Page
Thank you for stopping by today.


Thank you for sharing this!! I love this fold!
Thank you Paula!
Super fun fun fold – and so pretty! Georgia peaches say SUMMER in all caps, don’t they!? Love this kit – and how you modified it!
Thanks a million Mary and yes they do!
Beautiful cards, Rae! I couldn’t wait to see how you created it since I’ve never seen this before. Kind of a bridge easel card?? I might be able to CASE this! Have a great weekend!
Great name for this card. This is a modified version of a card I saw from Gina K. Designs. I love that it such a simple card that has a big WOW factor!
Thank you for your comment Debbie. Have a great weekend and stay cool!
Rae, your cards are gorgeous! I love how you used vellum to add a soft touch to the front panels! And all that beautiful foliage and sweet little fruits from the Paper Pumpkin kit make these cards extra special!
Thank you so much Carrie. I love this kit. Could it be the colors in the kit? I think so. Have a wonderful weekend.