Pals Blog Hop: Orange Theory

Welcome to the Stampin’ Pretty Pals’ Blog Hop!
This month, the theme is Orange Theory. We hope to inspire you with our creations using the color orange today! You will find the lineup at the end of my post to help you “hop” along from Pal to Pal.
Our October 2024 Blog Hop Theme is perfect for this time of year, especially this year. The weather is still warm making the leaves take there sweet time showing off their Autumn Colors. If we can’t have the beautiful foliage naturally, let’s make it happen with paper. Focus on leaves.
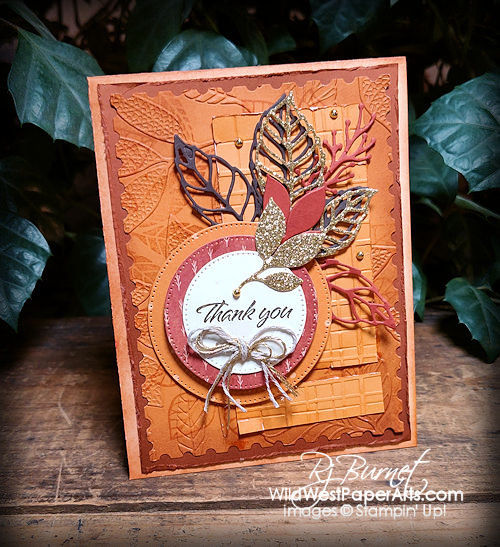
It’s so much fun to create this sort of shabby card. Mistakes are so easy to build upon. For instance, I cut the embossed rectangle (directly under the die cut leaves} too short. no problem. Just roll with it.
I also wanted to use a floral pattern from the Regals 6×6 Designer Series Paper (DSP) Pad. Darn, I don’t have that paper! No problem, I made my own. Pumpkin Pie cardstock paired with the Changing Leaves Bundle gets it done.
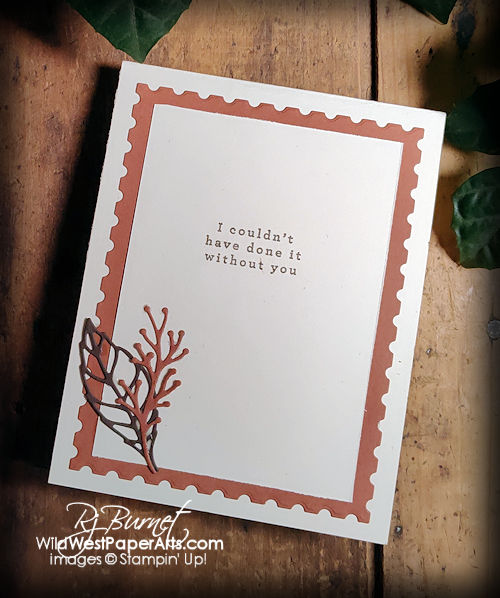
Perennial Postage Dies on the inside too. Perfect!
To create this card you’ll need DSP, dies, stamp set and a couple of embossing folders. Here’s what I used.
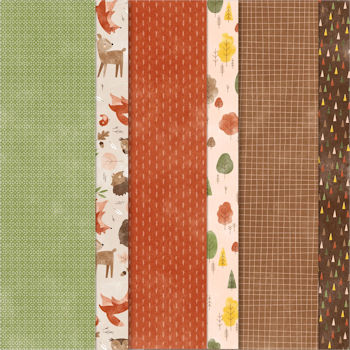 Sweet Days of Autumn DSP #166498 |
|
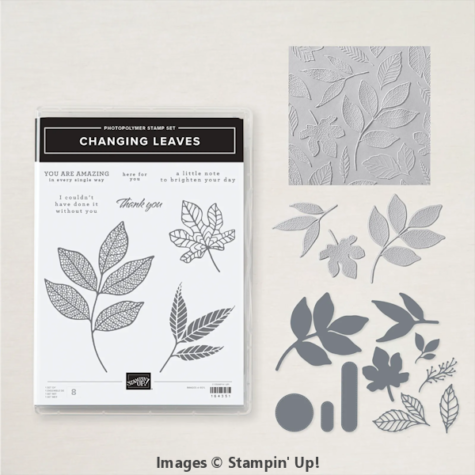 Changing Leaves Bundle |
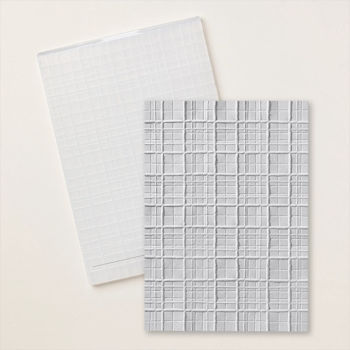 Forever Plaid 3D Embossing Folder |
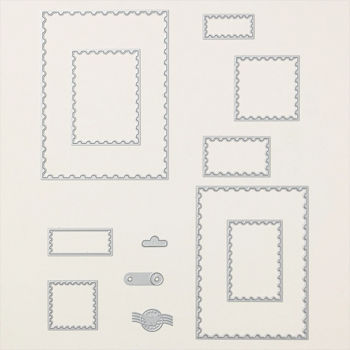 Perennial Postage Dies |
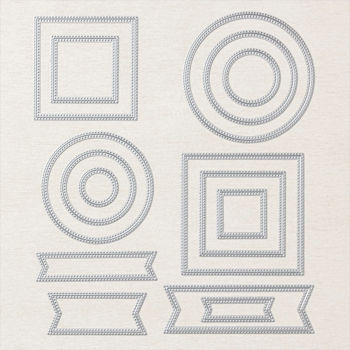 Stylish Shapes Dies |
Nuts & Bolts
Sizes
- A2 (4-1/4″ x 5-1/2″)
- Clear Block D: 2-7/8″ x 2-11/16″
- Clear Block E: 3-7/16″ x 4-7/16″
Paper Cuts
- Card Base: Very Vanilla Thick 4-1/4″ x 11″, score and fold at 5-1/2″
- Front & Inside Layer 1: Copper Clay Cardstock 4″ x 5-1/4″ (cut 2)
- Front Layer 2: Pumpkin Pie Cardstock 4″ x 5-1/4″
- Front Layer 3: Pumpkin Pie Cardstock 2″ x 4-1/2″
- Inside Layer 2: Very Vanilla 3-1/4″ x 4-1/2″
- Circles: Variety of papers from the Sweet Days of Autumn DSP
- Other: Copper Clay, Early Espresso & Gold Glimmer papers & cardstocks for leaves
Construction
- Sponge card base front edges with Pumpkin Pie and Copper Clay ink
- Sponge Layer 1 (front) with Copper Clay Ink. Rough the edges with the blade of your scissors or your finger nail. Adhere to card base
- Using the “Stamp-Off” method, randomly stamp Layer 2 (front) with leaves with Pumpkin Pie ink. Die Cut with the largest die from Perennial Postage. Sponge with Copper Clay and emboss with the Changing Leaves Embossing Folder. Adhere to Layer 1.
- Use Forever Plaid embossing folder to emboss Layer 3, with the light side up. Adhere to Layer 2.
- Starting from the 2nd larges circle, use 3 concentric circles from Stylish Shapes Dies to cut various patterns from Sweet Days of Autumn DSP and White or Vanilla Cardstock.
- Cut various leaves with the Changing Leaves Dies from Copper Clay, Early Espresso and Gold Glimmer cardstocks.
- Arrange and adhere leaves as shown reserving one small leaf for the top circle.
- Adhere two DSP circles to card front with Stampin’ Dimensionals.
- Stamp “Thank You” on the smallest circle with Early Espresso Ink. Adhere to the medium circle.
- Adhere the small glimmer leaf to the top of circle.
- Tie a 3-ply bow with Linen Thread. Trim and adhere to the top circle.
- Arrange and affix gold gems
- Inside:
- Die-Cut Inside Layer 1 with largest Perennial Postage Die. Adhere to the inside.
- Use Early Espresso Ink to stamp greeting on the Inside Layer 2. Adhere to Inside Layer 1
- Arrange and adhere leaves as shown.
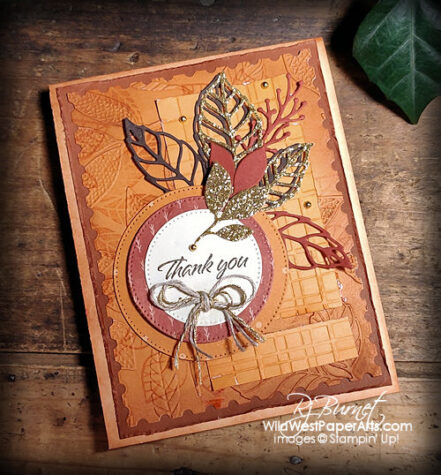
Your card will be a unique creation. Don’t expect it to look exactly like mine. Enjoy the process.
More inspiration awaits! Use the lineup below to visit the rest of the Design Team. Please mark your calendars for our next blog hop next month, when our theme will be Random Acts of Kindness.
Until then, have fun in your craft space.
Stampin’ Pretty Pals Blog Hop
- Mary Fish at Stampin’ Pretty
- Beth McCullough at Stamping Mom
- Tricia Chuba at ButterDish Designs
- Melissa Seplowitz at The Stamping Ninja
- Debbie Mageed at Secrets to Stamping
- Mary Hanson at Up North Stampin’
- Stesha Bloodhart at Stampin’ Hoot!
- Windy Ellard at Windy’s Wonderful Creations
- Peggy Noe at Pretty Paper Cards
- Su Mohr at Aromas And Art
- Lisa Ann Bernard at Queen B Creations
- Sue Jackson at Just Peachy Stamping
- Rae Burnet at Wild West Paper Arts <——-> You made it to the Wild West!
- Deb Walker at Deb Stamps Life
Thank you for stopping by today.
Make it a Wildly Creative Day!
Orange Theory Product Showcase:
Exactly where is the mistake? Your card is so creative and natural. I admire your artistic abilities and adaptabilities! Just think how happy you can make someone with your original ideas brought into reality.
Donna…. It looks intentional but it wasn’t. Look at the dry embossed “plaid” rectangle directly behind the bottom of the large circle. You’ll see two separate pieces. That’s the mistake.
Thank you for reading through the post and your great comment!
Gorgeous card!!
Thank you Cindie!
You made a wonderful card!!! Love it! A demonstrator of FRANCE (Gard) Thank you so much
Thank you so much Ramette.
Rae, I love all the textures and colors you’ve added to make such a pretty fall card!
Thank you Mary!
Fabulous fall card Rae! Love all those layers.
Thank you Tricia
What an orange stunner Rae! Love all those layers!!
Thank you Melissa
What a wonderful card, Rae! The layout and background are so creative. Love it all, my friend!
Thank you Debbie
I always enjoy and appreciation your creativity and your ability to adapt when things do not go according to plan !
Thank you Ruth. See you tomorrow!
Rae, love your card. I am a big fan of embossing folders. Love that you have used 2 different ones on the same card. Beautifully done! Great Card!
Thank you Kimberly
This is gorgeous…alll that texture!!!
Thank you Windy. Hope you’re doing OK in Florida.
Awesome orange McGyvered layers Rae! Always a pleasure to see how you put your own stamp on our Pals Hop!
Thank you Deb. McGyvered…. love it!
Beautiful orange card, Rae! Love the inside too!
Thank you Su.
Wow, Wow, Wow! Love all the wonderful elements of the card!
Thank you Stesha. That’s a whole lotta Wows!