Creative Creases #96: Hanging Around
Welcome to Creative Creases Challenge #96. Here we are in late November with Thanksgiving just around the corner. Let the December decorating begin! Don’t forget to hop on over to Challenge #96. We’d love to see your fun fold creation.
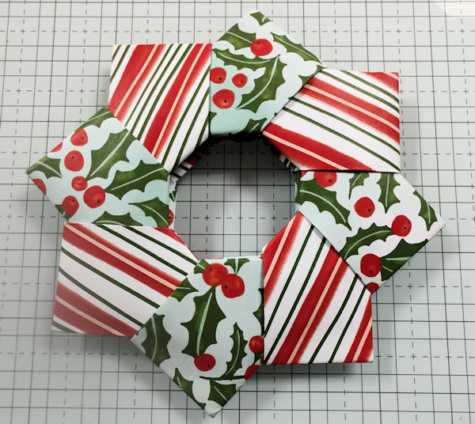
I love folding paper and have since I was very young. Some things never change. The fold I’m bringing you today is an Origami Wreath made from 8 pieces of pretty paper.

When creating Origami Folds, paper weight is critical. If the paper is too thick, it’s difficult to get the fold just right. I chose the Regal Distressed Patterns Specialty Designer Paper #164037 because it’s a little lighter weight than Stampin’ Up!s standard patterned paper.
The sample below is larger to accommodate standard weight DSP. Otherwise some of the folds would be too difficult. However, any size is possible. The smaller the wreath, the thinner the paper needs to be. The wreath above is created using 4″ x 4″ squares. The working wreath below is created with 6″ x 6″ squares resulting in a wreath that is approximately 6″ wide from point to point.
Grab your Bone Folder and let’s get started.
Nuts & Bolts
Paper Cuts:
- Light weight patterned paper – 4″ x 4″ squares; 8 pieces, OR
- Standard weight patterned paper – 6: x 6 squares, 8 pieces
- Paper Scraps:
- Basic White cardstock
- Dark, coordinating cardstock
Other Tools & Supplies:
- Ribbon or cording of your choice: Between 24″ and 36″
- Bone Folder – DON’T SKIP THIS!
- Heavy-duty hole punch
- Paper Trimmer
- Optional: Score Board
Construction:
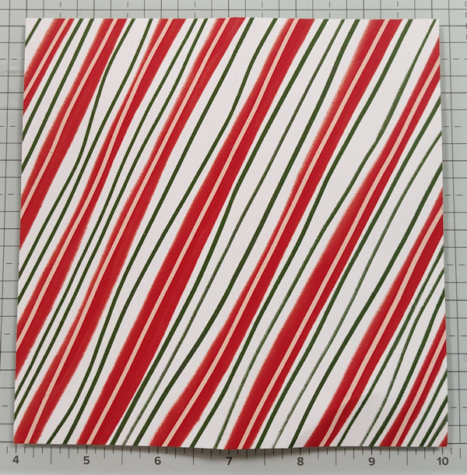 Figure 1: Score each square in half. |
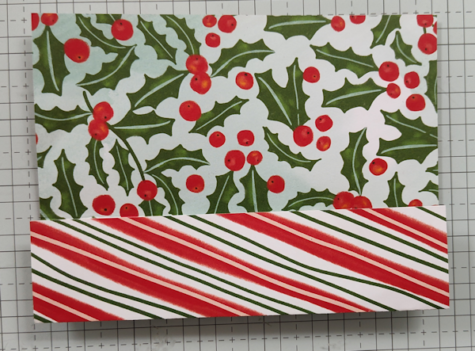 Figure 2: Fold one edge of the square up to the center crease, Repeat on the opposite side. |
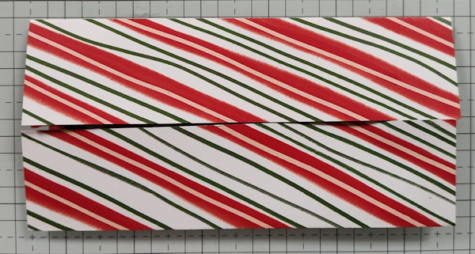 Figure 3: Your folded piece should look like this |
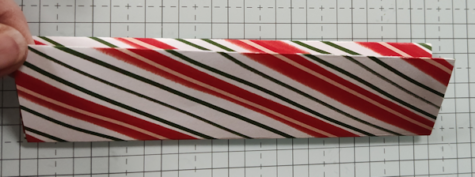 Figure 4: Fold piece in half |
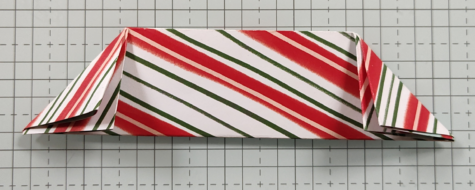 Figure 5: With open side up, fold all plies of each corner down to meet the folded edge. Burnish well. |
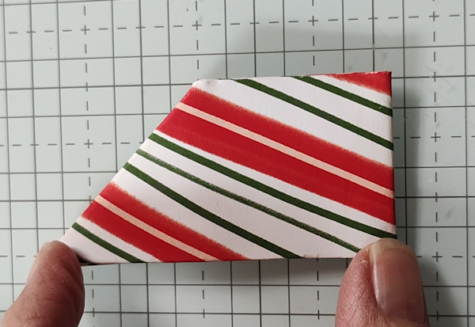 Figure 6: Fold in half and burnish |
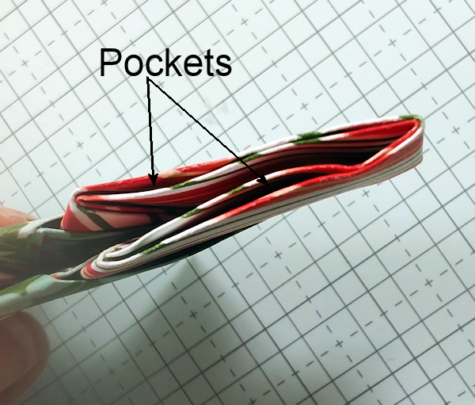 Figure 7: Assembling the wreath by locating the little pockets on the piece. Insert the points of the next piece into the pockets. Continue around. Tip: Use the Bone Folder, Take Your Pick Tools or other tool to open the pockets making it easier to insert the next piece. |
 Figure 8: Start assembling until all 8 pieces have been inserted. |
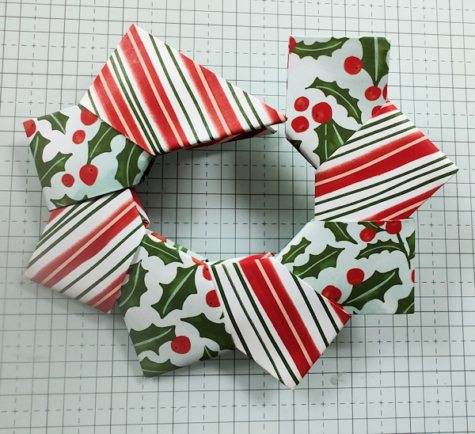 Figure 9: After all 8 pieces have been locked in, tuck the last piece into the first piece. |
 Figure 10: You made it! |
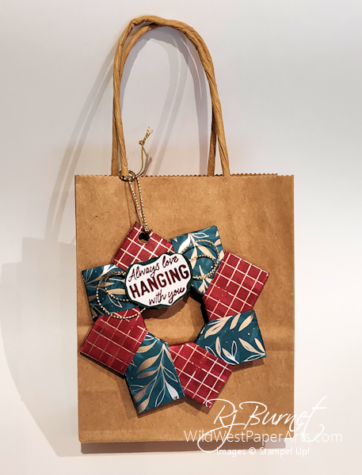
The only thing left to do is decorate your wreath. Use sequins, trinkets, bells, anything you like to make your wreath unique. Here’s what I did.
- Stamp or heat emboss a greeting on cardstock. I used Cherry Cobbler Ink to stamp a greeting from Dear Santa stamp set (#164303) on Basic White Cardstock.
- Fussy cut around the greeting and adhere it to a scrap of Shaded Spruce Cardstock. Fussy cut again leaving a small border.
- Attach your favorite thin ribbon or cording in a figure 8 pattern to the back of the little tag. Adhere to the wreath.
- Punch a hole through one of the points on your wreath. You’ll need something heavy-duty like a Crop-A-Dile.
- Use more of the ribbon from Step 3 to create a hanging loop.
The only thing left to do is hang it on the tree or gift it away. I use mine as card-toppers or to decorate packages.
That’s it for me. Join us in the challenge by clicking below. Even if you don’t enter visit the challenge gallery for great inspiration. Lots of beautiful cards will start to appear thanks to other entries. Time to play!
Enter the Challenge Here
Challenge #96 ends December 5, 2024 at 6:00 pm Eastern.
Click to leave a comment
Thank you for stopping by today.

Make it a Wildly Creative Day!
Creative Creases #96 Product Showcase:

I love this ornament. I’ve been trying to use up my hoarded DSP. Its perfect for decorating a package and using the DSP. Sadly the instructions are cut off.
Great idea! Thank you Anne.
Your origami wreath is terrific! I agree that the weight of the paper is very important so thank you for sharing size of square information. Your directions are clear and easy to follow. Thank you for sharing.
Thank you Pam. Sounds like you’re a fellow paper folding enthusiast.
Thank you Debbie. I can’t believe how easy they are. I bet yours were beautiful.
Oh – this is so cool! I love it – it’s such a great idea to use a wreath for a tag, too!! And thank you so much for the detailed instructions!
You’re welcome Mary and thank you for taking time to comment today.
Thank you Rae! I love it? I do paper folding… Can’t wait to try it! ? Thanks for sharing!!
Hi Georgie! Glad you like it and thank you so much for the comment.
I just love this and will make many of these!!! Thank you, Rae for sharing this!!!Just beautiful!
Thank you Paula. I don’t think you’ll even need clothespins!
What a great Christmas decoration, Rae! I made a few of these last year and they were lots of fun and turned out so pretty! You’re right about the weight of the paper being important. The sentiment is perfect for this; I missed that when reviewing the catalog. Have a great weekend, my friend!