Fun Fold Blog Hop: Corner on Fun
Happy New Year’s Eve and welcome to the last Fun Fold Blog Hop with Stampin’ Up! Demonstrators of 2024.

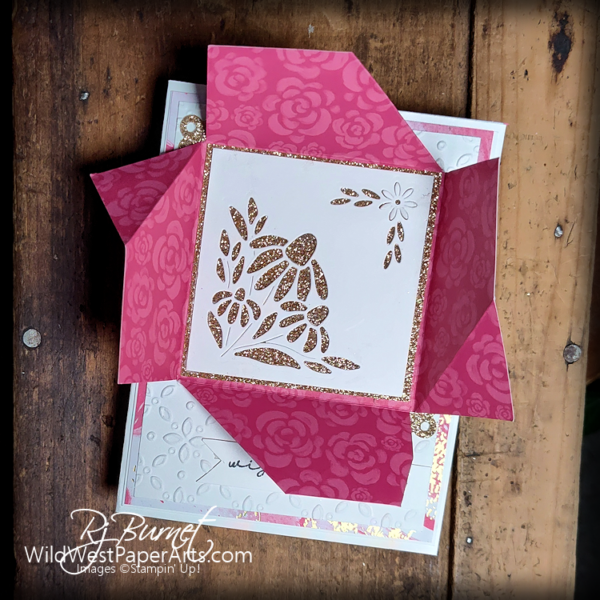
What does New Year’s Eve remind you of? Glimmer? Glitz? Fireworks? The inspiration for this project is all that.
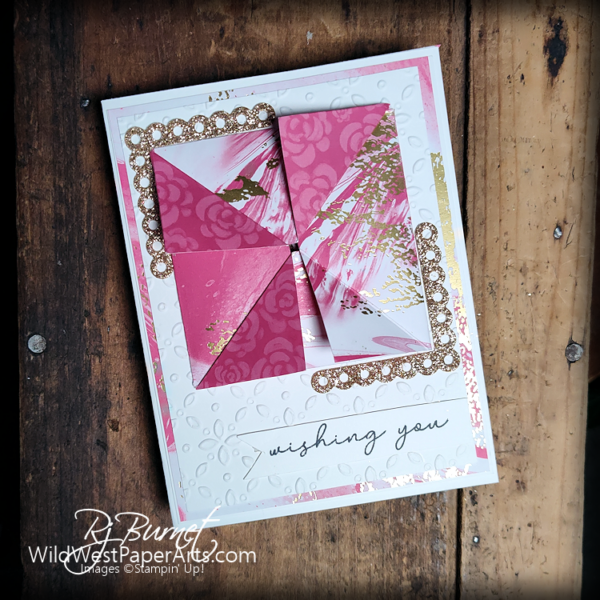
I’m not sure what the featured fold is called. It certainly has a great WOW factor. It’s easier than it looks. Scroll down to see the Nuts & Bolts of it all. You’ll even learn how to use up the scraps!
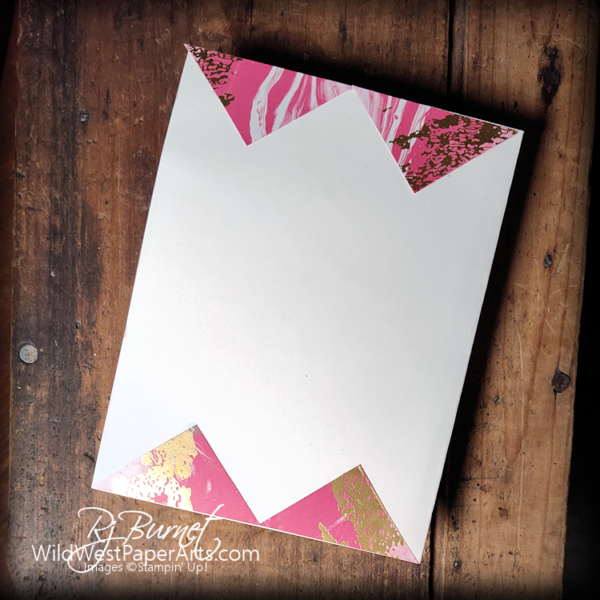
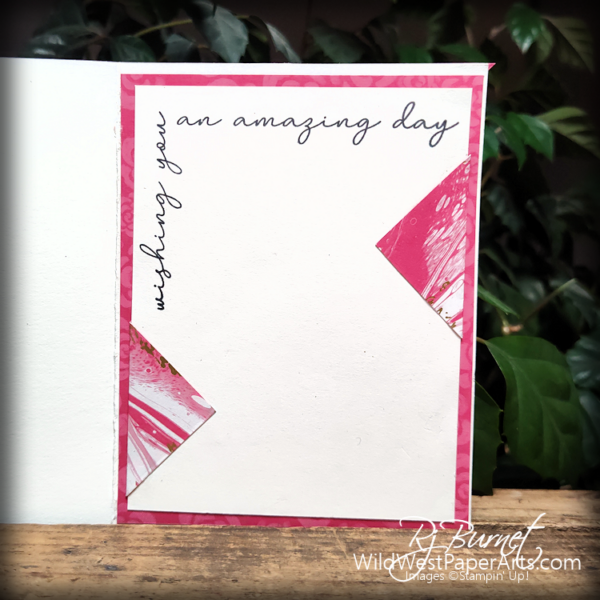
Back of Card
First things first. Thank you to Karen Titus for this fold. She made it so easy to create. Let’s get started.
Nuts & Bolts
Paper Cuts
- Card Stock
- Card Base – Thick Basic White CS 5-1/2″ x 8-1/2″; scored at 4-1/4″ on long side
- Basic White CS 3-3/4″ x 5″ (cut 2)
- Basic White CS 2-3/4″ x 2-3/4″ (cut 1)
- Basic White CS scrap for greeting
- Patterned Paper
- Marbled Excellence Specialty 6″ x 6″ (cut 1) score at 1-1/2″ on all 4 sides
- Marbled Excellence Specialty 4″ x 5-1/4″ (cut 2)
- Glimmer Paper
- Gold 3″ x 3″ (Cut 1)
- Gold Scraps
Construction
- Adhere the Marbled Excellence layers to the outside of the card base.
- Emboss one Basic White CS 3-3/4″ x 5″ with your choice of embossing folders. Adhere to the front Layer 1.
- Cut the corners off the 6″ x 6″ piece so it looks like Figure 1. Set aside the cut pieces for later use.
- Fold all score lines. Determine which pattern you want on the outside. Place this side down then fold the corners toward the score line as show in Figure 2
- Turn the piece over and Adhere the 3″ x 3″ Gold Glimmer paper to the center of the square.
- Use Spring Corners Dies to crop the 2-3/4″ x 2-3/4″ white CS. Adhere to the Gold Glimmer Square with strong adhesive.
- Refer to Figures 4 & 5 to fold the square up. The last corner will tuck under the first to hold closed. Adhere the entire folded square to the front of the card with Tear & Tape.
- Use Spring Corners Dies to crop desired corners from Gold Glimmer. Adhere as shown.
- Stamp greeting on Basic White CS. Trim and flag one end. Adhere to card front with Tear & Tape
- Inside:
- Stamp sentiment on second Basic White CS 3-3/4″ x 5″. Adhere to inside layer 1.
- Fold saved squares from Step 3, in half diagonally. Cut in half at fold line creating triangles.
- Adhere triangles to back of card and inside as shown above.
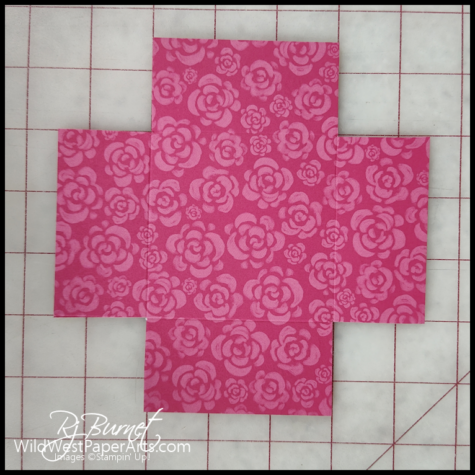 Figure 1 |
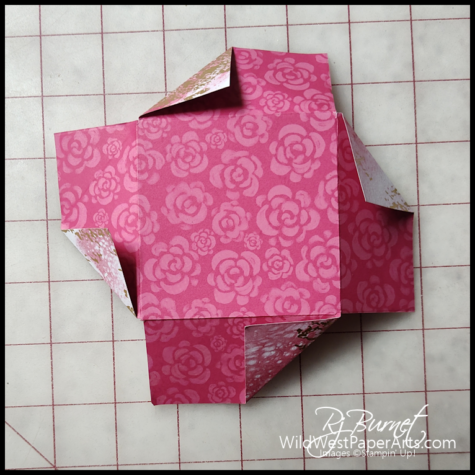 Figure 2 |
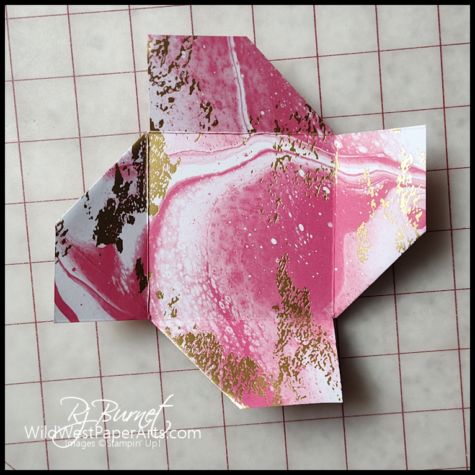 Figure 3 |
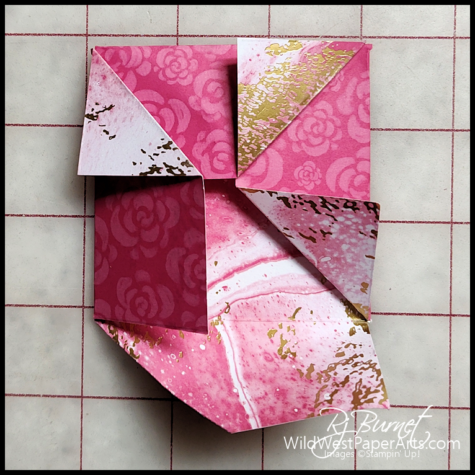 Figure 4 |
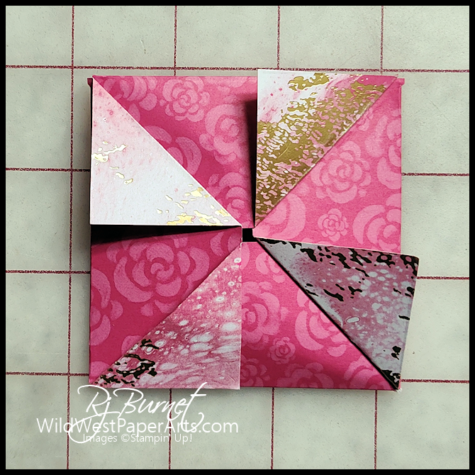 Figure 5 |
|
If you enjoyed this project, please consider leaving a comment. Just the link below.
Click to leave a comment
Let’s see what my fellow demonstrators have to share.
SU Demo Fun Fold Blog Hop Lineup
- Beth McCullough
- Mary Deatherage
- Debbie Mageed
- Lisa Ann Bernard
- Rae Burnet – You made it to the Wild West!
- Tara Carpenter
- Kathi Ondus
- Su Mohr
- Karen Finkle
Thank you for stopping by today.

Make it a Wildly Creative Day!
 |
 |
Corner on Fun Product Showcase:


Rae, I have never seen this fold…only something close with a pinwheel. Love it! Thanks for the instructions. Happy New Year!
Thank you Karen. I found it while searching through Origami folds. Fun, fun. I think you could make it with any size square.
Rae, I love your fun fold! The Marbled Elegance DSP makes it extra special! I need to give this one a try! TFS
Thanks a million Kathi. Happy New Year!
Wow, this is cool. Might have to try this some time. Have a good New Year.
Thank you Chris. Happy New Year!
Great fun fold card, Rae! You are so good at these folds! I need to try it soon. Hope you have a wonderful new year! Thank you for joining the hop!
Thank you Debbie. These folds take me back to my “little girl” days when I was an Origami enthusiast. Happy New Year, my friend.
Truly a “fun” fun fold, Rae! So great in this pretty paper!
Thank you Su! Happy New Year