
Sunday Social: Sweet Citrus Hello
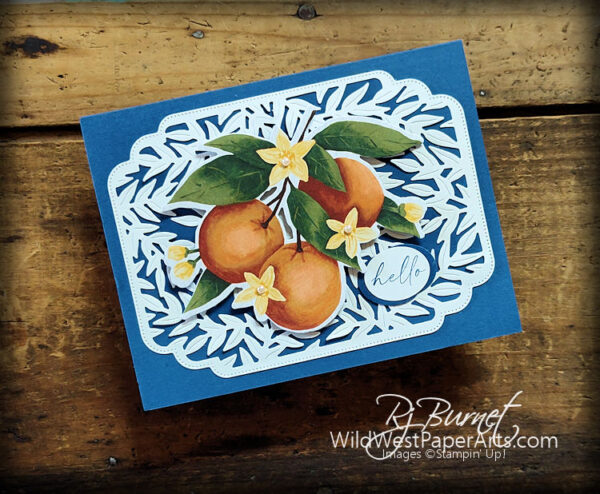
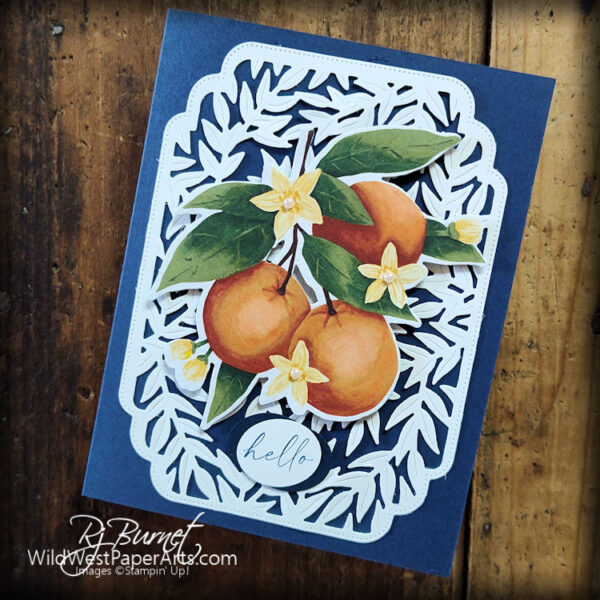
Today’s Sunday Social card features the outgoing Citrus Blooms Suite. I’ve created both portrait and landscape version. Not sure which one I like better. Whenever there’s a chance to die-cut images from patterned paper, I’ll take it.
 |
 |
At this date, the stamp set is only available in French. However, don’t be afraid to purchase the French version. The images and dies are the same in both. The difference is only in the greetings. Take a look at the difference.
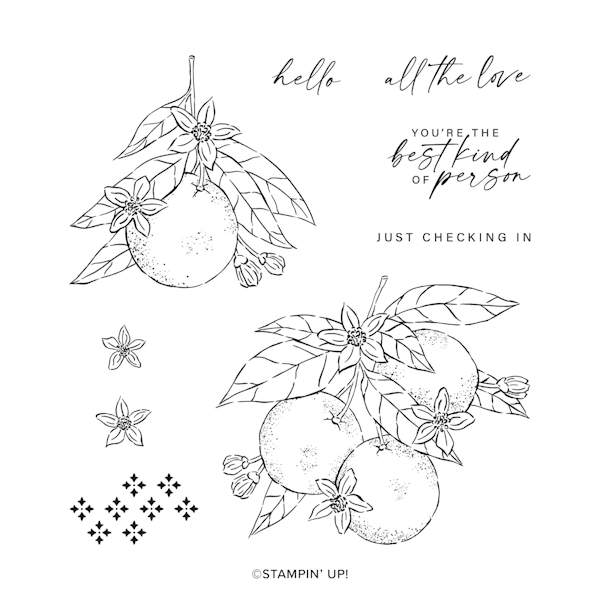 Mediterranean Blooms – English No longer available |
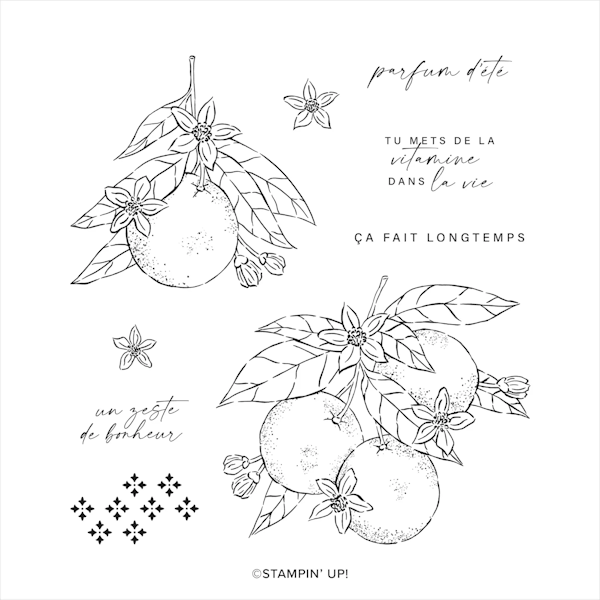 Mediterranean Blooms – French |
The French Mediterranean Blooms suite is on the last chance list as well. Here’s what it looks like.
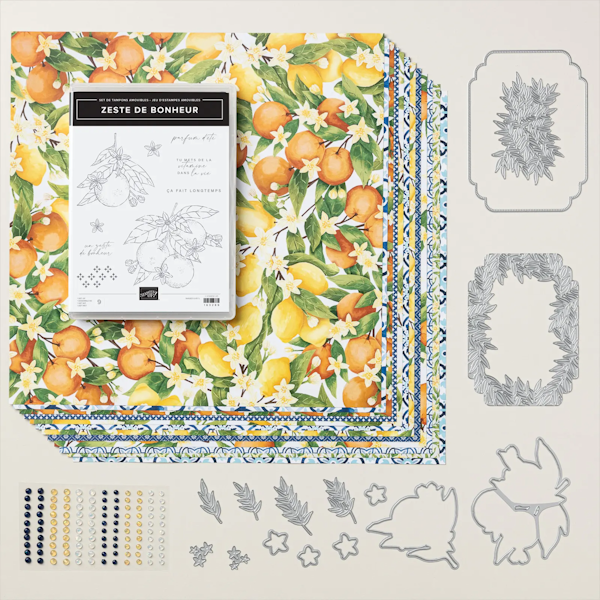
Mediterranean Blooms Suite – French
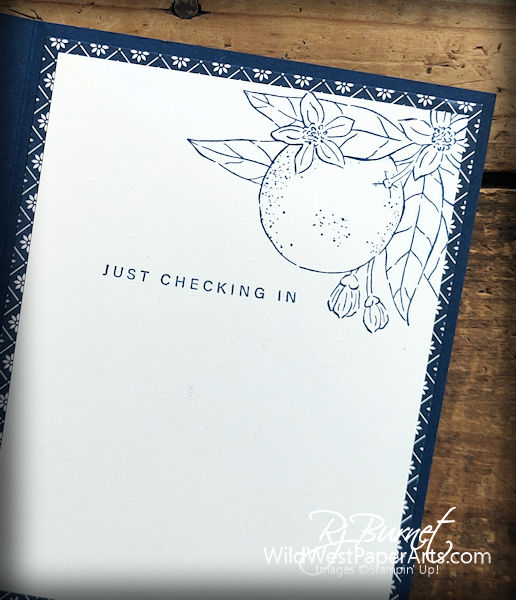
Step it up by decorating the inside. These images make it so simple to make this card extra special.
Let’s put it together.
Nuts & Bolts
All measurements are in inches.
Finished Size – A2 (4-1/4 x 5-1/2) – Instructions are for Landscape Orientation. Adjust as necessary for Portrait version.
Acronyms & Jargon
- CAS = Clean And Simple
- CASE = Copy And Share Everything
- CS = Cardstock
- DSP = Designer Series Paper (aka patterned paper)
- SDSP = Specialty Designer Series paper
- SIP = Stamp Paper Ink
Paper Cuts
- Cardstock –
- Night of Navy – 8-1/2 x 5-1/2 (cut 1); Score at 4-1/4 on long side. This is your card base.
- Night of Navy – Scraps
- Basic White – 4-1/2 x 5-3/4 for die-cutting
- Basic White – 3-3/4 x 5. This will be your writing panel
- Basic White – Scraps
- Patterned Paper (DSP)
- Mediterranean Blooms – Cluster of oranges for die or fussy cutting
- Mediterranean Blooms – Small pattern to mat the writing panel; 4 x 5-1/4
- Other Supplies –
- Opal Rounds Assortment or gems of your choice.
- Night of Navy Classic Ink
- Mediterranean Blooms Bundle (English version has retired. However, the French Version has the same dies and images. Take a look here.
- A complete list of supplies & tools can be found at the end of this post.
Construction
- Fold and burnish card base.
- Crop the Basic White “Die Cutting” piece with background dies. See figure 1 below. Adhere to Card Base.
- Crop or Fussy Cut a cluster of 3 oranges from DSP (Figure 2). Adhere to center of card base with Stampin’ Dimensionals.
- Stamp and punch “Hello” greeting as well as shadow pieces. Layer and glue together. Adhere to the card with Stampin’ Dimensio
- Stamp desired image on upper right corner and desired sentiment of Basic White Writing Panel piece with Night of Navy Classic Ink.
- Layer night of navy small pattern DSP (Figure 3) with 3-3/4 x 5 white cardstock. Adhere to the inside of the card.
- Decorate the outside with gems.
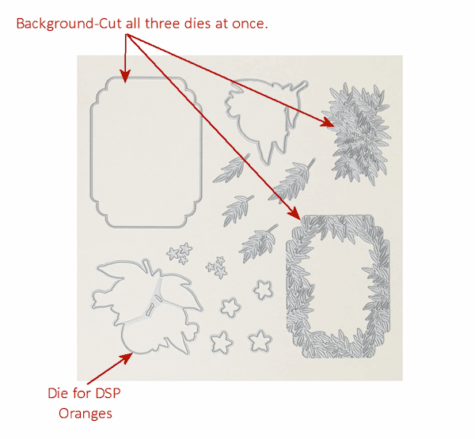
Figure 1
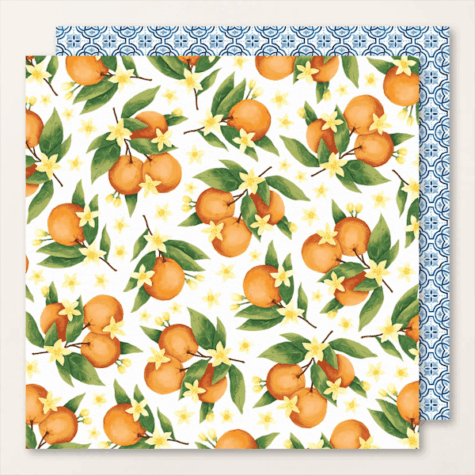 Figure 2 |
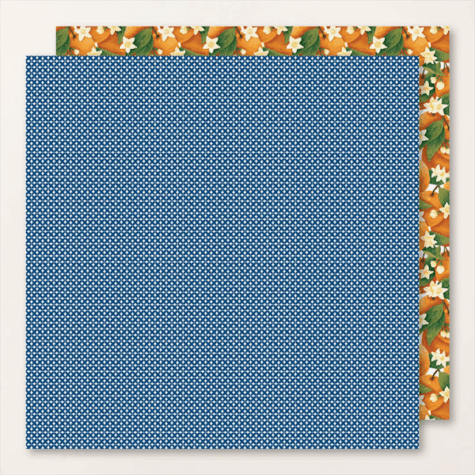 Figure 3 |
Before you go please consider leaving a comment on the project today. I love to read them. It’s like digital “Happy Mail”.
Click to Leave a Comment
Have a wildly creative day!


 Click to Shop Last Chance Products |
 Get Ready for a Sweet Suite Sale! |
 Join us for a Virtual Scrapbooking Event in July! |
|
Comments
Sunday Social: Sweet Citrus Hello — No Comments
HTML tags allowed in your comment: <a href="" title=""> <abbr title=""> <acronym title=""> <b> <blockquote cite=""> <cite> <code> <del datetime=""> <em> <i> <q cite=""> <s> <strike> <strong>