
Sunday Socials: Puzzle Me
Just about a year ago I fell in love with the Charming Duck Pond stamp set and Lily Pond Lane Designer Series Paper. Now that they are on the Last Chance List I thought it would be fun to revisit an old project.
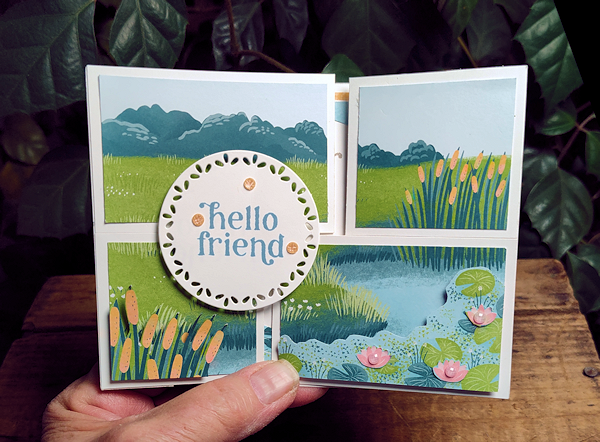
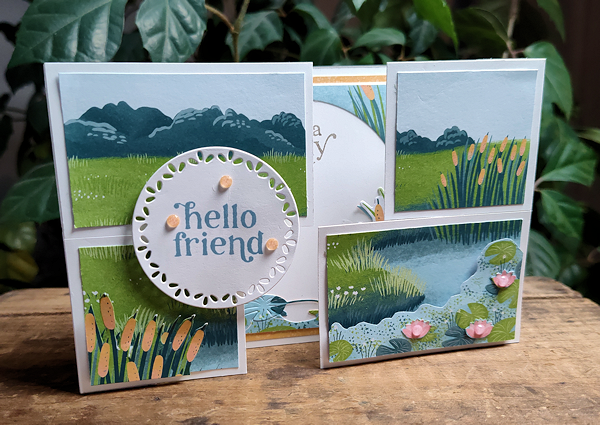
The fold: Sliding Puzzle Fold
So, what’s the puzzle? It’s in how the panels are cut and put back together. The card slides open to reveal a sweet scene.
Lily Pond Lane DSP paired with the Charming Duck Pond bundle to set the scene, inside and out.
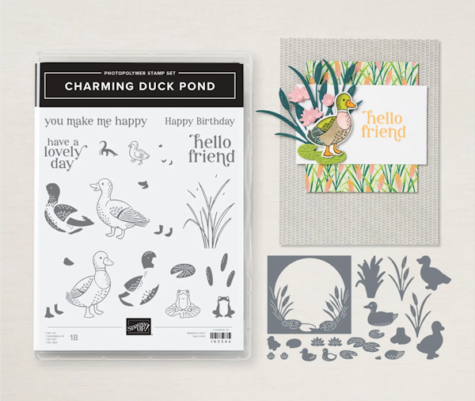 Charming Duck Pond Bundle |
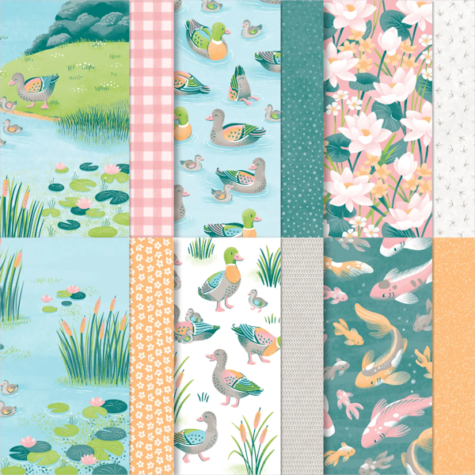 Lily Pond Lane DSP |
 Spotlight on Nature Dies #163580 |
|
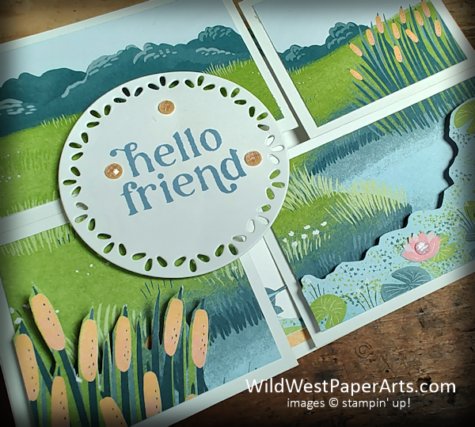
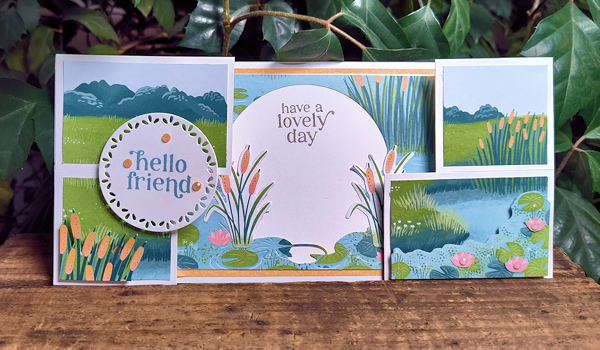 A close-up shows fussy cutting (in the foreground) affixed with Stampin’ Dimensionals. The paper is beautiful but sometimes scenes look a little flat. Lastly, I used Spotlight on Naturel dies for the front greeting and added a few sequins.
Lily Ponds, Ducks & Fun Fold Nuts & Bolts
Paper Cuts
- Card Base: Thick Basic White Cardstock 4-1/4″ x 9-1/5″; scored on long edge 1″, 2″, 7-1/2″ and 8-1/2″
- Cardstock Mats & Die Cuts: Basic White
- 2″ x 2-1/8″ (2 pcs)
- 2″ x 3-1/8″ (2 pcs)
- 5-1/2″ x 8-1/2″ (approximate) for puzzle pieces and die-cuts
- Designer Series paper:
- Outside – 3-3/4″ x 5″ (additional cutting discussed below)
- Inside Top Layer – 3-3-/4″ x 5″
- Fussy Cutting (outside) 1 piece lily pads and Tules
- Die Cutting (inside) 1 piece with Tules that line-up with the Tule Die
- Optional: Inside Bottom Layer – 4″ x 5-1/4″ (Only if you want to have a border or “reveal” under the top layer like the sample)
Construction
- Create an accordion style fold on each side of the card base. The outside edges will be pointing away from the inside of the card when done correctly. Burnish all score lines on the card base with your Bone Folder.
- Cutting the “puzzle pieces”
- Cut the outside DSP piece in half. Each measuring 1-7/8″ x 5″
- Cut the top strip into two pieces. Starting from the left cut at 3″
- Cut the bottom strip into two pieces. Starting at the left cut at 2″
- Adhere to the corresponding Basic White Cardstock pieces using a strong adhesive. I used Tear & Tape
- Lay the “Puzzle Pieces” out the way you want them to look after adhering to the card base.
- Lay down two strips of Tear & Tape on both the left and right panels of the card base.
- Attach the puzzle pieces too the left side aligning them flush to the edges of the panels. There should be no gaps between the pieces or the edge of the base. Repeat with the right side.
- Optional: Depending on the piece of DSP you decide on, Fussy Cut some of the elements and adhere them with Stampin’ Dimensionals for added dimension.
- Inside:
- Use the large circular ornamental die (I call it a window) to crop out the center of Top DSP layer.
- Using the Optional Bottom Layer. Using the same die as in 8A above, crop the Bottom Layer DSP. Make sure the top and bottom layers line up perfectly. You may want to adhere them and crop them together to make sure they line up. The object is to create a window where the white card base is visible.
- Adhere 8A to the card base
- Use Gray Granite Classic Ink to stamp the greeting
- Crop out two groups of tules from the corresponding DSP. Adhere over the tules in the die-cut with liquid glue.
- Use the large circular ornamental die (I call it a window) to crop out the center of Top DSP layer.
- Finishing the Outside:
- Using the Spotlight on Nature dies, cut the desired circle from Basic White Cardstock
- Stamp the greeting in Boho Blue Classic Ink.
- Adhere to the left front of the card with Stampin’ Dimensionals. Placement: when you open the card, the front greeting should not obstruct the inside greeting.
- Decorate with gems
Wild about Fussy Cutting! The pieces I fussy cut are:
- Bottom left corner – group of tules
- Bottom right corner – group of lily pads
- Bottom right corner – three pink water lilies. I also added coordinating Pretty in Pink gems to the water lilies.
Like this project? Please consider leaving a comment. Just click the link below.
Click here to leave a comment
Click to see what else is on the Last Chance List.
Click to Shop Last Chance Products
Thank you for visiting today!

Have a Wildly Creative Day!

Click to shop 24/7!
Comments
Sunday Socials: Puzzle Me — No Comments
HTML tags allowed in your comment: <a href="" title=""> <abbr title=""> <acronym title=""> <b> <blockquote cite=""> <cite> <code> <del datetime=""> <em> <i> <q cite=""> <s> <strike> <strong>