
Gallery Bloom Notes
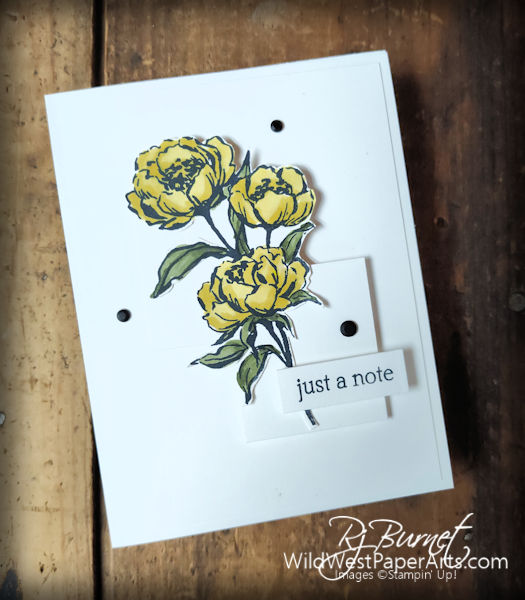
It’s a hot summer Friday in the Wild West. Time for a cool and clean card making session. Whip up a batch of these clean Gallery Bloom Notes. No oven needed.
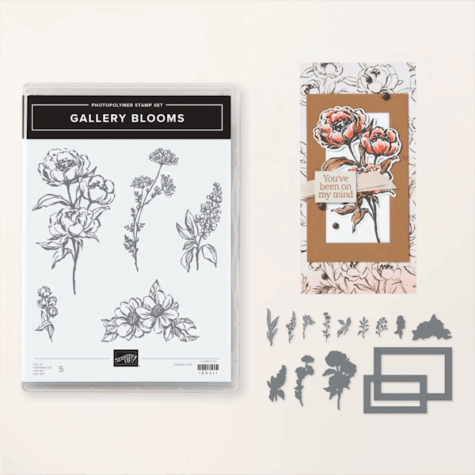
You’ll find this image in the Gallery Blooms Bundle and Beautiful Gallery Suite Collection (shown below). I wasn’t taken by this suite, at first. Colors seemed a bit dark for my taste. Then, I saw the versatility.
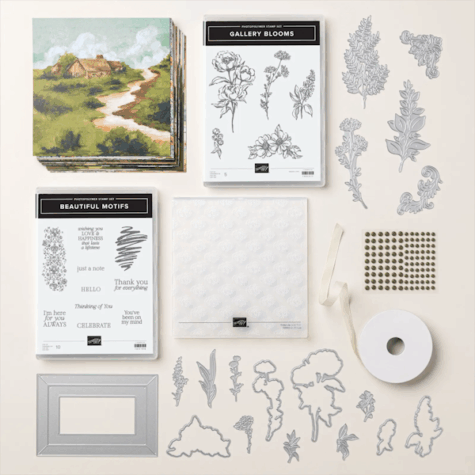 Stampin’ Up! Beautiful Gallery Suite |
 Stampin’ Up! Gallery Blooms Bundle |
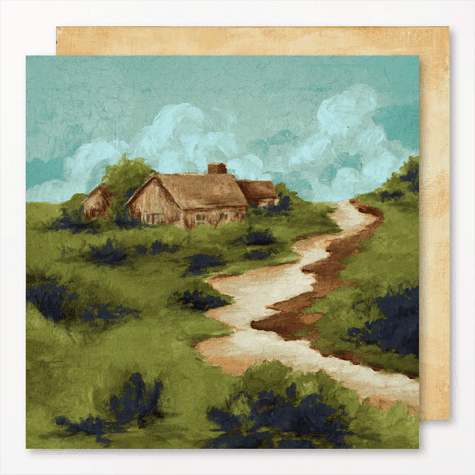
 Stampin’ Up! Beautiful Gallery DSP |
 Stampin’ Up! Beautiful Gallery DSP |
Images can steer us in a suggested direction. When we get stuck, it’s time to do a quick search for a different perspective. Then, turn off the computer and play. That’s how I came up with this clean and simple note card, along with some inspiration from another Stampin’ Up! Demonstrator who designed a similar card. Sorry, I didn’t save her name.
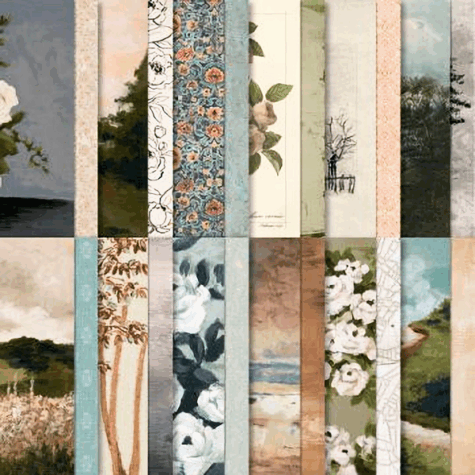
Don’t get me wrong, I LOVE the gallery images in the Beautiful Gallery patterned paper. However, a suite of products is an investment. I want to make sure I can get a lot of mileage from all of the products in that suite.
Shall we make the card?
Nuts & Bolts
All measurements are in inches.
Finished Size – A2 (4-1/4 x 5-1/2)
Acronyms & Jargon
- CAS = Clean And Simple
- CASE = Copy And Share Everything
- CS = Cardstock
- DSP = Designer Series Paper (aka patterned paper)
- SDSP = Specialty Designer Series paper
- SIP = Stamp Paper Ink
Paper Cuts
- Cardstock –
- Basic White Thick:
- 5-1/2 x 8-1/2, score at 4-1/4
- Basic White:
- Layer 1 – 4 x 5-1/4
- Layer 2 – 2 x 1-3/4 (cut 2)
- Greeting – 1/2 x 1-1/2
- Writing Panel – 4 x 5-1/4
- Flower – 3 x 3-1/2
- Basic White Thick:
- Other Supplies –
- Darling Duckling & Mossy Meadow Stampin’ Blends
- Embellishments
- Secret Sea Classic Ink
- Stamp Set
Construction
- Front –
- Fold and burnish card base.
- Layer 1 – Adhere with Stampin’ Seal or other adhesive.
- Layer 2 – Stagger and adhere with Stampin’ Dimensionals as shown.
- Greeting – Stamp and adhere with Stampin’ Dimensionals as shown.
- Flower – Stamp with Secret Sea Classic Ink. Color flower and leaves with Stampin’ Blends. Adhere with Tombo as shown.
- Inside –
- Stamp writing panel with desired sentiment and decorations.
- Adhere with Stampin’ Seal or other adhesive.
Crafty Tips from the Wild West
- When stamping an image to color, try a dark color OTHER THAN black. Your result will be softer while still packing a punch.
Before you go please consider leaving a comment. It means so much. Just click the link below.
Click to Leave a Comment
Thank you for stopping by today.

Have a Wildly Creative Day!
Product Showcase:
A beautiful CAS card! I may have to CASE this one!!! TFS!
Thank you so much Cheryl