
Throwback Thursday: Orange Theory
This Thursday we’re only going back to October 2024. No need to ramp up the Way-Back machine. In fact, many of the products used for this card are current. This card was created for a themed blog hop called “Orange Theory”. All designers were challenged to create something with, you guessed it, the color orange. I cringed at first. However, after I got going with autumn colors, it was easy.
Fun facts on the color orange. Orange creates feelings of freshness, excitement and warmth. It’s connected to nature and changing seasons. Because orange has high energy and increases competitiveness, many sports teams choose orange for their branding. Orange also warns of danger and is used on safety equipment.
Excerpts from the original post start here.
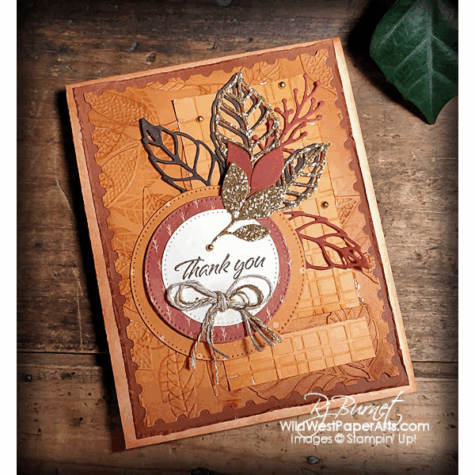
It’s so much fun to create this sort of shabby card. Mistakes are so easy to build upon. For instance, I cut the embossed rectangle (directly under the die cut leaves} too short. Nothing a bit of surgery can’t handle.
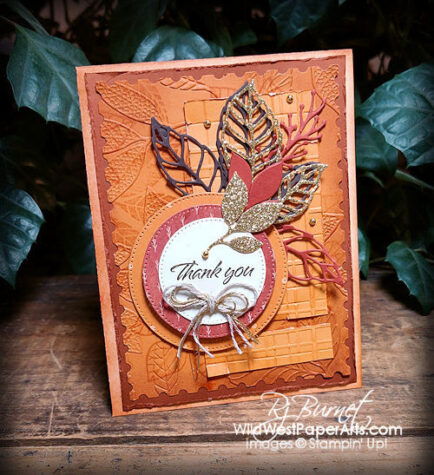
I also wanted to use a floral pattern from the Regals 6×6 Designer Series Paper (DSP) Pad. Darn, I don’t have that paper! No problem, I made my own. Pumpkin Pie cardstock paired with the Changing Leaves Bundle got it done.
Perennial Postage Dies on the inside and out. Perfect!
To create this card you’ll need DSP, dies, stamp set and a couple of embossing folders. Here’s what I used.
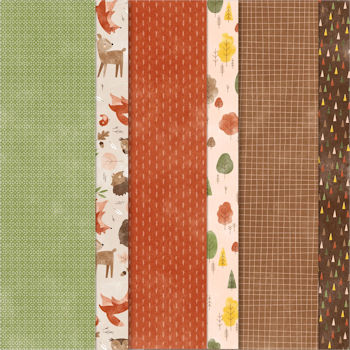 Sweet Days of Autumn DSP #166498 |
|
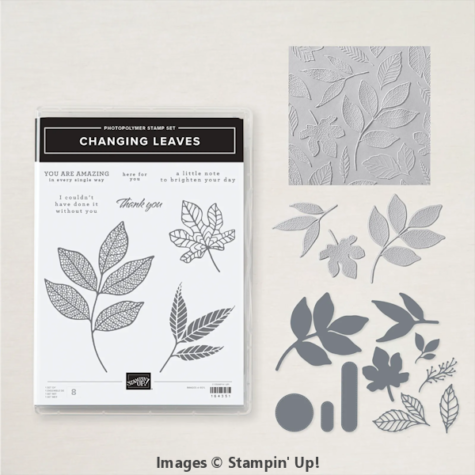 Changing Leaves Bundle |
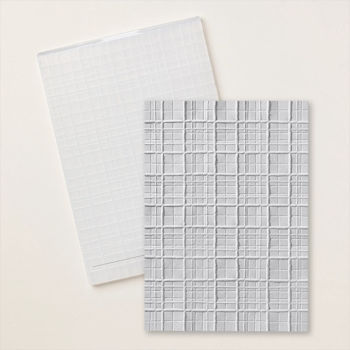 Forever Plaid 3D Embossing Folder |
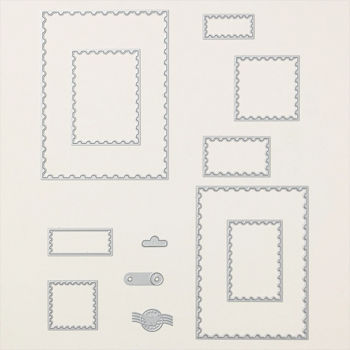 Perennial Postage Dies |
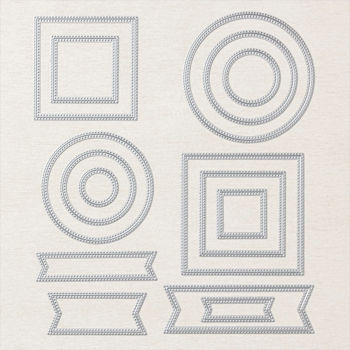 Stylish Shapes Dies |
Nuts & Bolts
Color Pallet
Sizes
- A2 (4-1/4″ x 5-1/2″)
- Clear Block D: 2-7/8″ x 2-11/16″
- Clear Block E: 3-7/16″ x 4-7/16″
Paper Cuts
- Card Base: Very Vanilla Thick 4-1/4″ x 11″, score and fold at 5-1/2″
- Front & Inside Layer 1: Copper Clay Cardstock 4″ x 5-1/4″ (cut 2)
- Front Layer 2: Pumpkin Pie Cardstock 4″ x 5-1/4″
- Front Layer 3: Pumpkin Pie Cardstock 2″ x 4-1/2″
- Inside Layer 2: Very Vanilla 3-1/4″ x 4-1/2″
- Circles: Variety of papers from the Sweet Days of Autumn DSP
- Other: Copper Clay, Early Espresso & Gold Glimmer papers & cardstocks for leaves
Construction
- Sponge card base front edges with Pumpkin Pie and Copper Clay ink
- Sponge Layer 1 (front) with Copper Clay Ink. Rough the edges with the blade of your scissors or your finger nail. Adhere to card base
- Using the “Stamp-Off” method, randomly stamp Layer 2 (front) with leaves with Pumpkin Pie ink. Die Cut with the largest die from Perennial Postage. Sponge with Copper Clay and emboss with the Changing Leaves Embossing Folder. Adhere to Layer 1.
- Use Forever Plaid embossing folder to emboss Layer 3, with the light side up. Adhere to Layer 2.
- Starting from the 2nd larges circle, use 3 concentric circles from Stylish Shapes Dies to cut various patterns from Sweet Days of Autumn DSP and White or Vanilla Cardstock.
- Cut various leaves with the Changing Leaves Dies from Copper Clay, Early Espresso and Gold Glimmer cardstocks.
- Arrange and adhere leaves as shown reserving one small leaf for the top circle.
- Adhere two DSP circles to card front with Stampin’ Dimensionals.
- Stamp “Thank You” on the smallest circle with Early Espresso Ink. Adhere to the medium circle.
- Adhere the small glimmer leaf to the top of circle.
- Tie a 3-ply bow with Linen Thread. Trim and adhere to the top circle.
- Arrange and affix gold gems
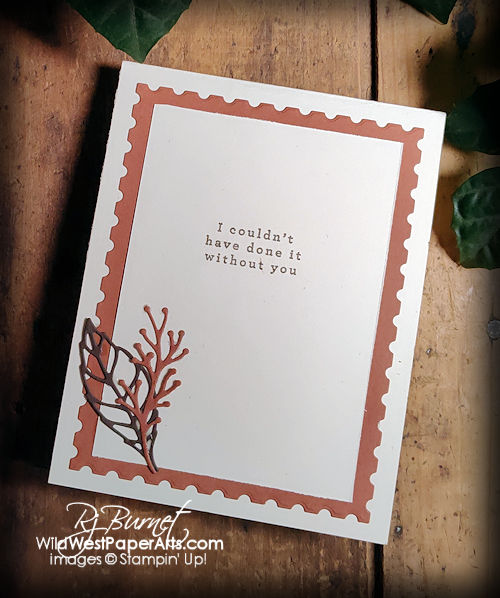
- Inside:
- Die-Cut Inside Layer 1 with largest Perennial Postage Die. Adhere to the inside.
- Use Early Espresso Ink to stamp greeting on the Inside Layer 2. Adhere to Inside Layer 1
- Arrange and adhere leaves as shown.

Your card will be a unique creation. Enjoy the process and embrace those mistakes.
I love to hear what you think about this Throwback Thursday project. Please consider leaving a comment by clicking the link below.
Please Click to Leave a Comment.
Thank you for visiting the Wild West today.

Make it a Wildly Creative Day!

Click to find out more!
 |
 |
Orange Theory Product Showcase:
This is a GORGEOUS card!!!! Thank you for sharing!!! It helps me learn new techniques!!!! Love love love!!!!
Thank you so much Melissa. It was a fun project.
I like this card! BEAUTIFUL, GORGEOUS! TFS
Thank you Therese.