
Throw WAY-back Thursday: Best of Autumn Free Mini-Tutorial!
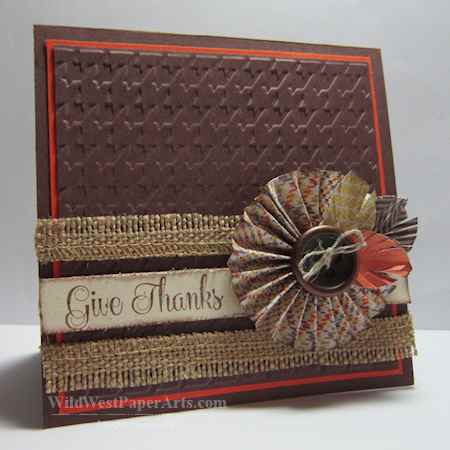
Welcome to another Throw WAY-back Thursday in the Wild West. Today we travel back to September, 2013. Lollies (aka rosettes) and burlap were all the rage that fall. If I remember correctly, the burlap I used was the selvedge edge on a wide piece of ribbon.
Hope you enjoy today’s sentimental journey.
Original Post Starts Here
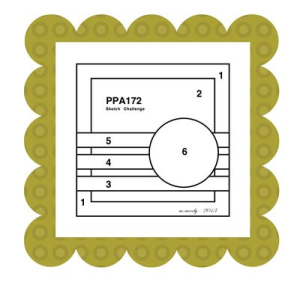
Pals Paper Arts Sketch Challenge PPA172
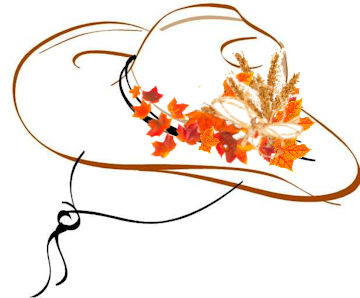
It’s almost here. Autumn will arrive with all its glory, this Sunday. What better time to feature the Best of Autumn Free Mini-Tutorial? And who better to share it with than You?!
Isn’t this a great sketch? Talented Pal, Margaret Moody, provided it for the Pals Paper Arts challenge this week. I’ve seen some really creative takes on this one.
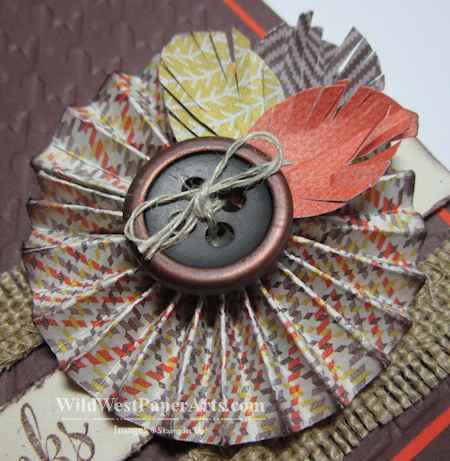
I’ve been stuck on feathers, rosettes (a.k.a. lollies), and handmade envelopes lately. We’ll skip the envelope today to save room for a cool trick featured at the Stampin’ Up! convention this year, making feathers. You won’t believe how easy this is.
Five Steps to a Perfect Paper Feather
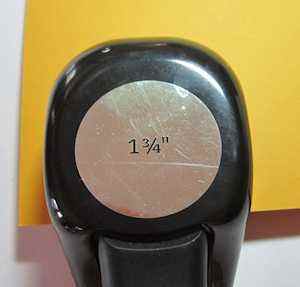
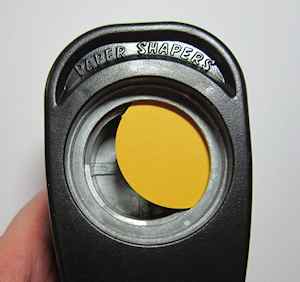
You’ll need a Circle Punch, Paper Snips and Designer Series Paper (DSP) or Card Stock (C/S). The feathers featured in the card above, are made using Sweater Weather DSP and a 1-3/8″ Circle Punch. For demonstration purposes, I’ll use Crushed Curry C/S and a 1-3/4″ Circle Punch but any size will do. In fact, mixing paper and sizes on a project gives the best result.
Step 1: Punch a circle from Designer Series Paper or Card Stock.
Paper Feather Step 1
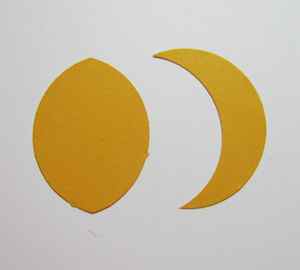
Step 2: Turn your punch upside down and slide the circle from Step 1 back into the punch about half way. Punch. If you did this correctly, you’ll have 2 pieces. One football shape and one half-moon shape. The football shape is your feather.
Paper Feather Step 2
Paper Feather Step 2
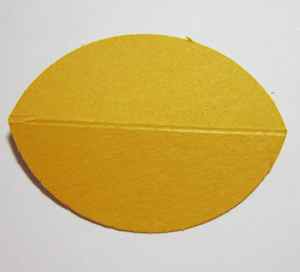
Step 3: Score feather down the middle, from point to point and fold.
Paper Feather Step 3
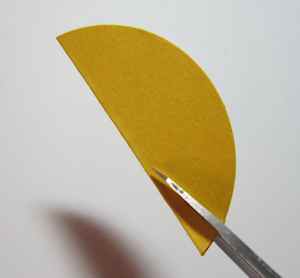
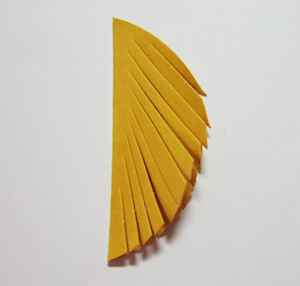
Step 4: Make thin cuts from the outer edge almost to the fold with Paper Snips. Be careful not to cut through the fold.
Paper Feather Step 4
Paper Feather Step 4
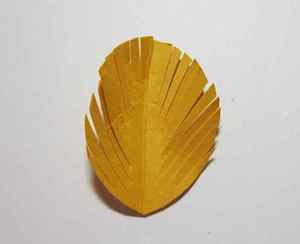
Step 5: Open up and fan out the feather a little for dimension.
Paper Feather Finished
That’s it! Make a few more in different colors and sizes to enhance any fall project.
Perfect Paper Feathers Using 1-3/8″ Circle Punch
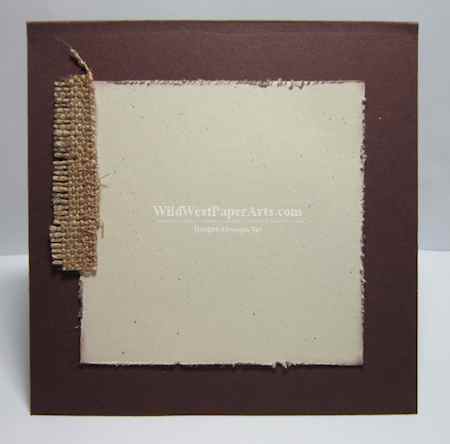
Before you leave, there’s one more thing to show you. The inside.
Best of Autumn – Inside
Nothing elaborate. A few leftover scraps of burlap trim pulls the whole thing together. Now it’s your turn.
Today’s Featured Items:
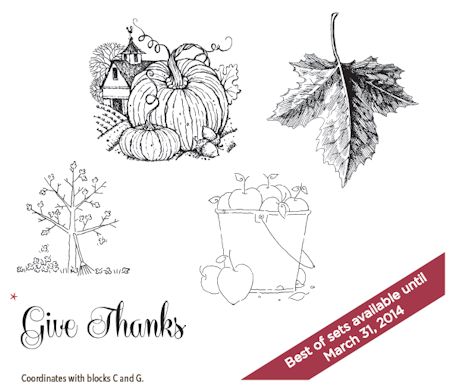
- Stamp Set – Best of Autumn (#134390 Clear Mount Only)
- Paper – Sweater Weather Designer Series Paper (#132184)
- Tools – Circle Punches (1-3/8″ #119860, 1-3/4″ #119850)
134390 Best of Autumn Stamp Set
PS. Collect all 12 “Best Of” sets and save your stickers. You’ll get a free stamp set (a $14.95 value) for every 6 you collect!
I’d love your feedback on the Best of Autumn Free Mini-Tutorial!
Great card. Thanks for the feather tutorial
Thank you and you’re welcome!