
Fun Fold Blog Hop: Shimmering Stripes
Welcome to the monthly Stampin’ Up!® Demonstrator Fun Folds Blog Hop, July 2026 edition. We’re so glad you’re here! Let the Fun Folds begin!
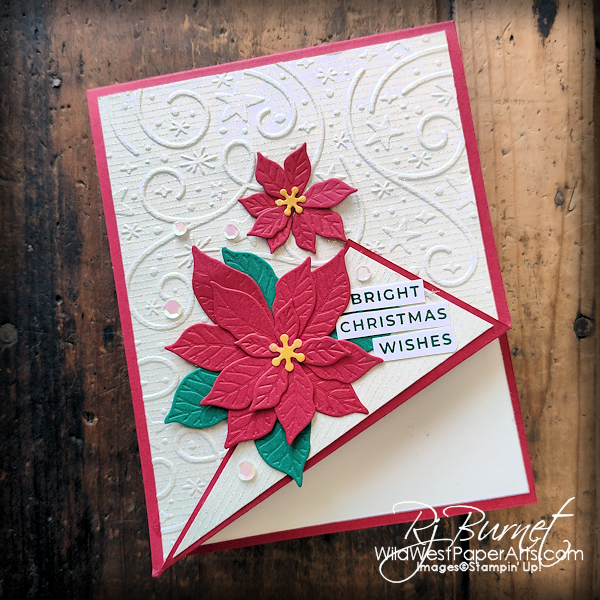
Where’s the fun fold? The lower, right corner is turned up and fastened down. Just a little fun to accent the beautiful supplies.
I have fallen in love with a few of Stampin’ Up!s newest additions. All of them used in this card.
- Pretty Poinsettia Stamps & Dies Bundle
- Shimmering Stripes Specialty Paper
- Swirls of Magic Embossing Folder
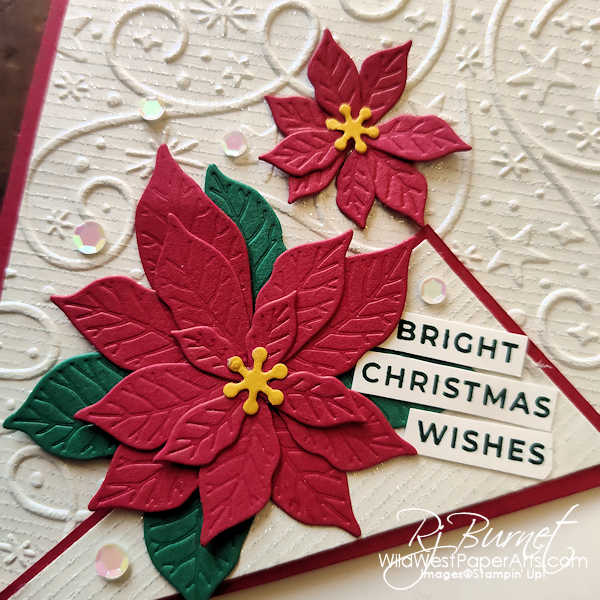
Today’s close-up above reveals the magic of embossing Shimmering Stripes Specialty Paper with Swirls of Magic Embossing Folder. Try it with your favorite embossing folder. Gorgeous!
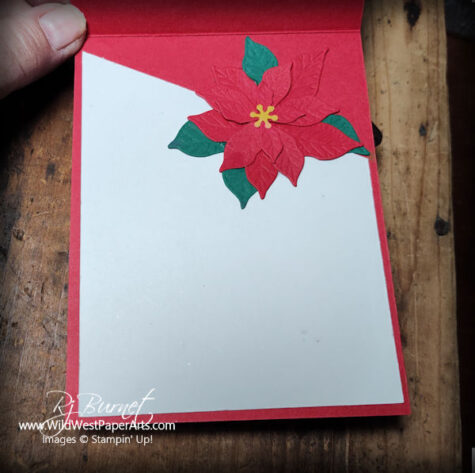
Magic continues throughout any card by adding special touches to the inside. Another Poinsettia will do just fine for this one.
Nuts & Bolts
All measurements are in inches.
Finished Size – A2 (4-1/4 x 5-1/2)
Acronyms & Jargon
- CAS = Clean And Simple
- CASE = Copy And Share Everything
- CS = Cardstock
- DSP = Designer Series Paper (aka patterned paper)
- SDSP = Specialty Designer Series paper (specialty patterned paper)
- SIP = Stamp Ink Paper
Basic Paper Cuts
- Cardstock:
- Base – Real Red 4-1/4″ x 11″; score at 5-1/2″ on long edge. See additional scoring below.
- Poinsettias – Real Red & Shaded Spruce several scraps
- Writing Panel – Basic White 4″ x 5-1/4″ trimmed as shown below.
- Specialty Paper
- Front panel – Shimmering Stripes 4″ x 5-1/4″ trimmed as shown below.
Construction
- Cut the Base – score and burnish
- Trim the specialty paper. Measurements below. Emboss the large piece with Swirls of Magic (or your favorite) Embossing Folder. Adhere.
- Fold up the bottom right corner along the scoreline, burnish, attach the small piece of DSP and glue down.
- Die cut poinsettia pieces, assemble, glue and adhere.
- Stamp the greeting, cut pieces apart and adhere focal piece
- Trim to the dimensions below. Flip so the cut-off corner is at the top right (inside). Adhere. See images above for help.
- Die cut one more large poinsettia. Assemble, glue and adhere to the top right corner, overlapping the writing panel.
- Embellish outside with gems or sequins if desired.
- Seal it with a kiss and send it on it’s merry way.
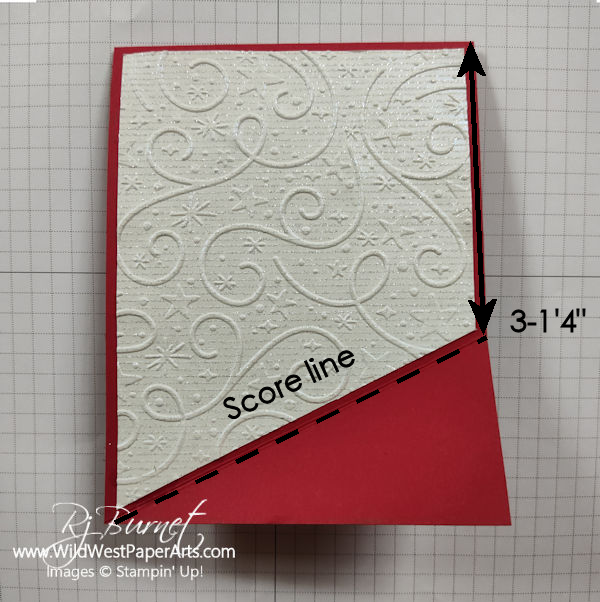 Scoreline Measurement |
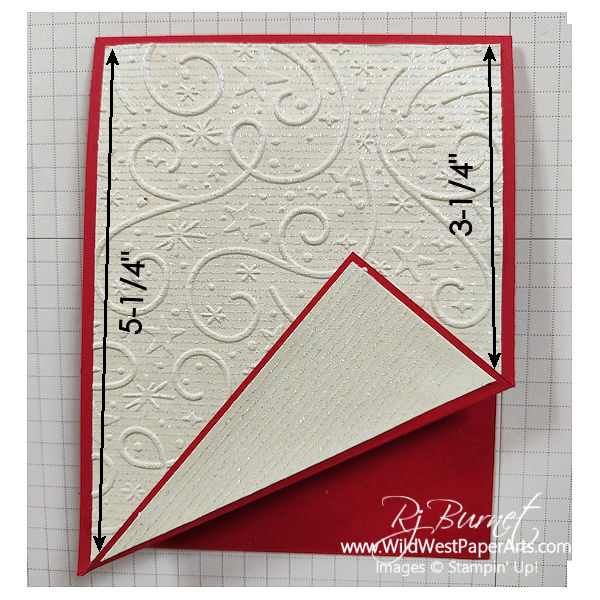 Specialty Paper & Writing Panel Cutting Measurements |
Click to leave a comment.
Make sure to visit the blogs below for more inspiration. I can’t wait to see what everyone has created. How about you?
SU Demo Fun Fold Blog Hop Lineup
- Beth McCullough
- Karen Finkle
- Su Mohr
- Debbie Mageed
- Lisa Ann Bernard
- Mary Deatherage
- Sue Jackson
- Rae Burnet
- Michele Deschenes
Shimmering Stripes Product Showcase
Don’t forget this fantastic Paper Pumpkin New Subscriber Special!
 Click to learn more! |
 Paper Pumpkin August 2026 – Kindred Greetings |
Have a wildly creative day!


Click to shop 24/7!
Wow, Rae, this is so pretty! I love your idea of turning up the corner. I haven’t done that in ages, so I will try to remember that. I’m envious of people making holiday cards when it’s 90+ degrees outside. I just can’t do it HAHA! Thank you for joining the blog hop this month!
Striking card, Rae! That angle sets off the poinsettias beautifully!
Wow! Rae, that is an elegant looking card!