Bouncing Bunny Fold

Time to put those bone folders to work with to another Creative Creases Challenge. My project today is light and airy in anticipation of spring. Here in Northern Nevada, it’s been a long, cold, snowy winter. Here’s to spring and bouncing bunnies.
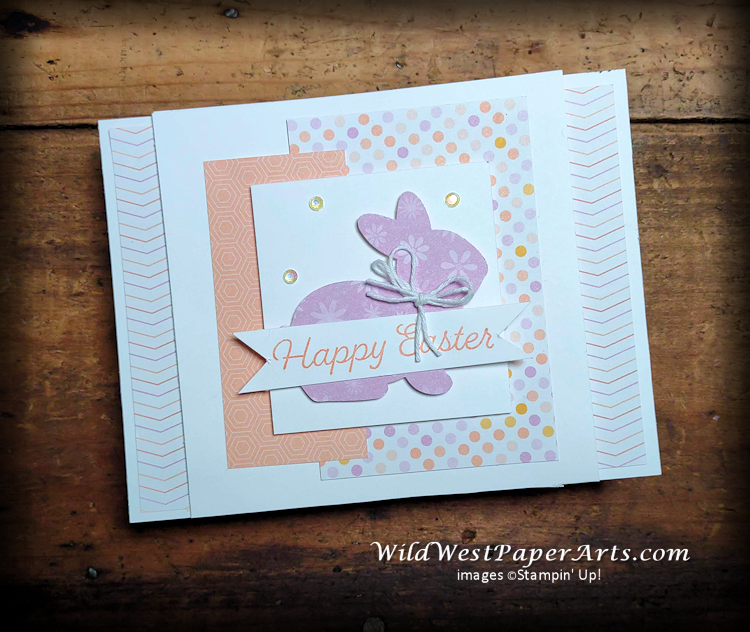
You may wonder why I’m calling this a Bouncing Bunny Fold. Well, I don’t know if this fold even has an official name. One crafter calls it a Flying Seagull Fold. If you know what it’s really called, let me know in a comment below. I’d really like to know. Before we get started, thanks are due. Thank you to fellow crafter Susan Campfield for this amazing fold (she calls it Flying Seagul Fold). The cover design is based on a card by Mary Fish, leader of the Pals. Actually, it’s almost identical. I’ll post my CASE of her original soon. Thank you Ladies!
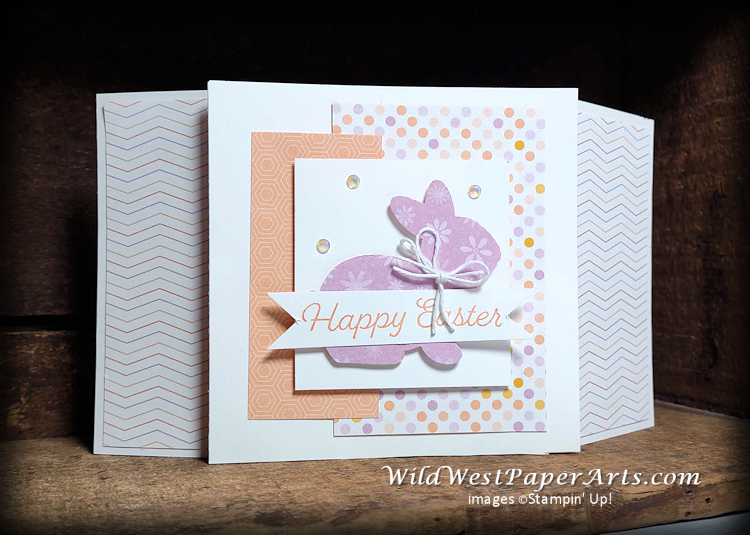 |
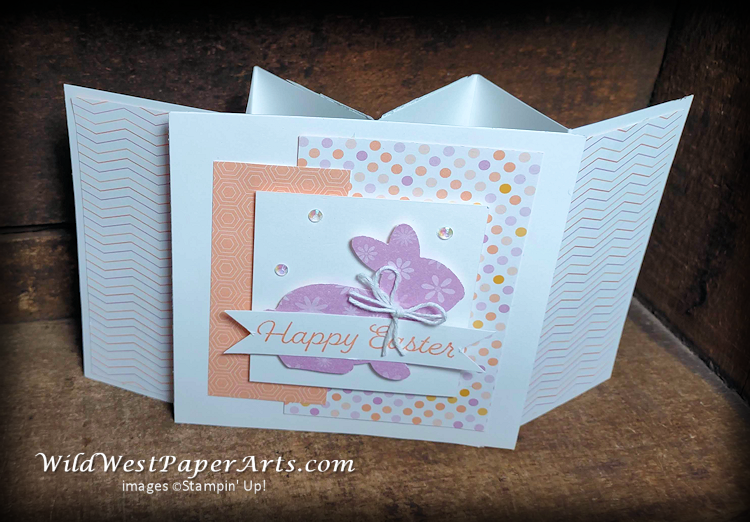 |
Nuts & Bolts
Basic Paper Cuts: (OUCH!)
- Thick Basic White: 8-1/4″ x 4-1/4″ (2 pcs); 4-1/4″ x 4-1/4″ (1 piece).
- For the best results, make sure to use the thick version of Basic White for all the base pieces. Normal basic white is just too thin for this card.
- Basic White: 2-1/2″ x 2-1/2″ (1 piece); 5/8″ x 3″ (1 piece)
- Designer Paper (DSP) : 2″ x 4″ (2 pcs); 2-1/2″ x 3-3/4″ (1 piece); 1-1/2″ x 3-1/4″ (1 piece); plus small piece for punched image
Construction:
- Score both 4-1/4″ x 8-1/4″ pieces on the long edge at 2-1/4″, 4″ and 6-1/4″
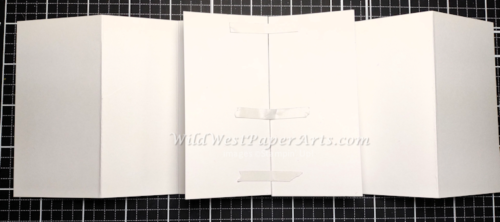
- Fold and burnish both pieces as shown below. Arrange the pieces so the largest panel is on the outside as seen below.
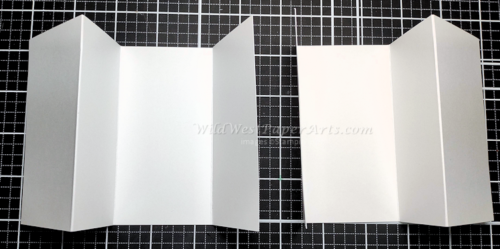
3. Create the Base. Fold back the center two panels and join the two halves with tape. I used Tear & Tape here.
4. Create the Bounce. Center and adhere the 4-1/4″ x 4-1/4″ Thick Basic White piece to the joined panels from step 3 with Liquid Glue. You should have about 1/8″ between the edge of this piece and the fold.
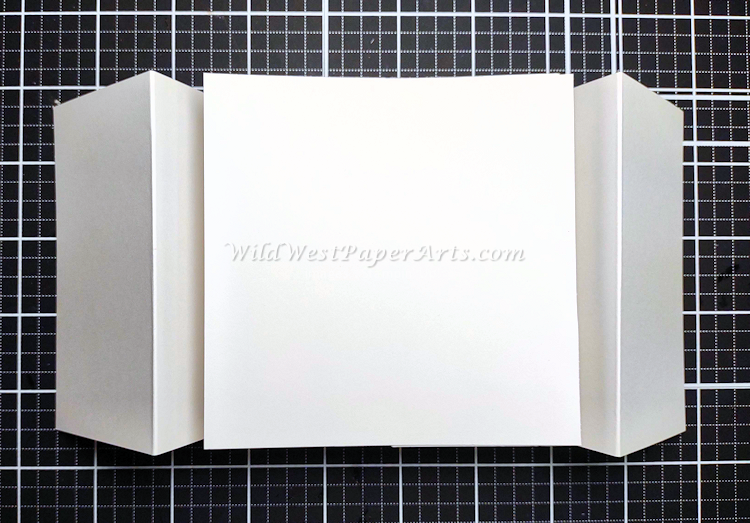
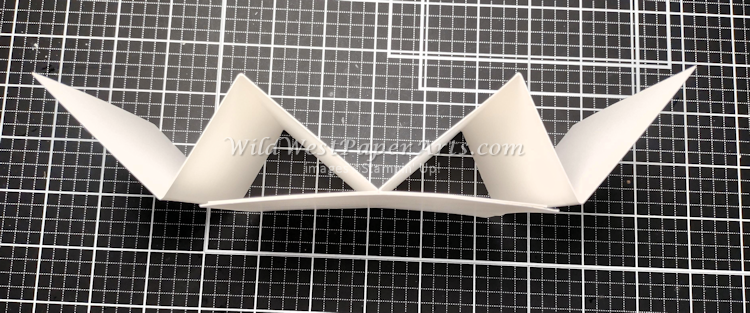
Looking down on the standing card.
5. Decorate the card with your favorite paper and images. Here’s what I did.
- Adhere the two 2″ x 4″ DSP pieces to the panels on the card.
- Adhere 1-1/2″ x 3-1/4″ and 5/8″ x 3″ DSP to and the center panel as shown.
- Adhere the 2-1/2″ x 2-1/2″ panel with Stampin’ Dimensionals.
- Punch the Bunny from DSP and adhere with Stampin’ Dimensionals.
- Stamp the 5/8″ x 3″ piece of Basic White with greeting. Cut banner ends if desired. Adhere over bunny with adhesive of your choice.
- Tie a double bow with white Baker’s Twine
- Adorn with Irridescent Rhinestones

P.S. Need a place to write your message? Plenty of room on either side after you open the fold.
Now, it’s your turn. Create your fun fold and enter the challenge.



great tutorial; thank you for posting; I’ve read this on Sue Stampfield’s blog.
Thank you Sue. Yes, I CASEd it from Sue.
Such a cute card. Your instructions are great and easy to follow.
What a great fun fold card, Rae! I truly haven’t seen this one before and the “bouncing bunny” fold is a great name, for sure. I will have to think about how to use it soon. Have a great weekend, my friend!
Thank you Debbie. I found this fold by accident while looking for something fres. I think it may have been created by the blogger, Susan Campfield.
Bunnies…I love them BUT especially purple ones! Thank you for the great pics and instructions. I did get a chuckle out of your paper cuts
Thank you Karen. I love to make people chuckle.