
Today and Tomorrow with Creative Creases #75
![]()
Happy Creative Creases Challenge Day! Thank you to everyone that took time to share their talent in the last Creative Creases Challenge. Your projects are always amazing and creative. Welcome back for more inspiration from my fellow Design Teammates.
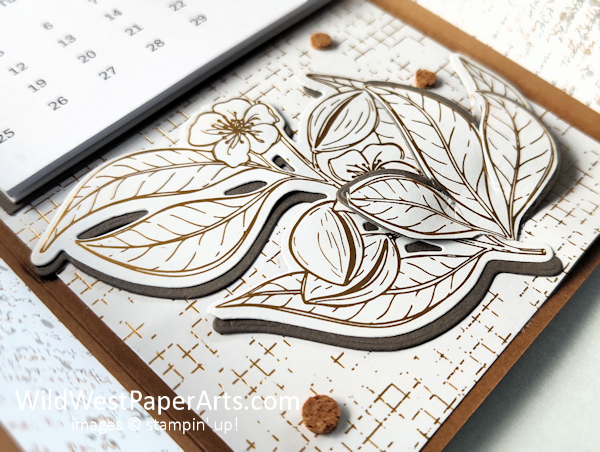
My fold today is based on a Bridge-Fold card. The difference? I lost the bridge and turned it into a birthday card and showcase for a tiny calendar.
Don’t forget to click the “Challenge Link” toward the end of this post. Even if you don’t enter the challenge, you’ll want to see what the rest of the Design Team has created.
Let’s get started….
Technically the back of the card is shown below, with a birthday greeting. Turn it over to reveal an annual calendar that can be displayed all year.
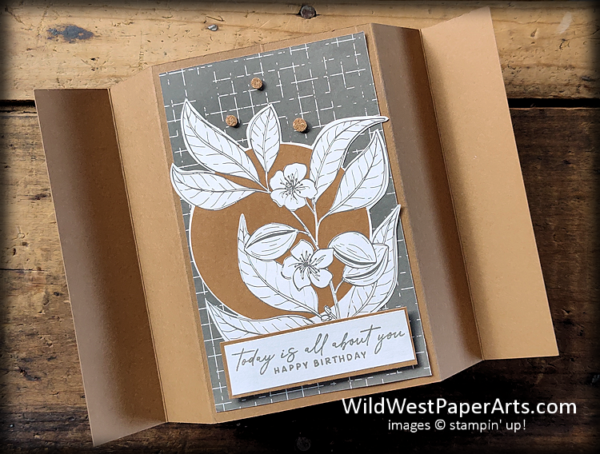
This one is going to a some with a February birthday. I’ll circle the day just before I send it.
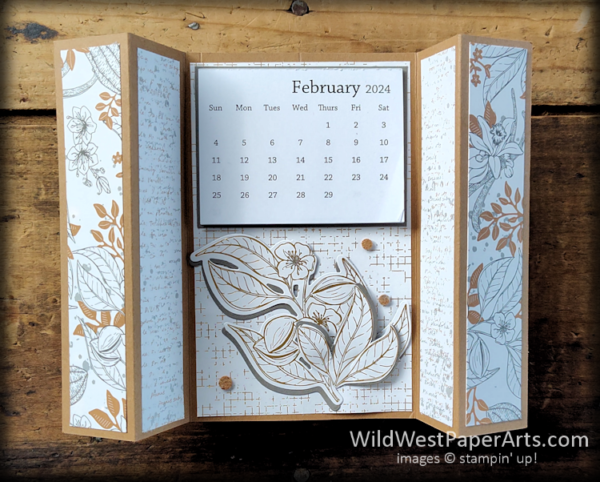
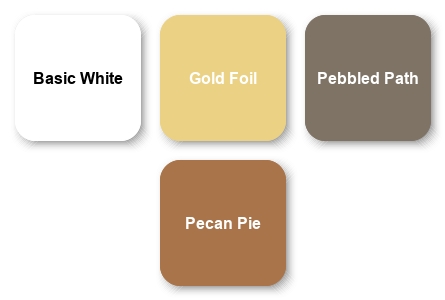
I’m in love with the beautiful earthy tones and florals in the Nature’s Sweetness products used here.
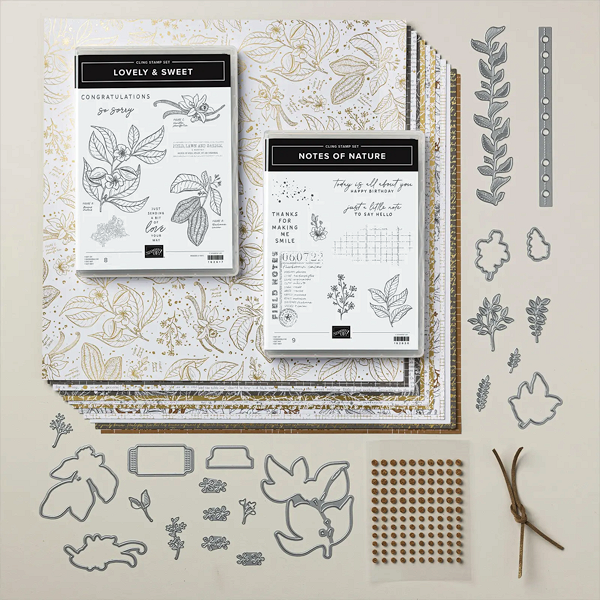 Nature’s Sweetness Collection #162645 |
 Nature’s Sweetness SDSP #162616 |
Nuts & Bolts
Finished Size
- A2 (4-1/4″ x 5-1/2″)
Paper Cuts
- Pecan Pie Cardstock:
- Card Base 5-1/2″ x 8-1/2″; score at 1-1/4″, 2-1/2″, 3-1/2″, and 4-3/4″
- Greeting mat 1″ x 3″ (for Happy Birthday Greeting)
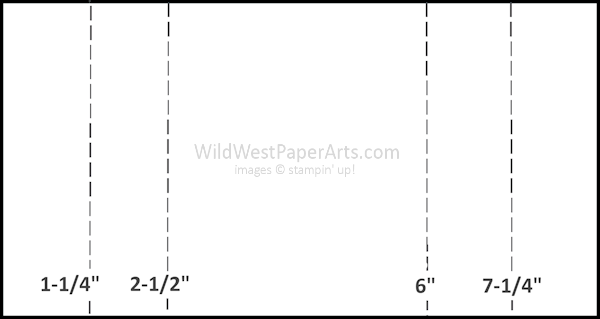
Corrected Score Measurements
- Pebbled Path Cardstock:
- Calendar mat 2-5/16″ x 3-1/8″ (or 1/8″ larger than the calendar)
- Floral Mat (for image beneath the calendar) 3-1/2″ x 3-1/2″ See close-up
- Basic White Cardstock:
- For Greeting 3/4″ x 2-3/4″
- Nature’s Sweetness Specialty Designer Series Paper:
- 1″ x 5-1/4″ strips, 4 pieces (2 each of 2 different patterns)
- 3-1/4″ x 5-1/4″, 2 pieces (2 different patterns)
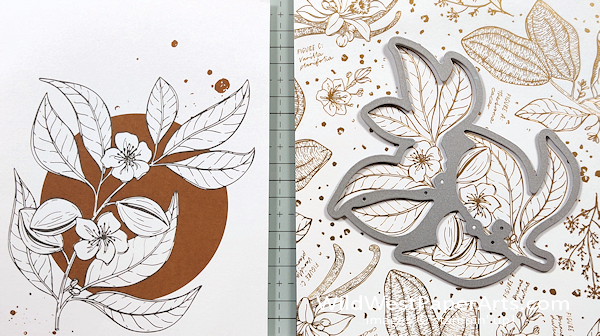
- Floral Image over Circle piece for fussy cutting
- Gold Foiled image that matches up with the corresponding Lovely & Sweet die
 |
 |
Construction
- Prepare Card Base
- Attach all Specialty Designer Series Paper pieces. Refer to the finished card for placement, both front and back.
- Fussy cut the floral image and adhere to the back where shown.
- Stamp the greeting in Pebbled Path Classic Ink and build the greeting piece. Adhere the greeting with Stampin’ Dimensionals.
- Attach three Adhesive-backed Cork Rounds where shown.
- Build the calendar piece by adhering the calendar to the Pebbled Path cardstock piece. Adhere where shown using either Liquid Glue, Tear & Tape or another strong glue.
- Die Cut the floral piece AND the corresponding Pebbled Path Cardstock piece.
- Trim the lower 3-leaf section from both the image AND the cardstock. Cut between the 3-leaf sections.
- Using liquid glue, adhere cardstock and floral pieces offsetting the Pebbled Path Cardstock piece to look like a shadow.
- Adhere the large floral image under the calendar where shown.
- Use a bone folder to gently curve leaves on the 3-leaf section. Adhere with both liquid glue and Mini Stampin’ Dimensionals as seen in close-up.
Now, it’s your turn. What will you create for Creative Creases Challenge #74?
Don’t forget to leave a comment and visit the other Design Team posts for great inspiration.
Click to Leave a Comment

Thank you for visiting today.…

Have a Wildly Creative Day!

Today and Tomorrow Product Showcase:
Rae, your card is just lovely! It’s so fun when you can die cut the dsp or fussy cut out portions like you did here. It makes the card elements coordinate so perfectly. This card style lends itself well to showcasing pretty dsp with all the panels to decorate!
Thank you Carrie. I love that Stampin’Up! has this in their arsenal.
Fun card! I definitely will give it a try. Love your creativity.
Thanks a million Ruth. Make sure you have the updated score measurements. I just corrected them.
Hi Rae, I love using this design for a calendar. Are your scoring measurements correct on the instructions, though? It seems like it should go from 2-1/2 to like 5-1/2 then 6-3/4 so that there is the wider space in the center. Or am I just reading it wrong?
Uh Oh! Fixing it now. It must have been late when I posted the template. Yikes and THANK YOU Pat!
What a great card! I love the colors!
Thank you Mary Lou!
Beautiful fun fold card, Rae! I just love that designer paper. It’s on my next order that’s on hold right now. This calendar card is just wonderful. I’m sure your friend will love having this on display. Have a great weekend!
Thanks a million Debbie. Have fun in your craft room this weekend.
This is awesome, Rae.
Thank you Sheila.
Thank you so much for sharing the construction of this beautiful card.
Thank you Judy. Make sure you have the corrected score measurements. There was an error early on.
Love your work!
Thank you Debra!