
Pals Blog Hop: Take a Dive into New Colors
![]()
Welcome to the Stampin’ Pretty Pals’ Blog Hop!
This month, we’re diving into the beautiful and brand-new 2025-2027 Stampin’ Up! In Colors! Whether you’re a seasoned crafter or just starting on your stamping journey, these fresh hues are giving us all inspiration. Click through each link at the bottom of this post to “hop” along and see how our community is using these beautiful new shades in their projects. You’ll leave with inspirational ideas, and maybe a few new must-haves on your wishlist!
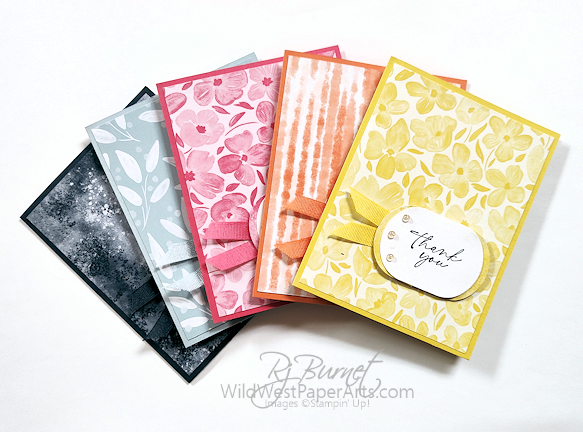
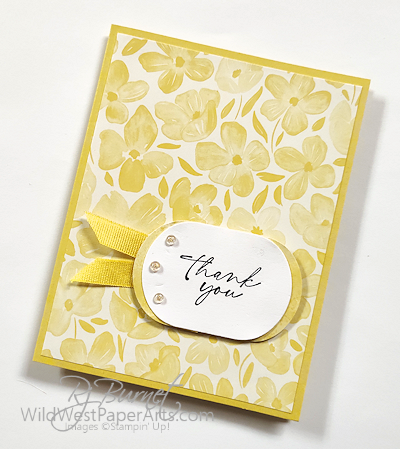
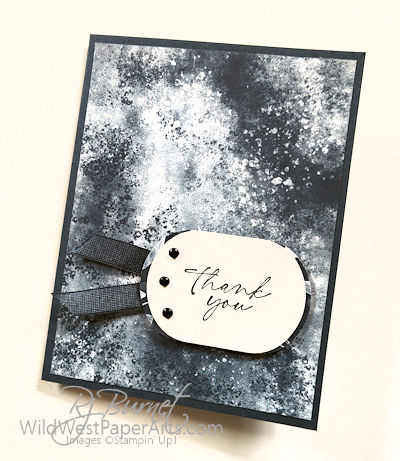
Great colors and coordinating patterned paper make clean and simple designs a snap. Ribbon and a few embellishment make them special.
The Palette
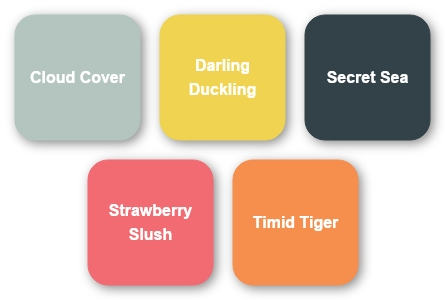
Stampin’ Up! 2025-2027 In Colors
The Patterned Paper
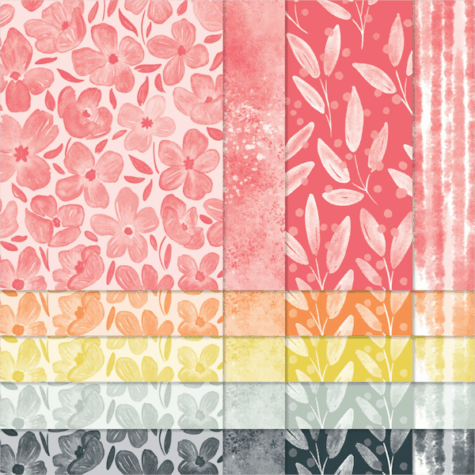
2025-2027 In Color Designer Series Paper
And, the cards
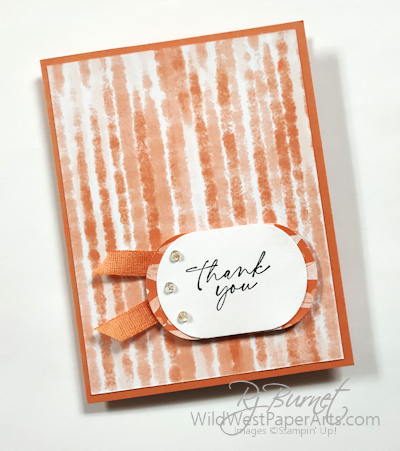 Timid Tiger |
 Darling Duckling |
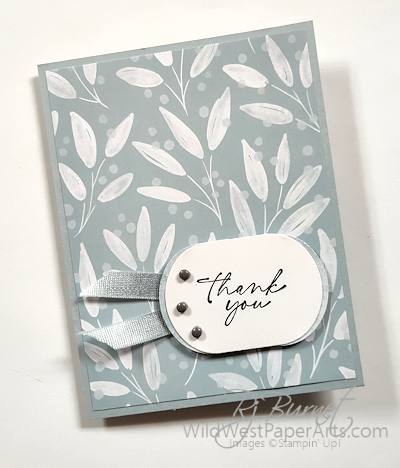 Cloud Cover |
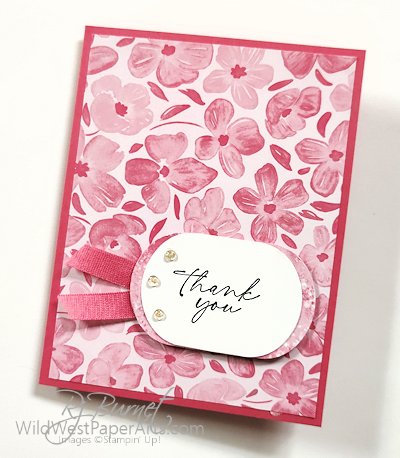 Strawberry Slush |
 Secret Sea |
|
There you have it! A collection of new colors with loads of possibilities. There are also coordinating embellishments, markers and more.
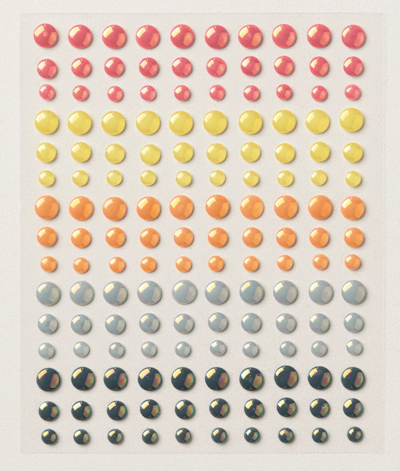 2025–2027 In Color™ Flat Pearls |
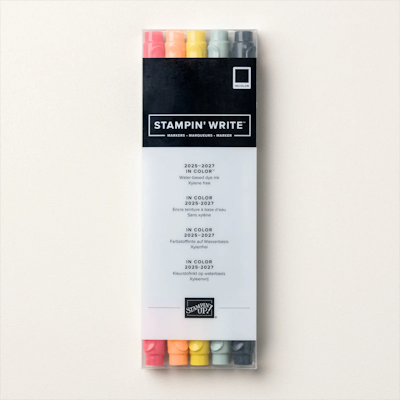 2025–2027 In Color™ Stampin’ Write Markers |
Find more at Stampin’ Up!
Nuts & Bolts
All measurements are in inches.
Finished Size – A2 (4-1/4 x 5-1/2)
Acronyms & Jargon
- CAS = Clean And Simple
- CASE = Copy And Share Everything
- CS = Cardstock
- DSP = Designer Series Paper (aka patterned paper)
- SDSP = Specialty Designer Series paper
- SIP = Stamp Paper Ink
Paper Cuts
- Cardstock –
- Base: 5-1/2 x 8-1/2, score at 4-1/4
- Basic White: 4 x 5-1/4; scraps for greeting
- Patterned Paper –
- Layer 1: 4 x 5-1/4
- Scraps for backing up the greeting
- Other Supplies –
- Coordinating Ribbon: about 4 inches
- Pearls or other embellishments
- Punch (I used the retired Modern Label Punch)
- Secret Sea Classic Ink.
Construction
- Score and burnish card base
- Adhere layer 1 to the card base
- Stamp greeting [with Secret Sea Ink) on scrap white making sure it’s the correct size for the punch you will use. Punch out the greeting
- Use the same punch to crop out a piece of coordinating DSP in a different pattern. Cut in half vertically. Use multipurpose liquid glue to adhere these pieces to the back of the finished piece in step 3.
- Fold the ribbon in half and glue to the card paying attention to placement of the greeting piece.
- Adhere the greeting piece over the ribbon with Stampin’ Dimensionals.
- Embellish with gems.
- Stamp a greeting on the 4 x 5-1/4 Basic White piece. Adhere to the inside of the card for a writing panel.
- Glue a leftover strip of DSP to the left edge of the writing panel
- And, you’re done!
Before you go please consider leaving a comment. It means so much. Just click the link below.
Click to Leave a Comment
There’s a whole lineup of great inspiration waiting for you! Scroll down to hop through the rest of the Blog Hop Team’s creations and fill your crafty cup. And don’t miss next month’s theme: My Favorites in the New Catalog — because you know we’ve already picked our must-haves!
Until then, have fun in your craft space.
Stampin’ Pretty Pals Blog Hop
- Mary Fish at Stampin’ Pretty
- Lisa Ann Bernard at Queen B Creations
- Sue Jackson at Just Peachy Stamping
- Karen Hallam at Karen’s Stamping Habit
- Beth McCullough at Stamping Mom
- Mary Hanson at Up North Stampin’
- Windy Ellard at Windy’s Wonderful Creations
- Su Mohr at Aromas And Art
- Tricia Chuba at ButterDish Designs
- Stesha Bloodhart at Stampin’ Hoot
- Rae Burnet at Wild West Paper Arts
- Peggy Noe at Pretty Paper Cards
- Debbie Mageed at Secrets to Stamping
Thank you for visiting …..

 In-Color Product Showcase:
HAPPY CARDS! Thank you so much for sharing!
Thank you Therese
Pretty cards. I love that paper.
Thank you Shila. Love the paper too!
Great “clean & simple” cards, Rae! Love this designer paper!
Thank you Su. Me too. I think this set of Color Family DSP is the best ever!
Beautiful set of cards!
Thank you Windy. Love this new DSP.