
Pals Blog Hop: Seasons Greetings
![]()
Welcome to the Stampin’ Pretty Pals’ Blog Hop! Ready to sprinkle some holiday magic into your crafting this season? This month’s theme, Season’s Greetings, is all about celebrating the joy of handmade creations. The Stampin’ Pretty Pals have come together to share festive cards and paper craft ideas using our favorite Stampin’ Up! products — each project designed to inspire your creativity and help you capture the spirit of the season.
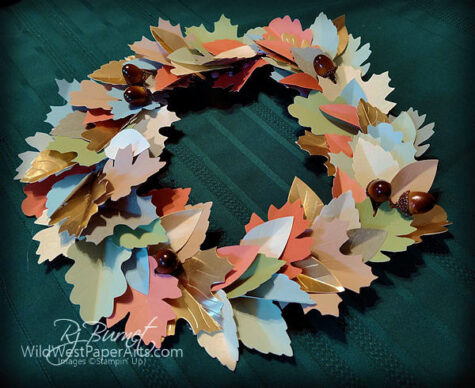
Nothing says “Season’s Greetings” like a welcoming wreath. The beautiful colors in this kit mimic the changing colors of autumn.
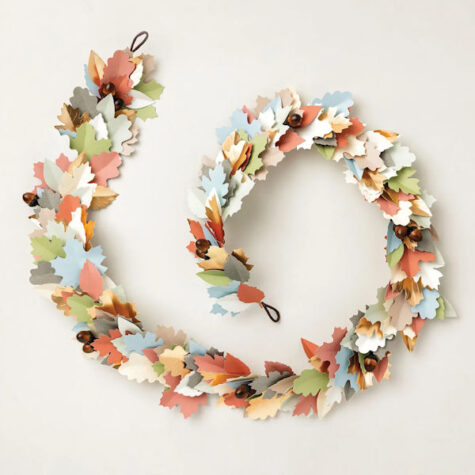
My wreath was created with the help of a kit called Harvest Home Garland from Stampin’ Up! The kit makes one beautiful 5’5″ swag (garland) or two 14″ wreaths with many leaves left over for other projects. One for you and one for a friend. Perfect! All you need is a hot glue gun, wire cutters and a bone folder.
 Harvest Home Garland Kit |
 Harvest Home Garland Kit Contents |
The colorful leaves are pre-die cut and dry embossed with life-like accents. All you need to do is punch them out with your fingers, fold them in half and you’re ready to assemble.
Let the conversion begin!
Supplies:
- Harvest Home Garland Kit (#166228)
- 12″ Petal Pink 5/16″ Braided Trim (#166140)
- Heat Tool (#129053) Optional
- Bone folder (#102300) Optional
- Hot Melt Glue Gun
- High Heat Glue Sticks (3 short sticks)
- Pliers with wire cutter (needle nose works well)
Construction:
- Snip the included wire in half with wire cutter. Set one half aside for a second wreath.
- Using the pliers, create a loop at one end of the wire.
- Create a circle with the wire and link the two ends together. After linking, close with the pliers.
- Create a hanging loop and attach to the back of the wire circle (for hanging).
- Starting at the top right of the circle, begin hot gluing leaves in layers. Stagger shapes and colors. If you’re not sure how many leaves to layer at a time, make a simple layer and tuck in more leaves later.
- I applies some glue to the wire and some to the leaf I was adding at the time to add strength.
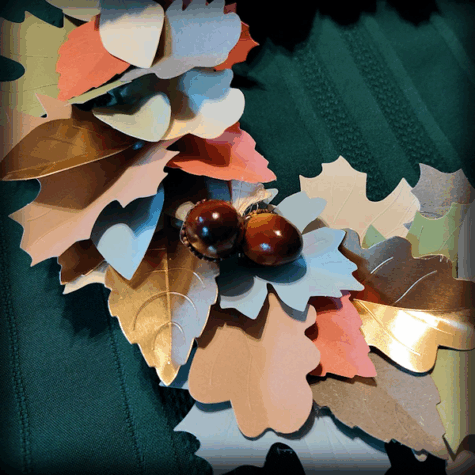
- Insert acorns as you go. I used 6 of them on this wreath.
- Remove the glue strings and you’re ready to enjoy your new home decor piece.
Wild West Glue Tip: Remove the strings of cooled glue by lightly going over the wreath with a heat tool or hair dryer.
Before you go please consider leaving a comment. It means so much. Just click the link below.
Click to Leave a Comment
I hope today’s project sparked some holiday cheer and crafting inspiration! There’s so much more to see — keep the fun going by following the lineup below to visit the rest of the Pals. And be sure to join us next month when we create our own Winter Wonderland!
Stampin’ Pretty Pals Blog Hop
- Mary Fish at Stampin’ Pretty
- Tricia Chuba at ButterDish Designs
- Debbie Mageed at Secrets to Stamping
- Windy Ellard at Windy’s Wonderful Creations
- Lisa Ann Bernard at Queen B Creations
- Stesha Bloodhart at Stampin’ Hoot!
- Peggy Noe at Pretty Paper Cards
- Beth McCullough at Stamping Mom
- Su Mohr at Aromas And Art
- Rae Burnet at Wild West Paper Arts — You made it to the Wild West!
- Sue Jackson at Just Peachy Stamping
- Mary Hanson at Up North Stampin’
Harvest Home Wreath Product Showcase:
Thank you for visiting

You’re absolutely right, Rae! The first thing I used to do was hang a pretty wreath for the holidays. I really love this one! Those acorns are so cool!
Love wreaths any time of the year. Thank you Debbie.
Love it.
Thank you Juanita.
Beautifully done, Rae! Such a perfect way add a little seasonal decor.
Thank you Tricia!
This wreath is so great! Now you’ve inspired me to create one for Thanksgiving!
There’s still time.Thank you Mary.
Beautifully done, Rae! Your photo shows off those fabulous acorns!
Thank you Su.
Wow…I love your wreath! Enjoy using it!
Thank you Windy.