
Creative Creases #113: Garden Paradise
Creative Creases #112: Special Delivery
![]() Are you ready for spring and all of it’s beautiful colors? I sure am. While we wait patiently for the season to change why not create some blooms of our own? Welcome to the March 2026 edition of Creative Creases Challenge.
Are you ready for spring and all of it’s beautiful colors? I sure am. While we wait patiently for the season to change why not create some blooms of our own? Welcome to the March 2026 edition of Creative Creases Challenge.
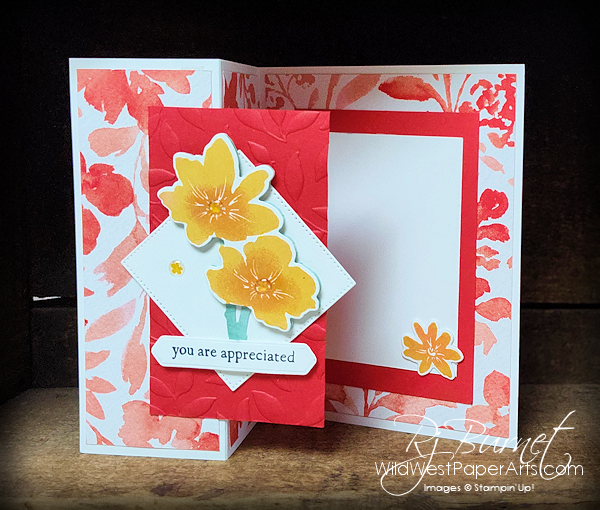
Today’s fun-fold is created with new items from the Garden Poetry Suite. The suite is packed with vibrant colors and a fun Hybrid 3D Embossing Folder that will make your creation stand out.
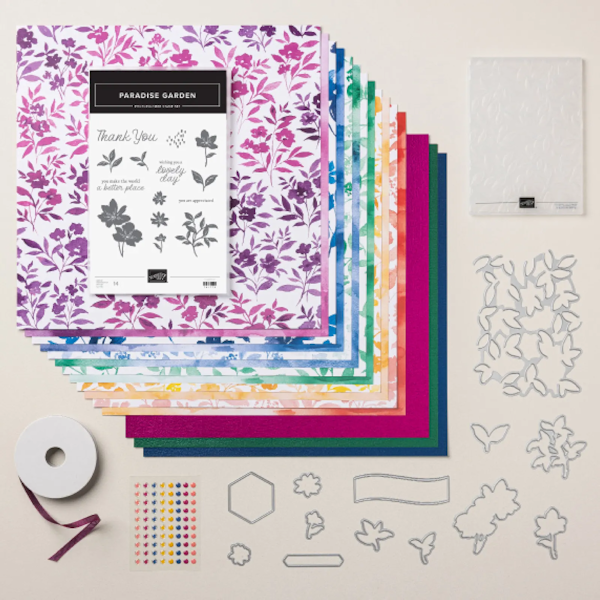
Garden Poetry Suite
Don’t need the entire suite? I get it. The individual elements used in my fun fold are shown below. I really appreciate that we can purchase an entire collection of products or pick and choose. Sure makes it easy to replace consumables when we use them up. Perfect for the paper collector too!
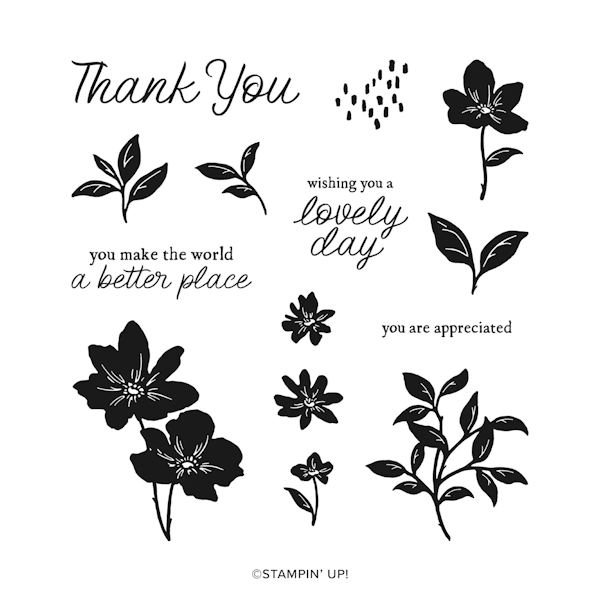 Paradise Garden Stamp Set |
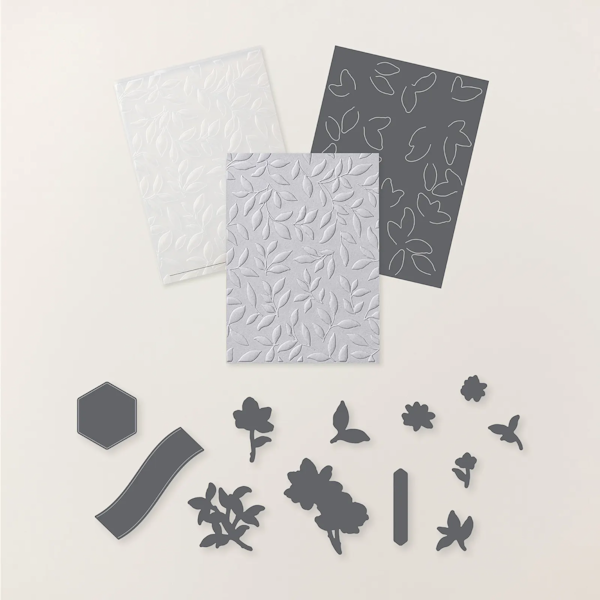 Paradise Garden Hybrid Embossing Folder |
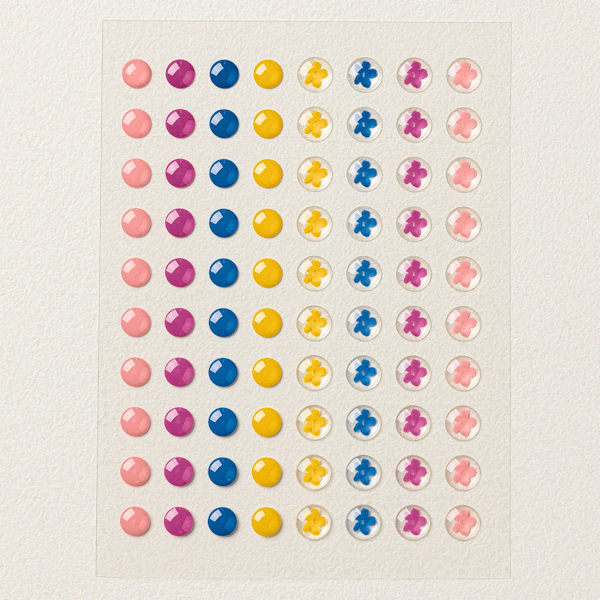 Garden Epoxy Dots |
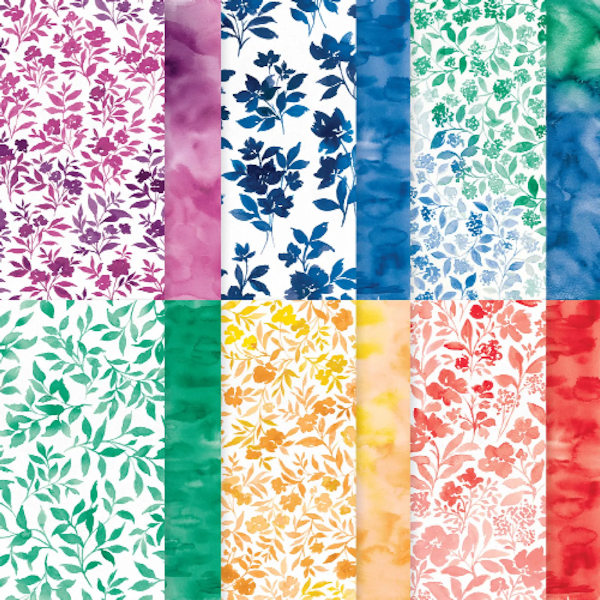 Garden Poetry DSP |
What I love: The bright, bold colors on both sides of the Designer Series Paper and the Hybrid Embossing Folder.
Ready to make the card?
Nuts & Bolts
All measurements are in inches.
Finished Size – A2 (4-1/4 x 5-1/2)
Acronyms & Jargon
- CAS = Clean And Simple
- CASE = Copy And Share Everything
- CS = Cardstock
- DSP = Designer Series Paper (aka patterned paper)
- SDSP = Specialty Designer Series paper (specialty patterned paper)
- SIP = Stamp Ink Paper
Colors
Paper Cuts
Cardstock:
- Card Base – Thick Basic White 8-1/2 x 5-1/2; score at 2-1/8 & 4-1/4
- Layers – Poppy Parade 2-1/2 x 4-1/4 (1 piece); 3 x 4-1/4 (1 piece)
- Writing Panel – Basic White 2-3/4 x 4 (1 piece) plus small pieces for flowers.
- Square for front – Basic White 2-1/4 x 2-1/4
Designer Series Paper:
- 4 x 5-1/4 (1 piece); 2 x 5-1/4 (cut 2 pieces) plus scraps for die cutting
Construction
- Fold & burnish card base like an accordian.
- Adhere DSP on coordinating panels.
- Adhere larger Poppy Parade Cardstock in the center of the inside panel
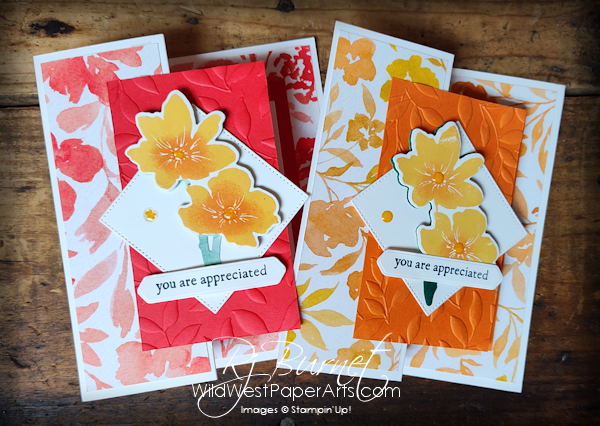
- Dry Emboss smaller Poppy Parade CS with Garden Paradise Embossing folder. Apply glue to the left side of this panel, glue to the left card panel so it lines up with the panel on the inside when folded.
- Use 2″ square from Stylish Shapes Dies to cut a square. Adhere to embossed layer as seen in the photo above.
- Stamp and die-cut desired number of flowers and greenery. Adhere to the card as shown in the photo above.
- Stamp & die-cut front greeting. Adhere to the card as shown in photo above.
- Embellish.
Experiment with all the colors included in the suite. So much to love!
Before you go please consider leaving a comment. It means so much. Just click the link below.
Click to Leave a Comment
Time to play! Create a fun-fold and upload it to the Challenge Gallery.
Click to enter the challenge
Thank you for visiting.

So pretty, Rae! And I love the orange version you show at the bottom of the post, too! Have a wonderful weekend!
Thank you Carrie. The perfect paper to usher in spring.
Beautiful!
Thank you Margaret. So glad you enjoyed the card.
Gorgeous card. Thx for the instructions for this fun fold. Love it.
Thank you CJ and you’re welcome.
What a pretty card, Rae! Wow, the papers and flowers are wonderful. I haven’t seen these yet but may need to take a look! Have a great weekend.
Thank you Debbie. I can’t wait to see what you do with this paper.