
Fun Fold Blog Hop: Moonlit Flora
Welcome to the monthly Stampin’ Up!® Demonstrator Fun Folds Blog Hop, April 2026 edition. We’re so glad you’re here! When you’re done here, don’t forget to visit the rest of our talented paper artists. You’ll find a list at the end of this post.
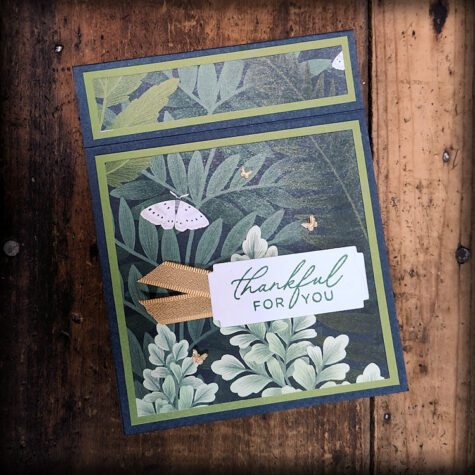
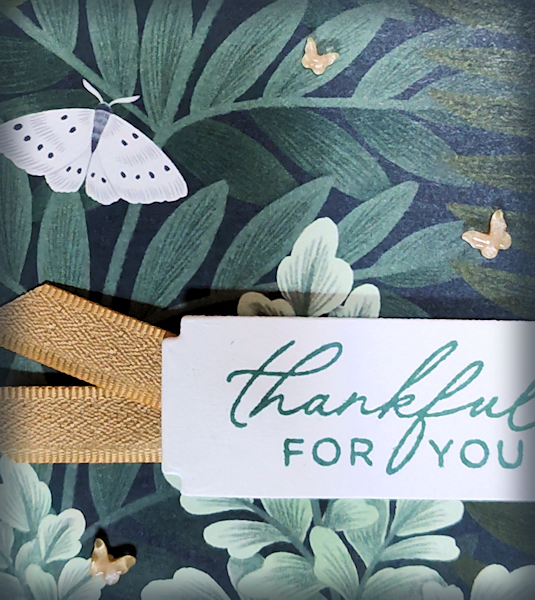
My project features the Book Binding Fold. This fold is about as simple as a fun fold can be. And, the magnificent Designer Series Paper (DSP) makes this project one of the easiest cards you’ll ever do.
I used products from the May-August 2026 catalog including some sweet little In Color Butterflies and items from the Moonlit Flora Suite by Stampin’ Up!®. These items aren’t available just yet but the wait is almost over. You’ll be able to order on May 5, 2026.
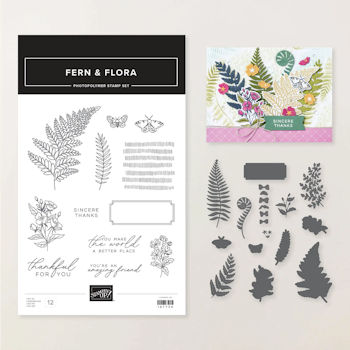 Fern & Flora Bundle #167745 |
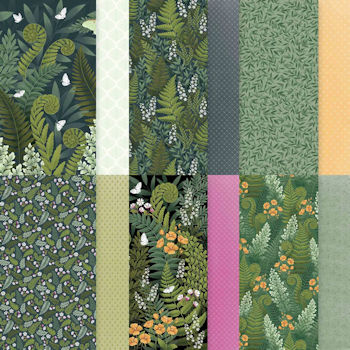 Moonlit Flora 12×12 DSP #167737 |
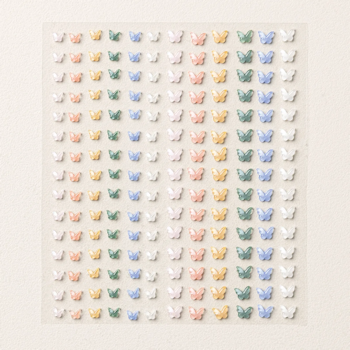 2026-2028 In Color Butterflies #167656 |
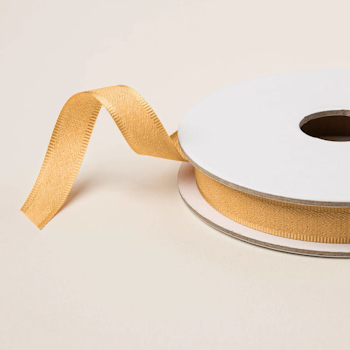 3/8″ Golden Glow Ribbon #167548 |
What I Love: The rich greens and luscious foliage that create the patterns of this beautiful paper. And, of course, those sweet little butterflies.
 The rest of the story….
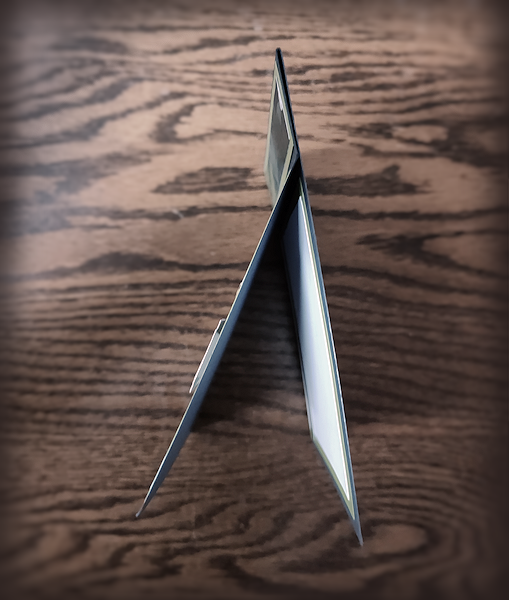 Book Binding Side Image |
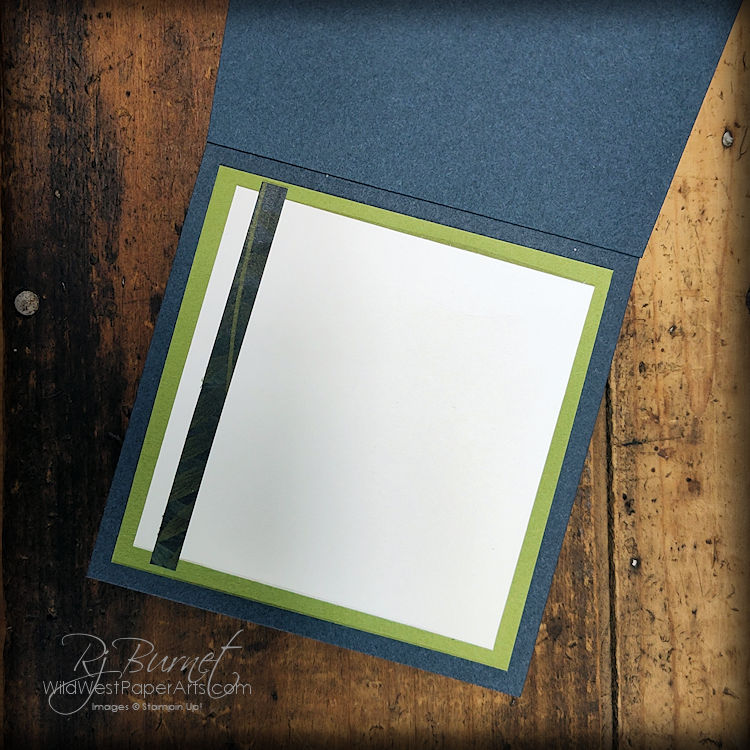 Inside |
Let’s get making!
Nuts & Bolts
All measurements are in inches.
Finished Size – A2 (4-1/4 x 5-1/2)
Acronyms & Jargon
- CAS = Clean And Simple
- CASE = Copy And Share Everything
- CS = Cardstock
- DSP = Designer Series Paper (aka patterned paper)
- SDSP = Specialty Designer Series paper (specialty patterned paper)
- SIP = Stamp Ink Paper
Paper Cuts
Cardstock
- Secret Sea
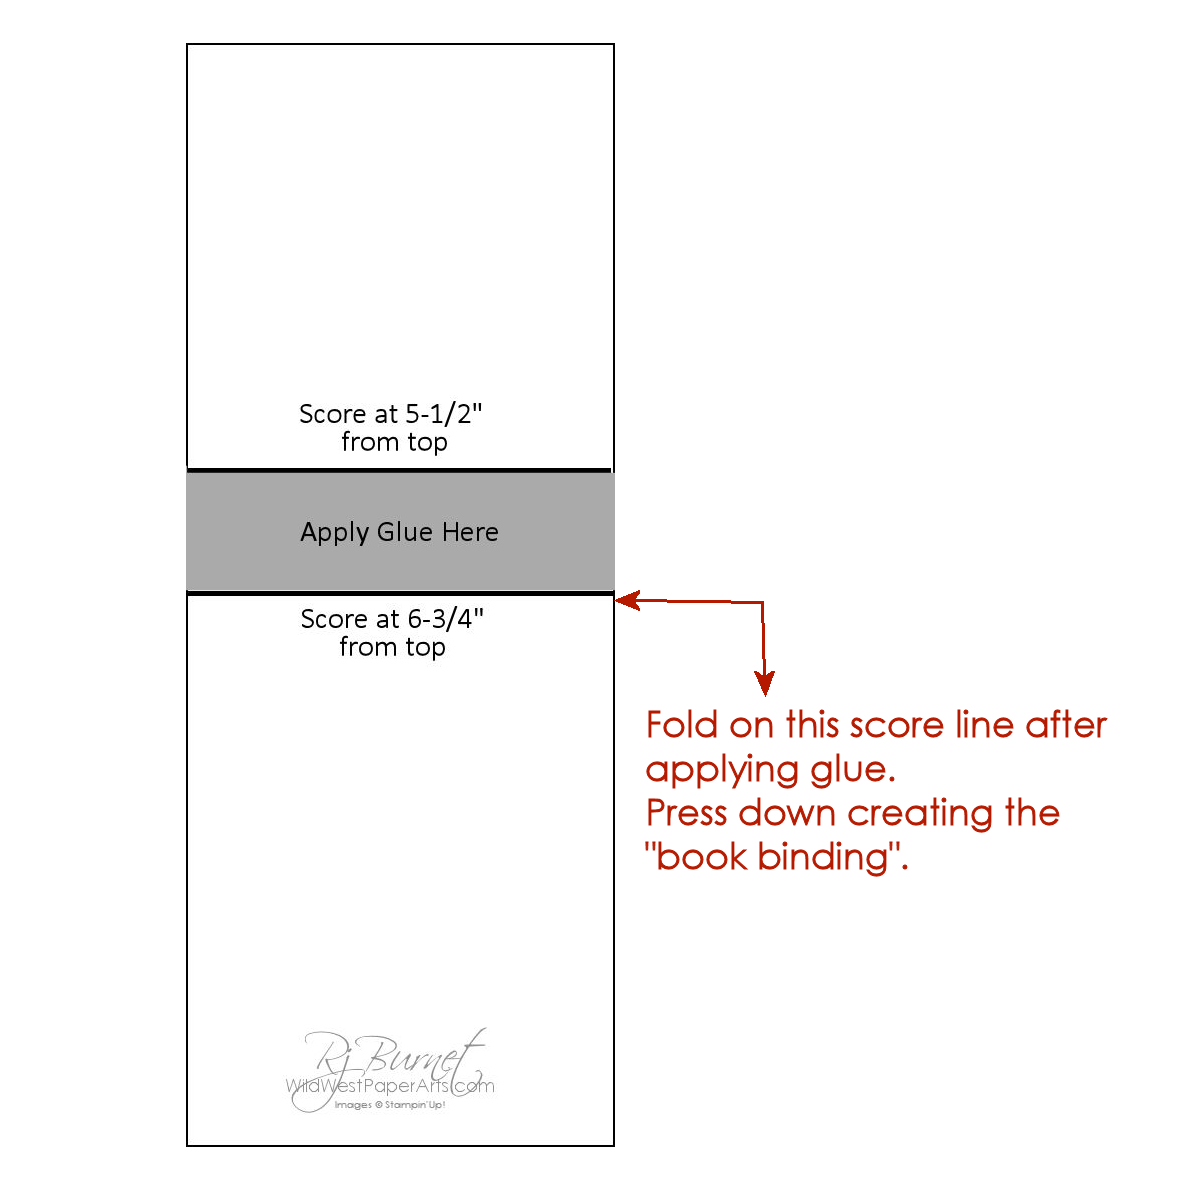
- Cardbase – 4-1/4″ x 11″; Score at 5-1/2″ and 6-3/4″ from the top. See Diagram.
- Old Olive
- 1″ x 4″ (cut 1)
- 4″ square (cut 2)
- Basic White
- Writing Panel – 3-1/2″ square
- Die Cut – 1-1/2″ x 2-1/2″
Moonlit Flora Designer Series Paper
- 3/4″ x 3-3/4″ (cut 1 piece)
- 3-3/4″ square (cut 2)
Dies & Stamps
- Fern & Flora Dies
- Fern & Flora Stamp Set
Construction
- Score card base according to template below. Burnish all score lines.
- Apply strong adhesive on the inside of the card base between the two score lines. Press down. (See Diagram below)
- Layer DSP & Cardstock pieces. Affix to card front.
- Layer Cardstock & Writing Panel. Affix to inside of card.
- Die Cut a label using the appropriate die from the set.
- Use Peaceful Pine ink to stamp greeting on the label.
- Snip a short piece of ribbon. Flat the ends and fold in half. Affix to back of label.
- Use Dimensionals to attach greeting piece to card front.
- Embellish with 2026-2028 In Color Butterflies.
Click the template image below for a larger view.
Click on the image to enlarge.
Before you go, please consider leaving a comment on our blogs. We love to hear from you.
Click to leave a comment.
Make sure to visit the blogs below for more inspiration. I can’t wait to see what everyone has created. How about you?
SU Demo Fun Fold Blog Hop Lineup
- Rae Burnet – Welcome to the Wild West!
- Karen Finkle
- Debbie Mageed
- Su Mohr
- Lisa Ann Bernard
- Mary Deatherage
- Michele Deschenes
- Sue Jackson
- Beth McCullough
Have a wildly creative day!


Click to shop 24/7!
Product Showcase:
The products used are not available to non-demonstrators until May 5, 2026.
This is such a lovely card, Rae! Those papers are so pretty! Thanks for the beautiful inspiration!
I will definitely try this one. Thanks Rae!
I love your card, so pretty. Everything works together so well. I’m going to CASE it…
Thank you Susan!
Very pretty card, Rae! You used one of my favorite folds because I love square cards. This fold makes it fit better in an A2 envelope. I just received this paper and need to take a look at it. It has such elegant patterns! Thanks for joining the hop.
Thank you Debbie.
That is beautiful with that paper.
Thank you Michele.
Fun! I like making those kinds of cards! Thank you for sharing!
Thank you Paula. My crystal ball says “You’ll be making this in the near future.”