
Fun Fold Blog Hop: Waterside Retreat
Welcome to the monthly Stampin’ Up!® Demonstrator Fun Folds Blog Hop, May 2026 edition. We’re so glad you’re here! Let our Fun Folds Blog Hop Designers inspire you to create your own masterpiece.
Today’s card features the new Waterside Retreat Suite of products put together in a Storyboard Fun Fold. At least that’s what I choose to call it. 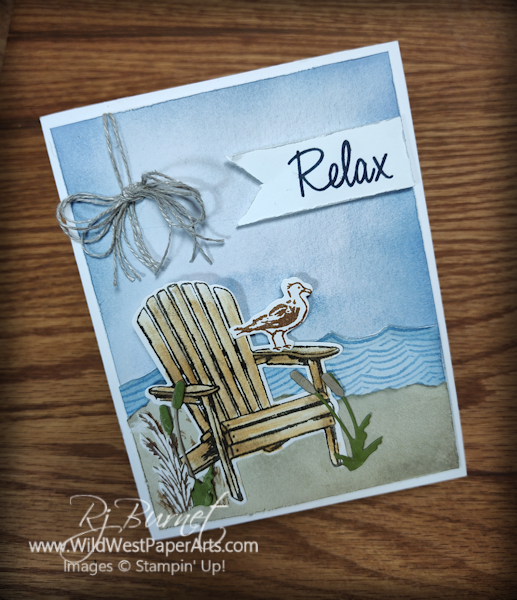
This fold is triple the fun and shows off the Waterside Retreat Designer Series Paper perfectly. There are so many great images and panels that it was difficult to choose which to use. Let’s take a look.
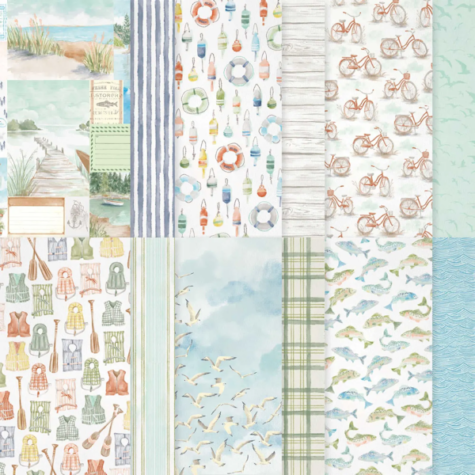 Waterside Retreat DSP |
|
 Used for front page sky. |
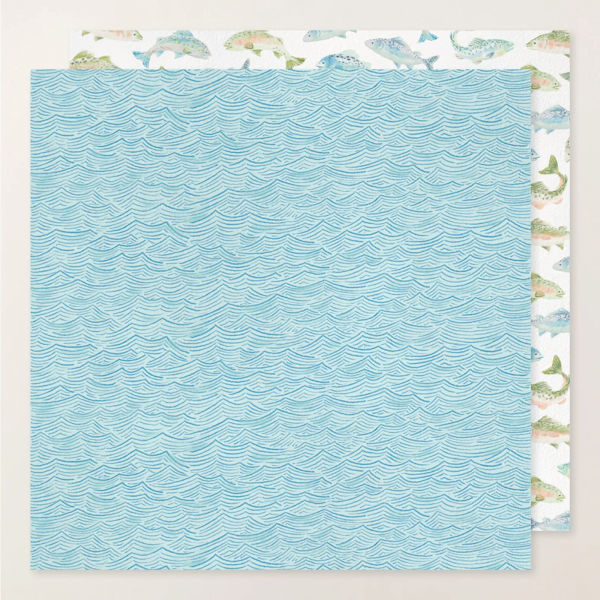 Used for water background on all three panels. |
Of course there is more than just Designer Series Paper to this suite. Need a Father’s Day card or masculine birthday card? Or maybe, a card for your favorite outdoor enthusiast? This Waterside Retreat Suite has it all.

Waterside Retreat Suite
The rest of the story…. Three panels let you create the message you want to tell. A sort of story board.
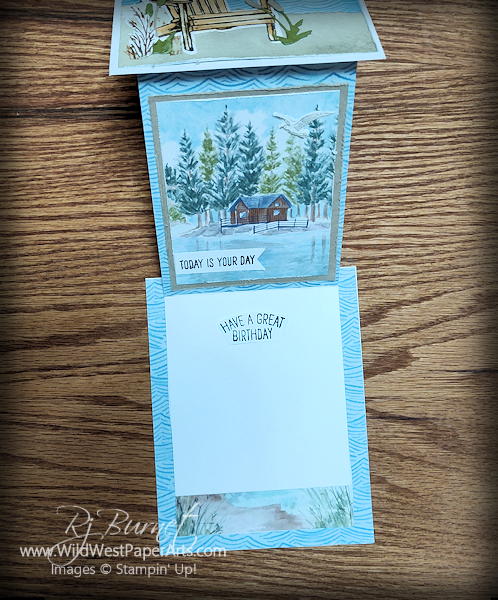 What I Love: Versatility! The possibilities with this suite. A cabin scene, the ocean, fishing even biking.
Nuts & Bolts
All measurements are in inches.
Finished Size – A2 (4-1/4 x 5-1/2)
Acronyms & Jargon
- CAS = Clean And Simple
- CASE = Copy And Share Everything
- CS = Cardstock
- DSP = Designer Series Paper (aka patterned paper)
- SDSP = Specialty Designer Series paper (specialty patterned paper)
- SIP = Stamp Ink Paper
Paper Cuts
Cardstock
- Basic White
- 4-1/4 x 5-1/2 (cut 2)
- 3-1/2 x 11, score at 1-1/2 & 6-1/4
- Additional for die cuts
- Basic Beige
- 4 x 2 (for sand piece on bottom of top panel)
- Crumb Cake
- 3-1/4 x 4 ( for mat behind center image)
- Scraps for Cattails
- Old Olive
- Scraps for Cattails
Waterside Retreat Designer Series Paper
- Top Panel – 4 x 5-1/4
- Top Panel – Water Piece – 3 x 4-1/4
- Middle Panel Background 3-1/2 x 4-5/8
- Middle Panel Picture – See image below
- Bottom Panel Background – 4-1/4 x 5-1/2
- Bottom Panel Border – 3/4 x 3-1/2 See Image below
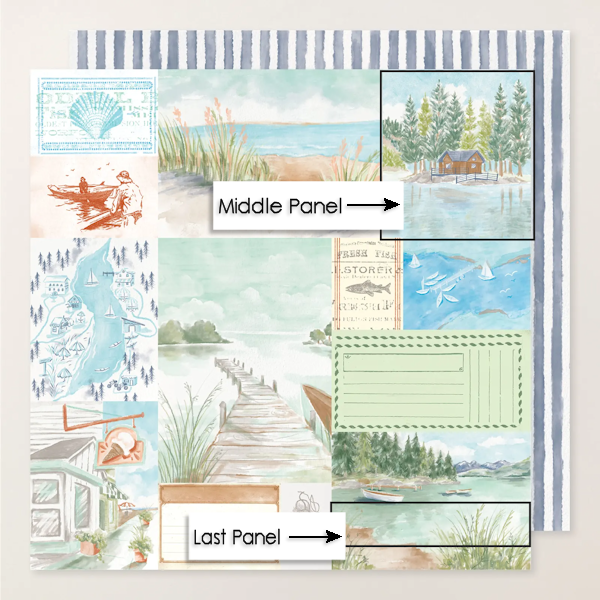
Images used from Designer Series Paper
Dies & Stamps
Simple Techniques [like distressing] take this project to the next level.
- Use detail scissors to gently soften the edges of layers.
- Use Blending Brushes to apply color to edges and accents.
- Use Blender Pens with Classic Ink for a watercolor look to elements. I used the 2026-2028 In Color – Golden Glow for the chair. The image was stamped in Early Espresso Classic Ink.
Before you go, please consider leaving a comment on our blogs. We love to hear from you. Let me know in a comment if you would like more information on how to create your own Storyboard Fun Fold. Just click the “Leave a Comment” message below to let me know.
Click to leave a comment.
Make sure to visit the blogs below for more inspiration. I can’t wait to see what everyone has created. How about you?
SU Demo Fun Fold Blog Hop Lineup
- Su Mohr
- Mary Deatherage
- Debbie Mageed
- Karen Finkle
- Sue Jackson
- Beth McCullough
- Lisa Ann Bernard
- Rae Burnet – Welcome to the Wild West!
- Michele Deschenes
Have a wildly creative day!


Click to shop 24/7!
Product Showcase:
The products used are not available to non-demonstrators until May 5, 2026.
Oh – this is just wonderful! What a perfect fun fold pick to showcase this DSP!! 🙂
Thanks a million Mary!
Great fold, Rae, showing off this beautiful suite! I love how you colored the chair!
Thank you Su. I love this suite!
Oh, Rae, you used my favorite suite! Your card is so serene and the fold shows the paper off perfectly. Thank you for joining the blog hop this month.
Thank you Debbie. I LOVE this suite.
Thank you Michele!
Rae, lovely use of the paper. And the fold is perfect.